
1. შესავალი
This manual provides detailed instructions for the installation, operation, and maintenance of your AZZA Solano 1000R CSAZ-1000R Full Tower Computer Case. Please read this manual thoroughly before beginning installation to ensure proper setup and to maximize the performance and longevity of your system components.
2. პროდუქტის მახასიათებლები
- ოპტიმიზებული თერმული მართვა: Features multiple fans for superior cooling, including a 230mm top fan, a 230mm side fan, two 140mm front fans, and a 120mm rear fan.
- Bottom-Mounted Power Supply: Designed for improved thermal separation and stability, allowing installation facing up or down.
- გაფართოებული კაბელების მართვა: Pre-drilled motherboard tray and ample space behind for organized cable routing, enhancing airflow and aesthetics.
- Tool-Less Design: Thumb screws for easy installation of optical drives and hard disk drives.
- მოსახერხებელი წინა შეყვანა/გამოყვანა: USB and audio ports, along with an eSATA port, located on the top panel for easy access.
- ფართო ინტერიერი: Full tower design accommodates large components, including extended graphics cards and tall CPU coolers.
- ესთეტიკური დიზაინი: Black exterior with a vibrant red painted interior and red LED fans.
3. პაკეტის შიგთავსი
გთხოვთ, დარწმუნდეთ, რომ თქვენს პაკეტში ყველა ნივთია:
- AZZA Solano 1000R CSAZ-1000R Full Tower Case
- აქსესუარების ყუთი (შეიცავს ხრახნებს, საყრდენებს, კაბელის შესაკრავებს და ა.შ.)
- მომხმარებლის სახელმძღვანელო (ეს დოკუმენტი)
4. კომპონენტი დასრულდაview
4.1 გარეგანი Views
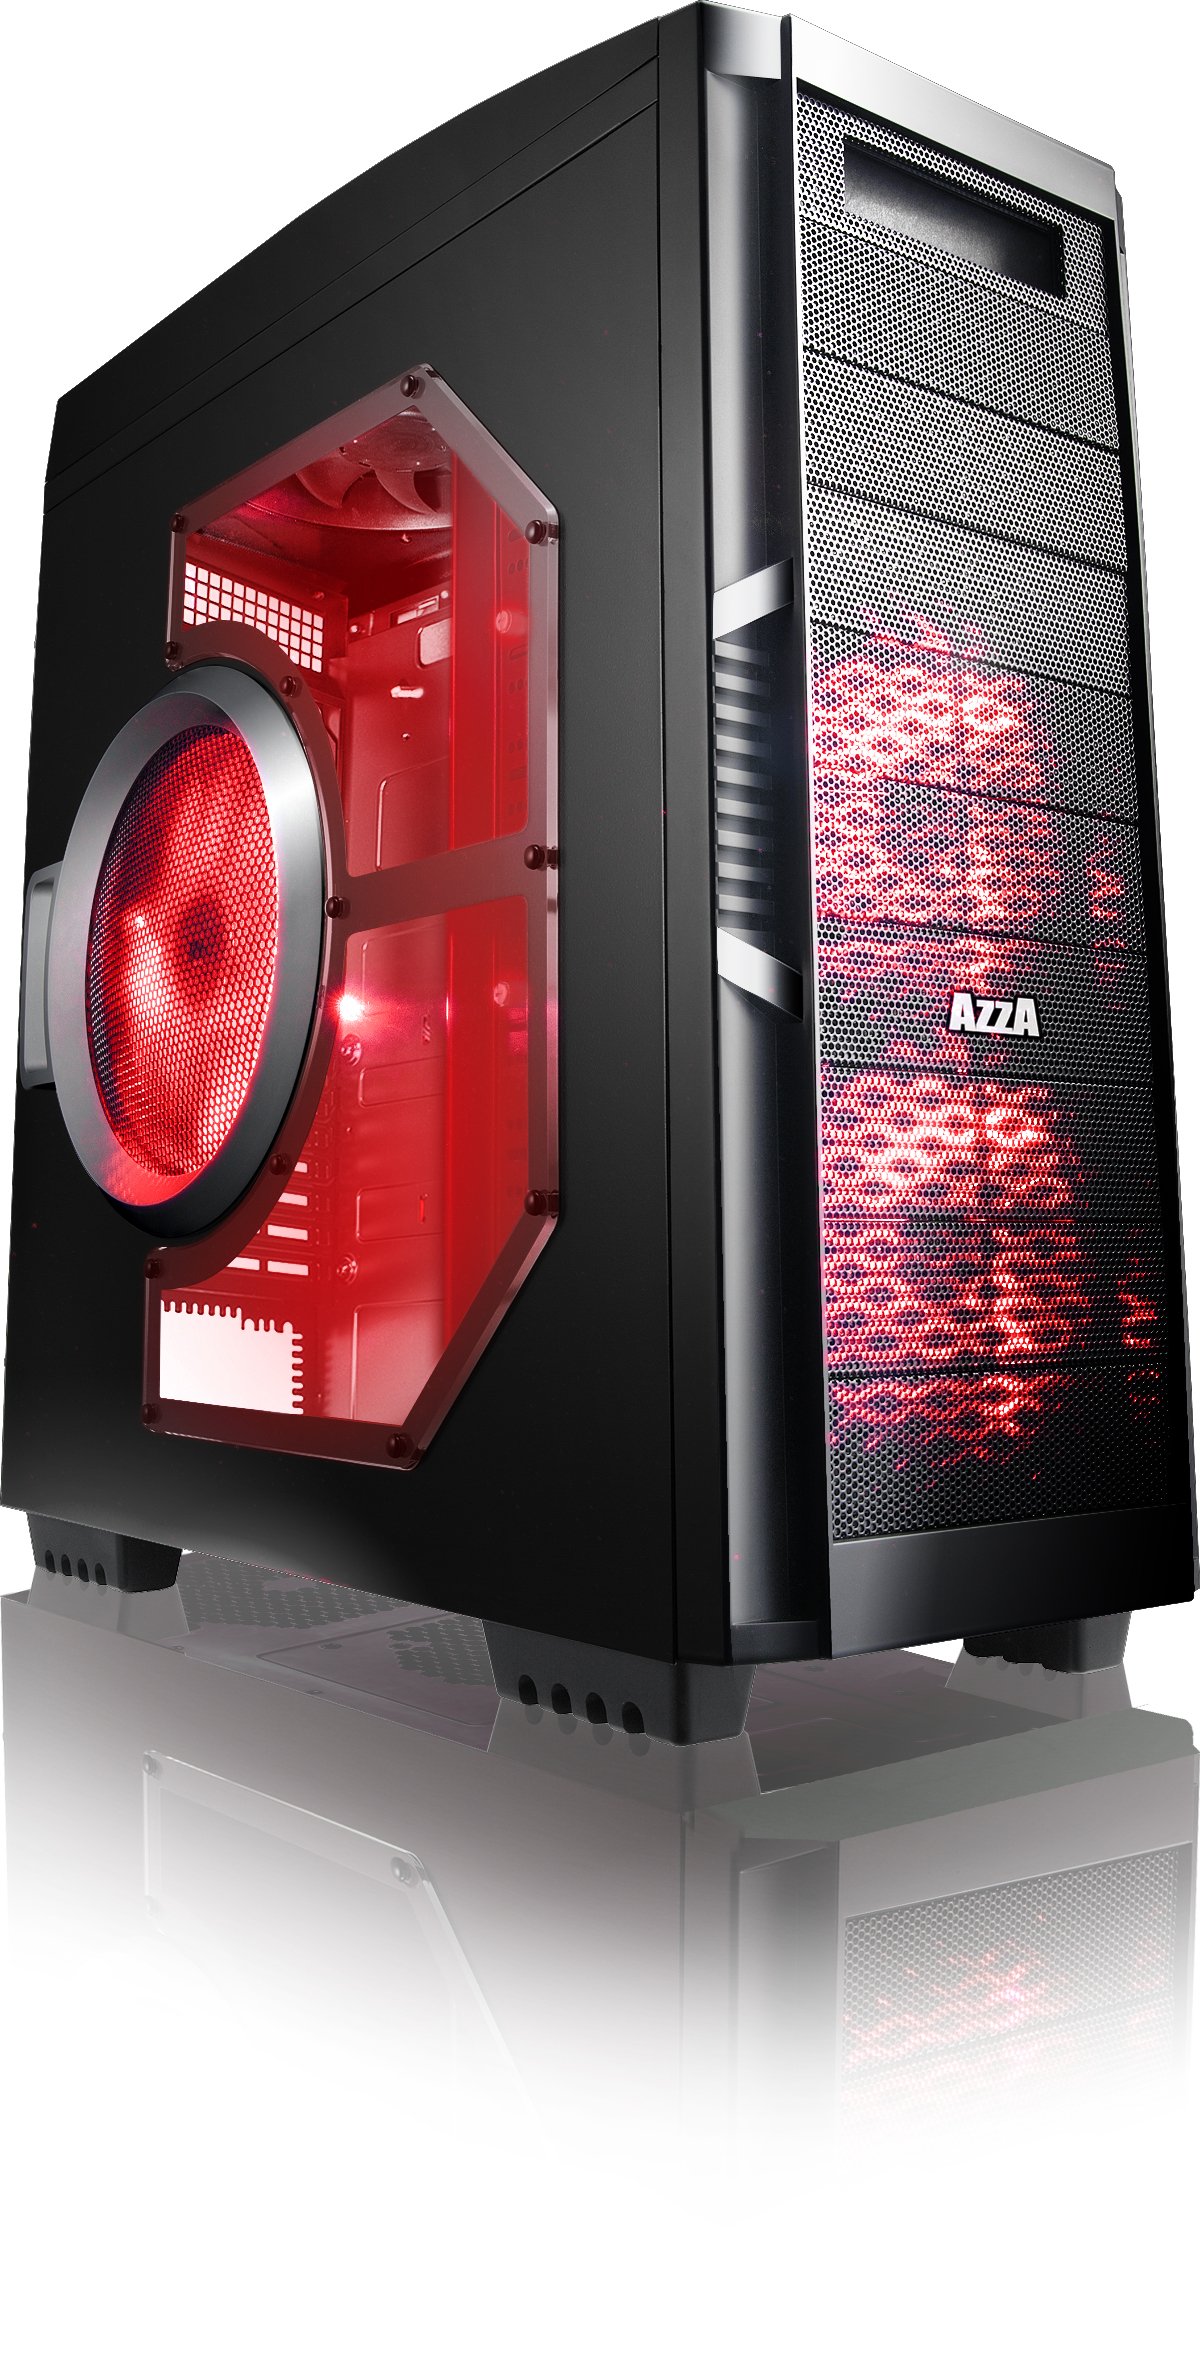
სურათი 4.1: წინა მხარე view of the AZZA Solano 1000R case, showcasing the red LED fans on the front and side panel.

სურათი 4.2: წინა view of the AZZA Solano 1000R case, highlighting the two 140mm red LED intake fans behind the mesh panel.

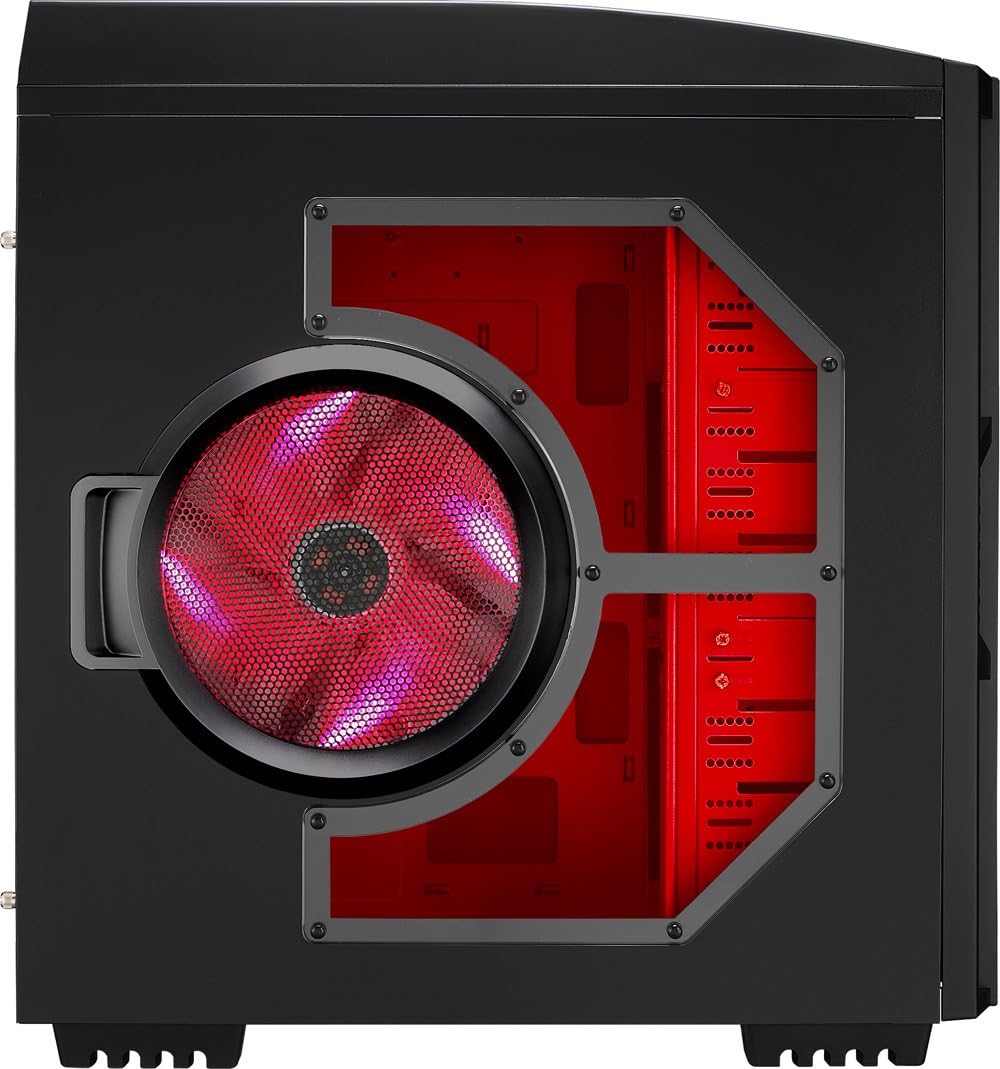
სურათი 4.3: მხარე view of the AZZA Solano 1000R case, showing the large 230mm red LED side panel fan and the transparent window.

Figure 4.4: Top-front angled view of the AZZA Solano 1000R case, showing the top ventilation grille, front I/O panel with USB and audio ports, and power button.
სურათი 4.5: უკანა მხარე view of the AZZA Solano 1000R case, displaying the red interior, rear exhaust fan, and expansion slots.
4.2 შიდა Views

სურათი 4.6: ინტერიერი view of the AZZA Solano 1000R case with the left side panel removed, revealing the red painted motherboard tray, drive bays, and cable routing cutouts.

სურათი 4.7: დახრილი ინტერიერი view of the AZZA Solano 1000R case, focusing on the multiple 5.25" and 3.5" drive bays.

სურათი 4.8: დახრილი ინტერიერი view of the AZZA Solano 1000R case, showing the rear 120mm exhaust fan, expansion slots, and the extensive drive bay structure.

სურათი 4.9: ინტერიერი view of the AZZA Solano 1000R case with the right side panel removed, showing the space behind the motherboard tray for cable management.
5. ინსტალაციის სახელმძღვანელო
ინსტალაციის დაწყებამდე დარწმუნდით, რომ თქვენი სამუშაო სივრცე სუფთაა და არ ასხივებს სტატიკას. რეკომენდებულია ანტისტატიკური სამაჯურის ტარება.
5.1 საქმის მომზადება
- მოათავსეთ ქეისი ბრტყელ, სტაბილურ ზედაპირზე.
- Remove the side panels by unscrewing the thumb screws at the rear of the case and sliding the panels backward.
5.2 დედაპლატის ინსტალაცია
- Install the I/O shield provided with your motherboard into the opening at the rear of the case.
- Align the motherboard with the pre-installed standoffs. If necessary, install additional standoffs according to your motherboard's form factor.
- Carefully place the motherboard onto the standoffs, ensuring the I/O ports align with the shield.
- დაამაგრეთ დედა დაფა აქსესუარების ყუთიდან შესაბამისი ხრახნებით.
5.3 კვების წყაროს მონტაჟი
- Position the power supply unit (PSU) in the bottom-rear compartment of the case. You can orient it with the fan facing up or down, depending on your cooling preference and PSU design.
- დაამაგრეთ კვების ბლოკი კორპუსზე თქვენს კვების ბლოკთან ერთად მოწოდებული ხრახნების გამოყენებით.
5.4 მეხსიერების დისკის ინსტალაცია (HDD/SSD)
- For 3.5" HDDs, slide the drive into an available drive bay until it clicks into place. Use the provided thumb screws for additional security if desired.
- For 2.5" SSDs, an adapter bracket (not included) may be required to fit into the 3.5" bays. Secure the SSD to the adapter, then install the adapter into a 3.5" bay.
- Connect the SATA data and power cables to your installed drives.
5.5 Optical Drive Installation
- Remove the desired 5.25" front bay cover from the case.
- Slide the optical drive into the bay from the front until it aligns with the screw holes.
- Secure the optical drive using the provided thumb screws.
- Connect the SATA data and power cables to the optical drive.
5.6 გაფართოების ბარათის ინსტალაცია
- მოხსენით საჭირო გაფართოების სლოტების გადასაფარებლები კორპუსის უკანა მხარეს.
- Insert your graphics card or other expansion card into the appropriate PCIe/PCI slot on your motherboard.
- Secure the card with the provided screw or tool-less latch mechanism.
5.7 საკაბელო მენეჯმენტი
Utilize the cutouts and space behind the motherboard tray to route and organize your cables. This improves airflow and gives your build a cleaner appearance. Use cable ties from the accessory box to bundle cables.
5.8 Connecting Front Panel I/O
Connect the front panel cables (USB, Audio, Power Switch, Reset Switch, Power LED, HDD LED) to the corresponding headers on your motherboard. Refer to your motherboard manual for exact header locations.
6. ოპერაცია
6.1 ჩართვა/გამორთვა
Press the power button located on the top panel to turn your system on or off. A power LED will illuminate when the system is active.
6.2 ვენტილატორის კონტროლი
The case features a fan speed control switch (L/M/H) at the rear, primarily for the top, side, and rear fans. Adjust this switch to balance cooling performance and noise levels according to your preference.
7. მოვლა
7.1 დასუფთავება
Regular cleaning helps maintain optimal airflow and component longevity.
- ექსტერიერი: გაწმინდეთ გარე ზედაპირები რბილი, დamp ქსოვილი. მოერიდეთ აბრაზიულ საწმენდებს.
- მტვრის ფილტრები: The case includes mesh filters at the bottom. Periodically remove and clean these filters to prevent dust buildup.
- ინტერიერი: Use compressed air to remove dust from inside the case, especially from fans and heatsinks. Ensure the system is powered off and unplugged before cleaning the interior.
8. Დიაგნოსტიკა
- სისტემა არ ირთვება: Ensure all power cables (24-pin ATX, 8-pin CPU, GPU power) are securely connected. Verify the PSU switch is in the 'ON' position. Check front panel power switch connection to the motherboard.
- ვენტილატორები არ ბრუნავენ: Check fan power connections to the motherboard or fan controller. Ensure the fan speed switch is not set to 'Off' or 'Low' if fans are not spinning at all.
- Side Panel Not Closing: If a large CPU cooler or tall components prevent the side panel from closing, especially due to the side fan, consider relocating the side fan to the exterior of the panel if possible, or ensure your cooler fits within the case's clearance specifications.
- Cable Management Difficulty: If the rear panel bulges due to thick cables, try rerouting cables more efficiently or using flatter cables where possible.
9. სპეციფიკაციები
| ფუნქცია | დეტალი |
|---|---|
| მოდელის ნომერი | CSAZ-1000R |
| საქმის ტიპი | სრული კოშკი |
| ფერი | შავი/წითელი |
| პროდუქტის ზომები (L x W x H) | 19.7 x 8.1 x 21.5 ინჩი (500 x 206 x 546 მმ) |
| ნივთის წონა | 24 ფუნტი (10.89 კგ) |
| გაგრილების მეთოდი | ჰაერი |
| კვების წყაროს მონტაჟის ტიპი | ქვედა მთა |
| სულ USB პორტები | 2 (USB 2.0) + 1 (eSATA) |
| Hard Disk Form Factor Support | 3.5 ინჩი |
| შედის გულშემატკივრები | 2x 230mm (Top, Side), 2x 140mm (Front), 1x 120mm (Rear) |
10. გარანტია და მხარდაჭერა
For warranty information and technical support, please refer to the official AZZA webადგილზე ან დაუკავშირდით ადგილობრივ საცალო მოვაჭრეს. შეინახეთ შეძენის დამადასტურებელი საბუთი გარანტიის მოთხოვნებისთვის.