1. შესავალი
This manual provides comprehensive instructions for the assembly, operation, and maintenance of your AmScope D200 Two-Observing Compound Microscope. This instrument is designed for teaching and training purposes, featuring a unique double binocular head for simultaneous observation by two users.
ძირითადი მახასიათებლები მოიცავს:
- Two Binocular Heads for simultaneous observation.
- Fully Coated Optical System ensuring high resolution and sharp images.
- Magnification range: 40X, 100X, 400X, and 1000X.
- 45-degree inclined, 360-degree swiveling compensation-free binocular heads.
- Large Double Layer Mechanical Stage with slide clips for precise sampპოზიციონირება.

Figure 1.1: AmScope D200 Two-Observing Compound Microscope, showing its dual viewing heads and main body.
2. უსაფრთხოების ინფორმაცია
Please read and understand all safety precautions before operating the microscope. Failure to do so may result in injury or damage to the instrument.
- ელექტრო უსაფრთხოება: Ensure the microscope is connected to a grounded power outlet with the correct voltage (240 Volts). Do not operate with wet hands. Disconnect power before cleaning or servicing.
- დამუშავება: Always carry the microscope by its arm and base. Avoid sudden impacts or vibrations.
- Optical Components: Do not touch optical surfaces with bare hands. Use lens paper or a soft, lint-free cloth for cleaning.
- სინათლის წყარო: The halogen light source can become hot during operation. Avoid direct contact with the bulb or lamp საცხოვრებელი.
- ქიმიკატები: When working with chemical samples, ensure proper ventilation and use appropriate personal protective equipment. Avoid spilling corrosive liquids on the microscope.
- ბავშვები: This microscope is not a toy. Supervise children closely if they are using the instrument.
3. კომპონენტის იდენტიფიკაცია
Familiarize yourself with the various parts of your AmScope D200 microscope before assembly and operation.
- Eyepieces (Oculars): The lenses through which you view the specimen. The D200 features two sets of binocular heads.
- Binocular Heads: The upper part of the microscope containing the eyepieces, designed for comfortable viewინგ.
- მკლავი: Connects the head to the base and stage, used for carrying the microscope.
- მბრუნავი ცხვირის საცობი: Holds the objective lenses and allows for easy switching between magnifications.
- ობიექტური ლინზები: Lenses located just above the specimen, providing the primary magnification. The D200 includes 4X, 10X, 40X, and 100X achromatic objectives.
- Stage: The flat platform where the specimen slide is placed. The D200 has a large double-layer mechanical stage.
- Stage კლიპები: Secure the specimen slide on the stage.
- მექანიკური სtage Knobs: Allow precise movement of the specimen slide (X-Y axis).
- ფოკუსირების უხეში ღილაკი: Large knob for rapid focusing adjustments.
- წვრილი ფოკუსირების ღილაკი: Smaller knob for precise focusing adjustments.
- კონდენსატორი: მდებარეობს s-ის ქვეშtage, it focuses light onto the specimen.
- ირისის დიაფრაგმა: Adjustable aperture within the condenser to control the amount of light reaching the specimen.
- Illuminator (Light Source): Built-in halogen lamp providing illumination from below the stage.
- სინათლის ინტენსივობის კონტროლი: Rheostat knob to adjust the brightness of the illuminator.
- ბაზა: The bottom support of the microscope, housing the illuminator and electronics.
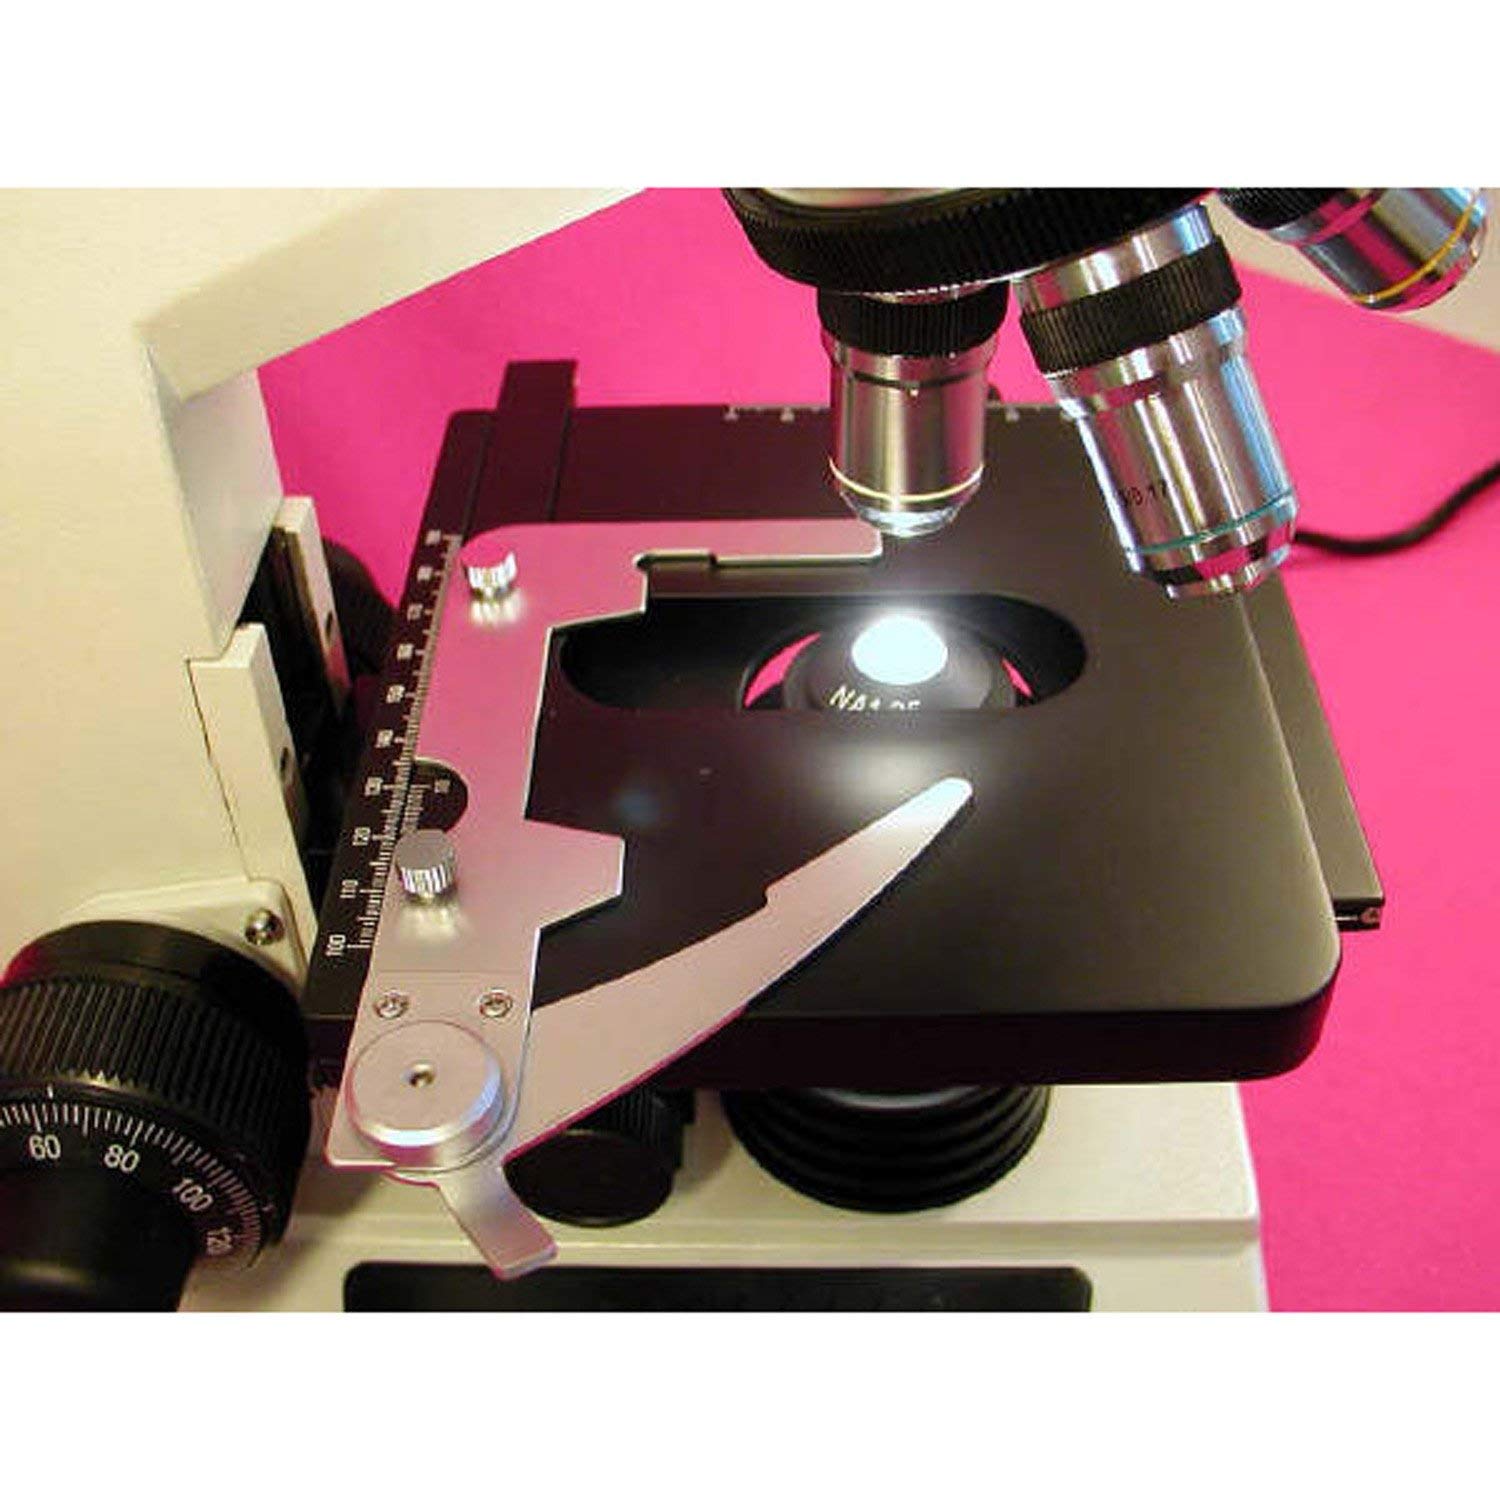
სურათი 3.1: ახლოდან view მექანიკური სtage, objective lenses, and illuminator of the AmScope D200 microscope.
4. დაყენება
Follow these steps to set up your AmScope D200 microscope:
- შეფუთვა: Carefully remove all components from the packaging. Retain the original packaging for future transport or storage.
- განთავსება: Place the microscope on a stable, level surface, away from direct sunlight, excessive heat, dust, and vibrations.
- Head Installation: Gently place the binocular heads onto the top of the microscope arm. Secure them by tightening the set screw, if present.
- ოკულარის მონტაჟი: Insert the eyepieces into the eyepiece tubes of both binocular heads.
- დენის კავშირი: Connect the power cord to the microscope's power input and then to a grounded 240V AC power outlet.
- Illumination Check: Turn on the power switch and adjust the light intensity control to ensure the illuminator is functioning.
5. საოპერაციო ინსტრუქციები
5.1 Preparing a Specimen
- Place the prepared microscope slide onto the mechanical stage.
- გამოიყენეთ სtage clips to gently secure the slide in place.
- Use the mechanical stage knobs to position the specimen directly over the center of the illuminator opening.
5.2 Focusing and Viewინგ
- Start with Lowest Magnification: Rotate the revolving nosepiece to select the 4X objective lens. Ensure it clicks firmly into place.
- განათების რეგულირება: Turn on the illuminator and adjust the light intensity to a comfortable level. Adjust the iris diaphragm for optimal contrast.
- Lower Stage: Using the coarse focus knob, lower the stage as far as it will go.
- Raise Stage and Focus: While looking through the eyepieces, slowly raise the stage using the coarse focus knob until the specimen comes into rough focus.
- დახვეწილი ფოკუსი: Use the fine focus knob to achieve a sharp, clear image.
- გუგებს შორის მანძილის რეგულირება: Adjust the distance between the two eyepiece tubes to match the distance between your eyes for comfortable binocular viewინგ.
- Adjust Diopter (if applicable): If one eyepiece has a diopter adjustment ring, adjust it to compensate for differences in vision between your eyes.
- გადიდების შეცვლა: To increase magnification, rotate the revolving nosepiece to the next higher objective (e.g., 10X, 40X, 100X). The microscope is parfocal, meaning only minor fine focus adjustments should be needed when changing objectives.
- Using 100X Oil Immersion Objective: For the 100X objective, a drop of immersion oil must be placed on the specimen slide directly over the area to be viewed. Lower the objective into the oil until it makes contact. After use, clean the 100X objective and slide thoroughly with lens paper and lens cleaning solution.
6. მოვლა და მოვლა
Proper maintenance ensures the longevity and optimal performance of your microscope.
- Cleaning Optical Components:
- Use a soft brush or air blower to remove loose dust.
- For smudges or fingerprints, use lens paper lightly moistened with lens cleaning solution. Wipe gently in a circular motion from the center outwards.
- Never use abrasive cloths or harsh chemicals.
- Clean the 100X oil immersion objective immediately after use to prevent oil from hardening.
- სხეულის გაწმენდა: გაწმინდეთ გარე ზედაპირები რბილი, დamp cloth. Avoid getting moisture into electrical components.
- შენახვა: When not in use, cover the microscope with a dust cover to protect it from dust and debris. Store in a cool, dry place.
- Lamp ჩანაცვლება: If the illuminator lamp burns out, disconnect power, allow it to cool, and replace it with a compatible halogen bulb (refer to specifications for bulb type).
7. Დიაგნოსტიკა
| პრობლემა | შესაძლო მიზეზი | გამოსავალი |
|---|---|---|
| არანაირი განათება | Power cord disconnected; Power switch off; Bulb burnt out; Light intensity too low. | Check power connection; Turn on power switch; Replace bulb; Increase light intensity. |
| Image is blurry/out of focus | Incorrect focus adjustment; Slide upside down; Objective not clicked into place. | Adjust coarse/fine focus; Flip slide; Rotate nosepiece until objective clicks. |
| ბნელი ველი view | Iris diaphragm closed; Condenser too low; Light intensity too low. | Open iris diaphragm; Raise condenser; Increase light intensity. |
| Dust/spots in view | Dust on eyepiece, objective, or slide. | Clean optical components and slide. Rotate eyepiece to determine if dust is on eyepiece. |
| Cannot see through both eyepieces clearly | Interpupillary distance incorrect; Diopter not adjusted. | Adjust interpupillary distance; Adjust diopter on eyepiece. |
8. სპეციფიკაციები
| ფუნქცია | დეტალი |
|---|---|
| მოდელის ნომერი | D200 |
| გადიდების დიაპაზონი | 40X, 100X, 400X, 1000X |
| ობიექტური ლინზები | Achromatic (4X, 10X, 40X, 100X Oil) |
| თვალები | Widefield (specific magnification not provided, typically 10X) |
| ხელმძღვანელის ტიპი | Two Binocular Heads, 45-degree inclined, 360-degree swiveling |
| Stage | Large Double Layer Mechanical Stage with Slide Clips |
| ფოკუსირება | Coaxial Coarse & Fine Focus |
| განათება | Halogen, Brightfield, with Light Intensity Control |
| დენის წყარო | კაბელიანი ელექტრო |
| ტtage | 240 ვოლტი |
| ნივთის წონა | 30 ფუნტი (დაახლოებით 13.6 კგ) |
| მწარმოებელი | AmScope |
| ASIN | B005OSCR0Y |
| UPC | 013964560619 |
9. გარანტია და მხარდაჭერა
For specific warranty information regarding your AmScope D200 microscope, please refer to the documentation included with your purchase or contact AmScope customer support directly. Warranty terms and conditions may vary.
For technical support, parts, or service inquiries, please visit the official AmScope website or contact their customer service department. When contacting support, please have your model number (D200) and ASIN (B005OSCR0Y) available.
დამატებითი ინფორმაცია და საკონტაქტო ინფორმაცია შეგიძლიათ იხილოთ ვებგვერდზე AmScope Store on Amazon.