
1. შესავალი
This manual provides essential information for the proper setup, operation, and maintenance of your Sony SLV-FT5 VHS Video Cassette Recorder (VCR). Please read these instructions thoroughly before using the unit to ensure optimal performance and safety.
2. უსაფრთხოების ინფორმაცია
ამ პროდუქტის გამოყენებისას ყოველთვის დაიცავით უსაფრთხოების ძირითადი ზომები, რათა შეამციროთ ხანძრის, ელექტროშოკის და დაზიანების რისკი.
- არ დაუშვათ მოწყობილობა წვიმის ან ტენიანობის ქვეშ.
- არ გახსნათ კაბინეტი. მიმართეთ მომსახურებას მხოლოდ კვალიფიციურ პერსონალს.
- უზრუნველყავით სათანადო ვენტილაცია; არ დაბლოკოთ ვენტილაციის ღიობები.
- გამოიყენეთ მხოლოდ ამ მოწყობილობისთვის მითითებული კვების წყარო.
- შეინახეთ მოწყობილობა სითბოს წყაროებისა და მზის პირდაპირი სხივებისგან შორს.
3. დაყენება
3.1 შეფუთვა
Carefully remove the VCR and all accessories from the packaging. Verify that all components are present: the SLV-FT5 VCR unit, remote control, and necessary connection cables (e.g., RCA audio/video cables).
3.2 ტელევიზორთან დაკავშირება
To connect the VCR to your television, use the provided RCA audio/video cables. Match the colored plugs to the corresponding colored jacks on both the VCR and your TV (Yellow for Video, White for Left Audio, Red for Right Audio).

სურათი 1: Rear panel of the Sony SLV-FT5 VCR. This image displays the various input and output ports, including RCA jacks for audio and video, and the power input. The product label with model number SLV-FT5 and power specifications (100V 18W 50/60Hz) is also visible.
3.3 დენის კავშირი
Plug the VCR's power cord into a standard electrical outlet (AC 100V, 50/60Hz). Ensure the power outlet is easily accessible.
3.4 დისტანციური მართვის დაყენება
Open the battery compartment on the back of the remote control and insert two AA batteries, observing the correct polarity (+/-). Close the compartment securely.

სურათი 2: The Sony RMT-V219 remote control, designed for the SLV-FT5 VCR. This image also shows the included RCA audio/video cables, which are typically used for connecting the VCR to a television.
4. ვიდეომაგნიტოფონის მართვა
4.1 ჩართვა/გამორთვა
დააჭირეთ სიმძლავრე button on the VCR's front panel or the remote control to turn the unit on or off.
4.2 Loading and Unloading a VHS Tape
- იტვირთება: Insert a VHS cassette into the tape slot on the front of the VCR with the tape window facing forward. The VCR will automatically pull the tape in.
- გადმოტვირთვა: დააჭირეთ ამოგდება button on the VCR or remote control. The tape will be ejected.
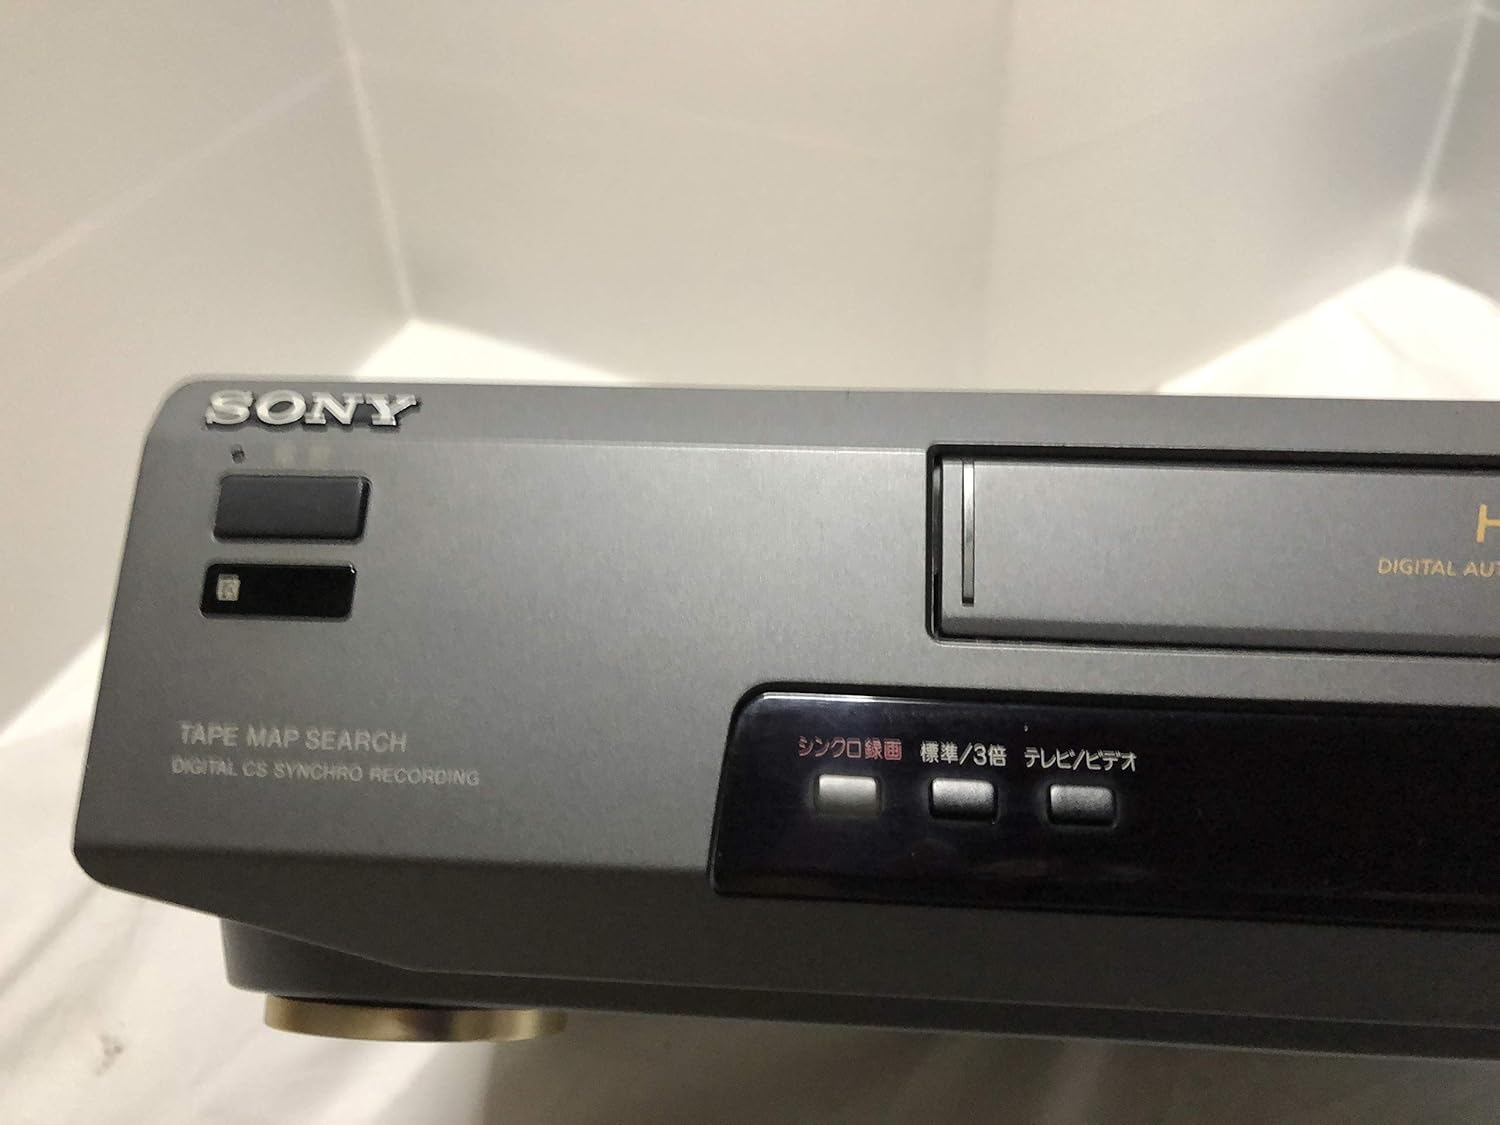
სურათი 3: Front left section of the Sony SLV-FT5 VCR. This view highlights the tape loading slot and the 'TAPE MAP SEARCH' feature, which assists in navigating recorded content on a tape.
4.3 დაკვრა
After loading a tape, press the ითამაშე button (►) on the VCR or remote control to begin playback. Use the პაუზა (∥), STOP (■), გადახვევა (◀◀), and სწრაფი წინ (►►) buttons to control playback.

სურათი 4: Front right section of the Sony SLV-FT5 VCR. This image displays the main playback controls (Play, Stop, Rewind, Fast Forward, Pause) and additional buttons for 'Quick Timer' and 'Tracking' adjustments.
4.4 ჩაწერა
To record, ensure a blank or recordable tape is inserted. Select the desired input source (e.g., TV channel). Press the REC (●) button on the VCR or remote control. Press STOP (■) to end recording.
4.5 Tracking Adjustment
If the picture quality during playback is poor (e.g., horizontal lines or noise), use the თვალთვალი buttons on the front panel or remote control to fine-tune the tape's alignment with the VCR's heads.
5. მოვლა
5.1 დანადგარის გაწმენდა
Wipe the exterior of the VCR with a soft, dry cloth. For stubborn stains, use a cloth lightly dampგარეცხეთ რბილი სარეცხი ხსნარით, შემდეგ გაამშრალეთ. არ გამოიყენოთ აბრაზიული საწმენდები ან გამხსნელები.
5.2 თავის გაწმენდა
Over time, VCR heads can accumulate dirt, leading to poor picture and sound quality. Use a commercially available dry-type VHS head cleaning cassette according to its instructions. Avoid wet-type cleaners as they can damage the heads.
5.3 შენახვა
When not in use for extended periods, disconnect the VCR from the power outlet. Store the unit in a cool, dry place, away from dust and direct sunlight.
6. Დიაგნოსტიკა
If you encounter issues with your VCR, refer to the following common problems and solutions before seeking professional service.
| პრობლემა | შესაძლო მიზეზი | გამოსავალი |
|---|---|---|
| არავითარი ძალა | დენის კაბელი გათიშულია; დენის წყაროს პრობლემაა | შეამოწმეთ კვების კაბელის კავშირი; სცადეთ სხვა სოკეტი. |
| სურათი/ხმა არ არის | Incorrect TV input; loose A/V cables | Select correct TV input (e.g., Video 1, AV); ensure A/V cables are securely connected. |
| Poor picture quality (snowy, lines) | Dirty VCR heads; tracking issue; old/damaged tape | Clean VCR heads; adjust tracking; try a different tape. |
| Tape won't eject | Power issue; mechanical malfunction | Ensure power is on; try pressing EJECT multiple times. If issue persists, seek service. |
| დისტანციური მართვა არ მუშაობს | დაცლილი ბატარეები; დაბლოკილი სენსორი | Replace batteries; ensure no obstacles between remote and VCR sensor. |
7. სპეციფიკაციები
| ფუნქცია | სპეციფიკაცია |
|---|---|
| ბრენდი | სონი |
| მოდელის ნომერი | SLV-FT5 |
| მედიის ტიპი | VHS |
| რეზოლუცია | 720 x 480 პიქსელი |
| პროდუქტის წონა | 4160 გრამი |
| აუდიო გამოყვანის რეჟიმი | სტერეო |
| მხარდაჭერილი აუდიო ფორმატები | Monaural, Stereo |
| ვიდეოს კოდირება | ანალოგი |
| თავსებადი მოწყობილობები | ტელევიზია |
| შეყვანის ვიდეო თავსებადობა | NTSC |
| დენის მოთხოვნები | 100V, 18W, 50/60Hz |
8. გარანტია და მხარდაჭერა
For warranty information and customer support, please refer to the documentation included with your purchase or visit the official Sony webსაიტი. შეინახეთ შეძენის დამადასტურებელი საბუთი გარანტიის მოთხოვნისთვის.