
1. შესავალი
The GameMax Expedition is a compact Micro ATX PC gaming case designed for efficient cooling and component compatibility. This manual provides instructions for the proper installation, operation, and maintenance of your PC case.

Figure 1.1: GameMax Expedition MATX PC Gaming Case, White.
2. უსაფრთხოების ინფორმაცია
- ინსტალაციამდე ან მოვლა-პატრონობამდე ყოველთვის გამორთეთ ყველა კომპონენტის კვება.
- ელექტროსტატიკური განმუხტვის (ESD) შედეგად კომპონენტების დაზიანების თავიდან ასაცილებლად, ატარეთ ანტისტატიკური სამაჯური.
- Be cautious of sharp edges inside the chassis.
- პატარა ნაწილები და ხრახნები ბავშვებისთვის მიუწვდომელ ადგილას შეინახეთ.
- Ensure proper ventilation around the case during operation.
3. პაკეტის შიგთავსი
დარწმუნდით, რომ შეფუთვაში ყველა ნივთია:
- GameMax Expedition MATX PC Gaming Case
- Accessory box (screws, standoffs, cable ties)
- 1 x 120mm Blue LED Fan (pre-installed at rear)
- მომხმარებლის სახელმძღვანელო (ეს დოკუმენტი)
4. პროდუქტის მახასიათებლები
- Micro Gaming Chassis: Compact design optimized for gaming components.
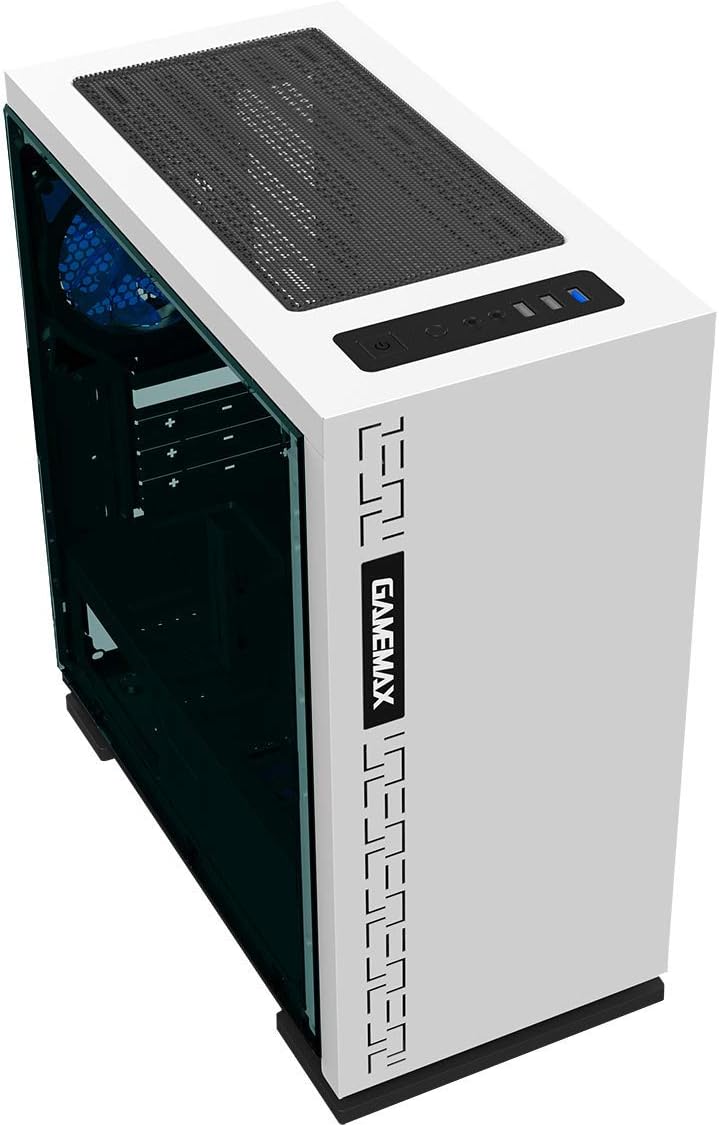
- I/O პორტები: 1 x USB 3.0, 2 x USB 2.0, and HD Audio ports located on the top panel.
- გაგრილება: Includes 1 x 120mm Blue LED fan. Supports additional fans for enhanced airflow.
- Side Window: Full side window panel allows visibility of internal components.
- მაგნიტური მტვრის ფილტრი: Removable dust filter on the top panel for easy cleaning and improved system longevity.
- GPU Bracket: Integrated bracket provides support for graphics cards, preventing sag and accommodating larger cards.
5. კომპონენტი დასრულდაview
5.1 გარეგანი Views

Figure 5.1: Front panel design with air intake and included 120mm fan illustration.

Figure 5.2: Top I/O panel featuring USB 3.0, USB 2.0, and audio ports.
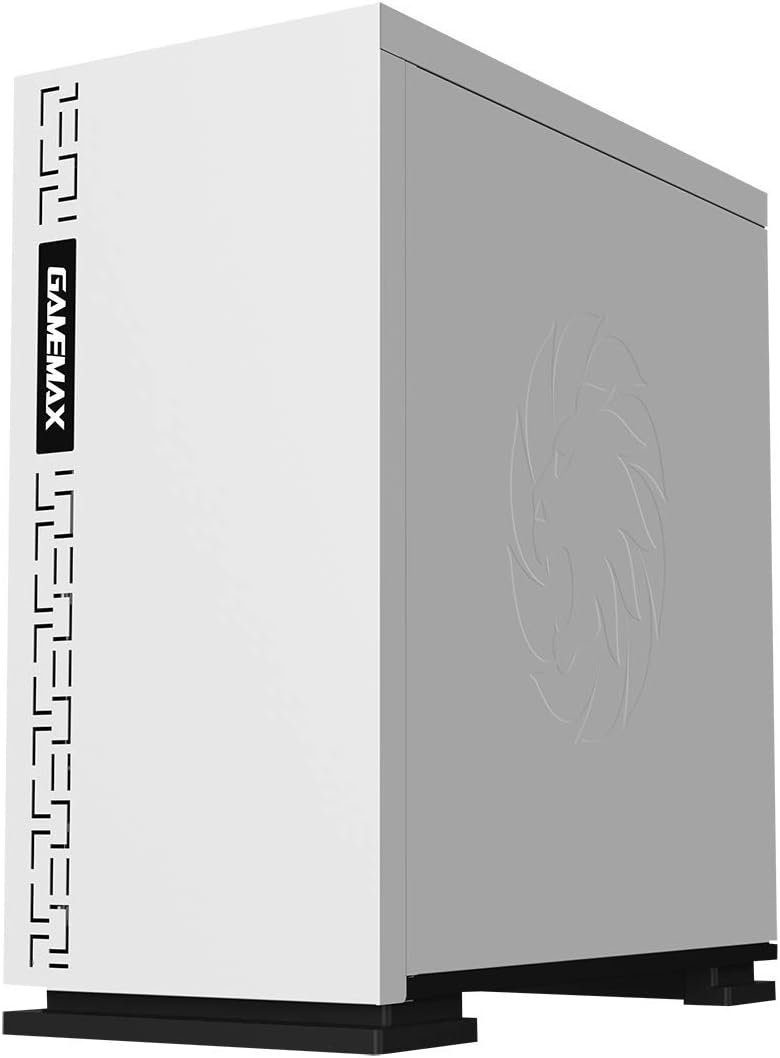
სურათი 5.3: ზედა view showing the magnetic dust filter for fan ventilation.
სურათი 5.4: უკანა view displaying expansion slots and the pre-installed 120mm fan.
5.2 Internal Layout

სურათი 5.5: შიდა view with the side panel removed, showing the motherboard tray and cable routing options.

Figure 5.6: Illustration of fan and radiator mounting points within the chassis.
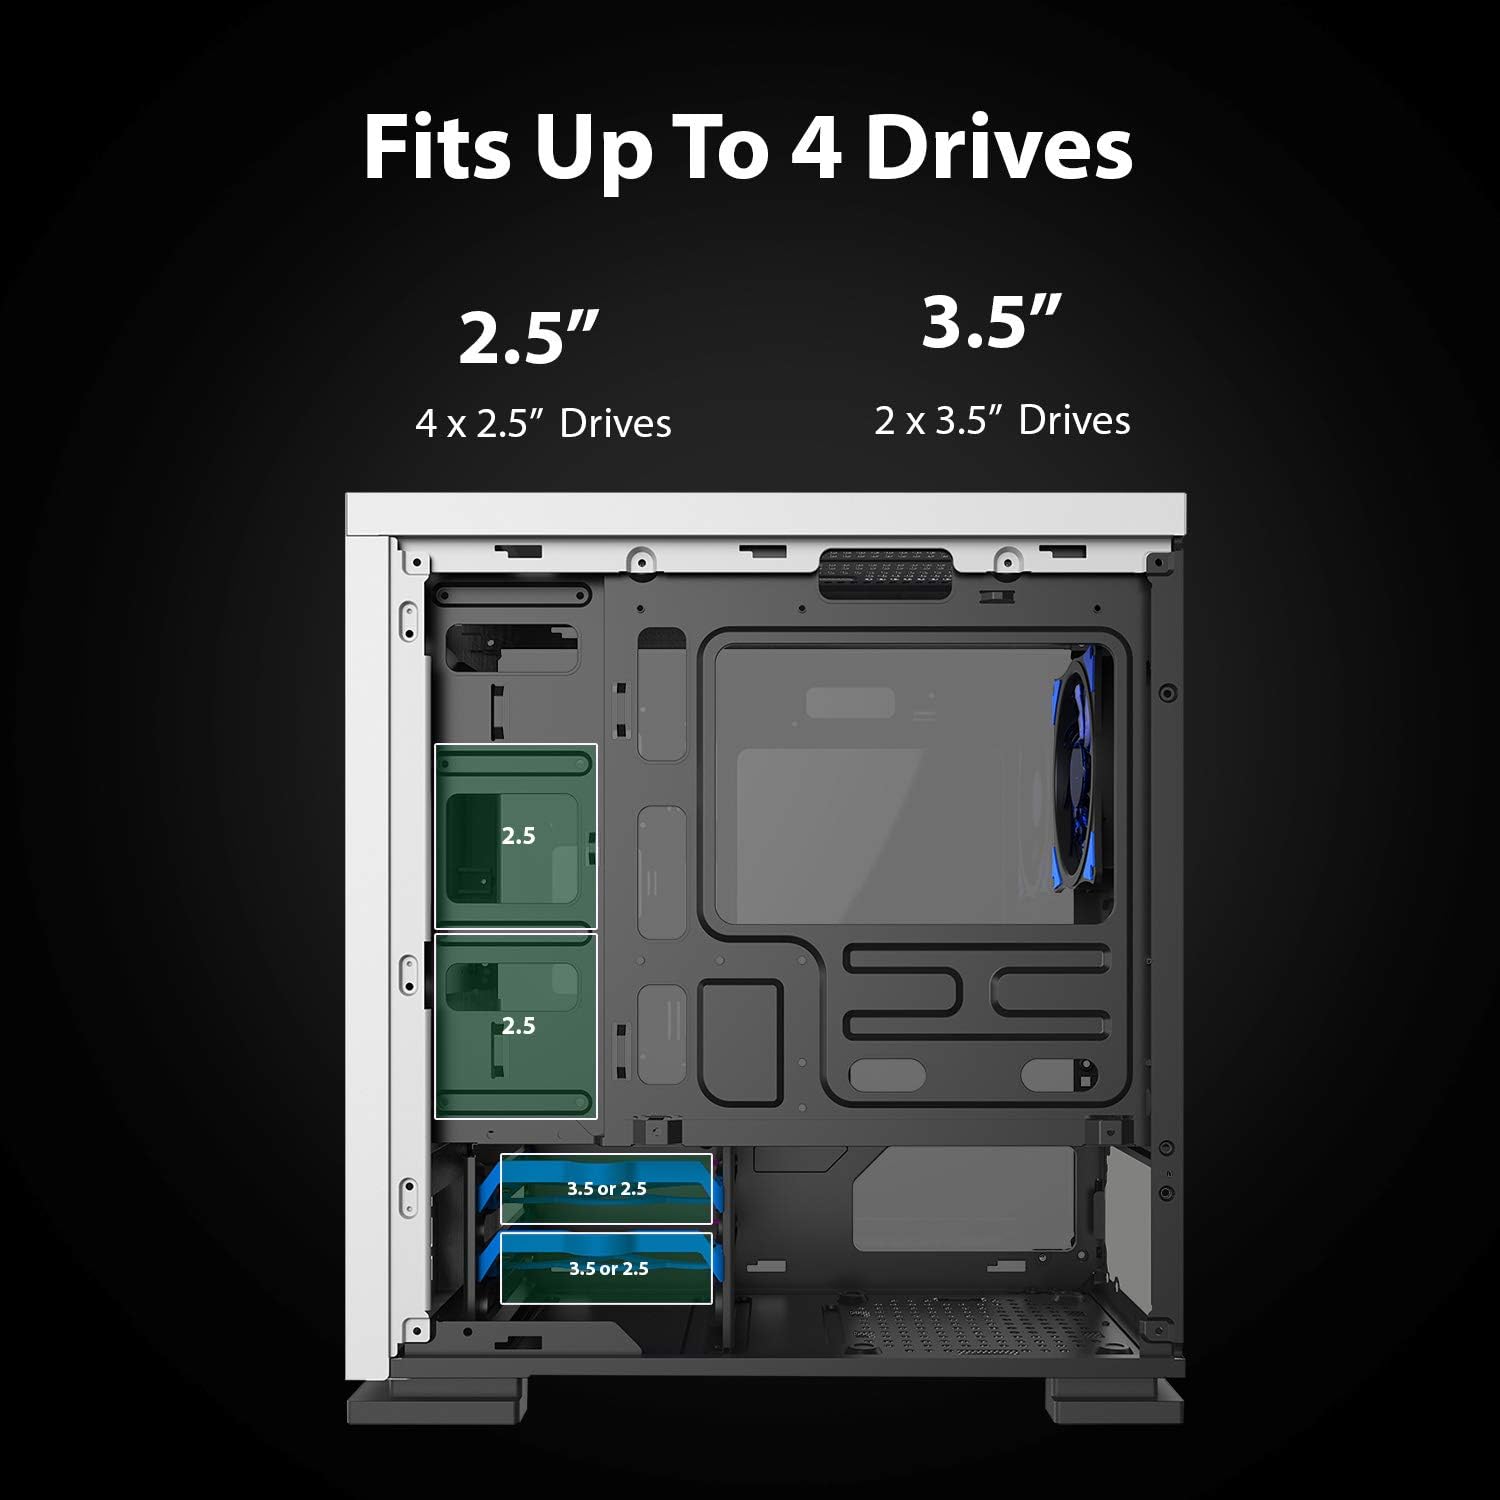
Figure 5.7: Drive bay locations supporting 2.5" and 3.5" storage devices.
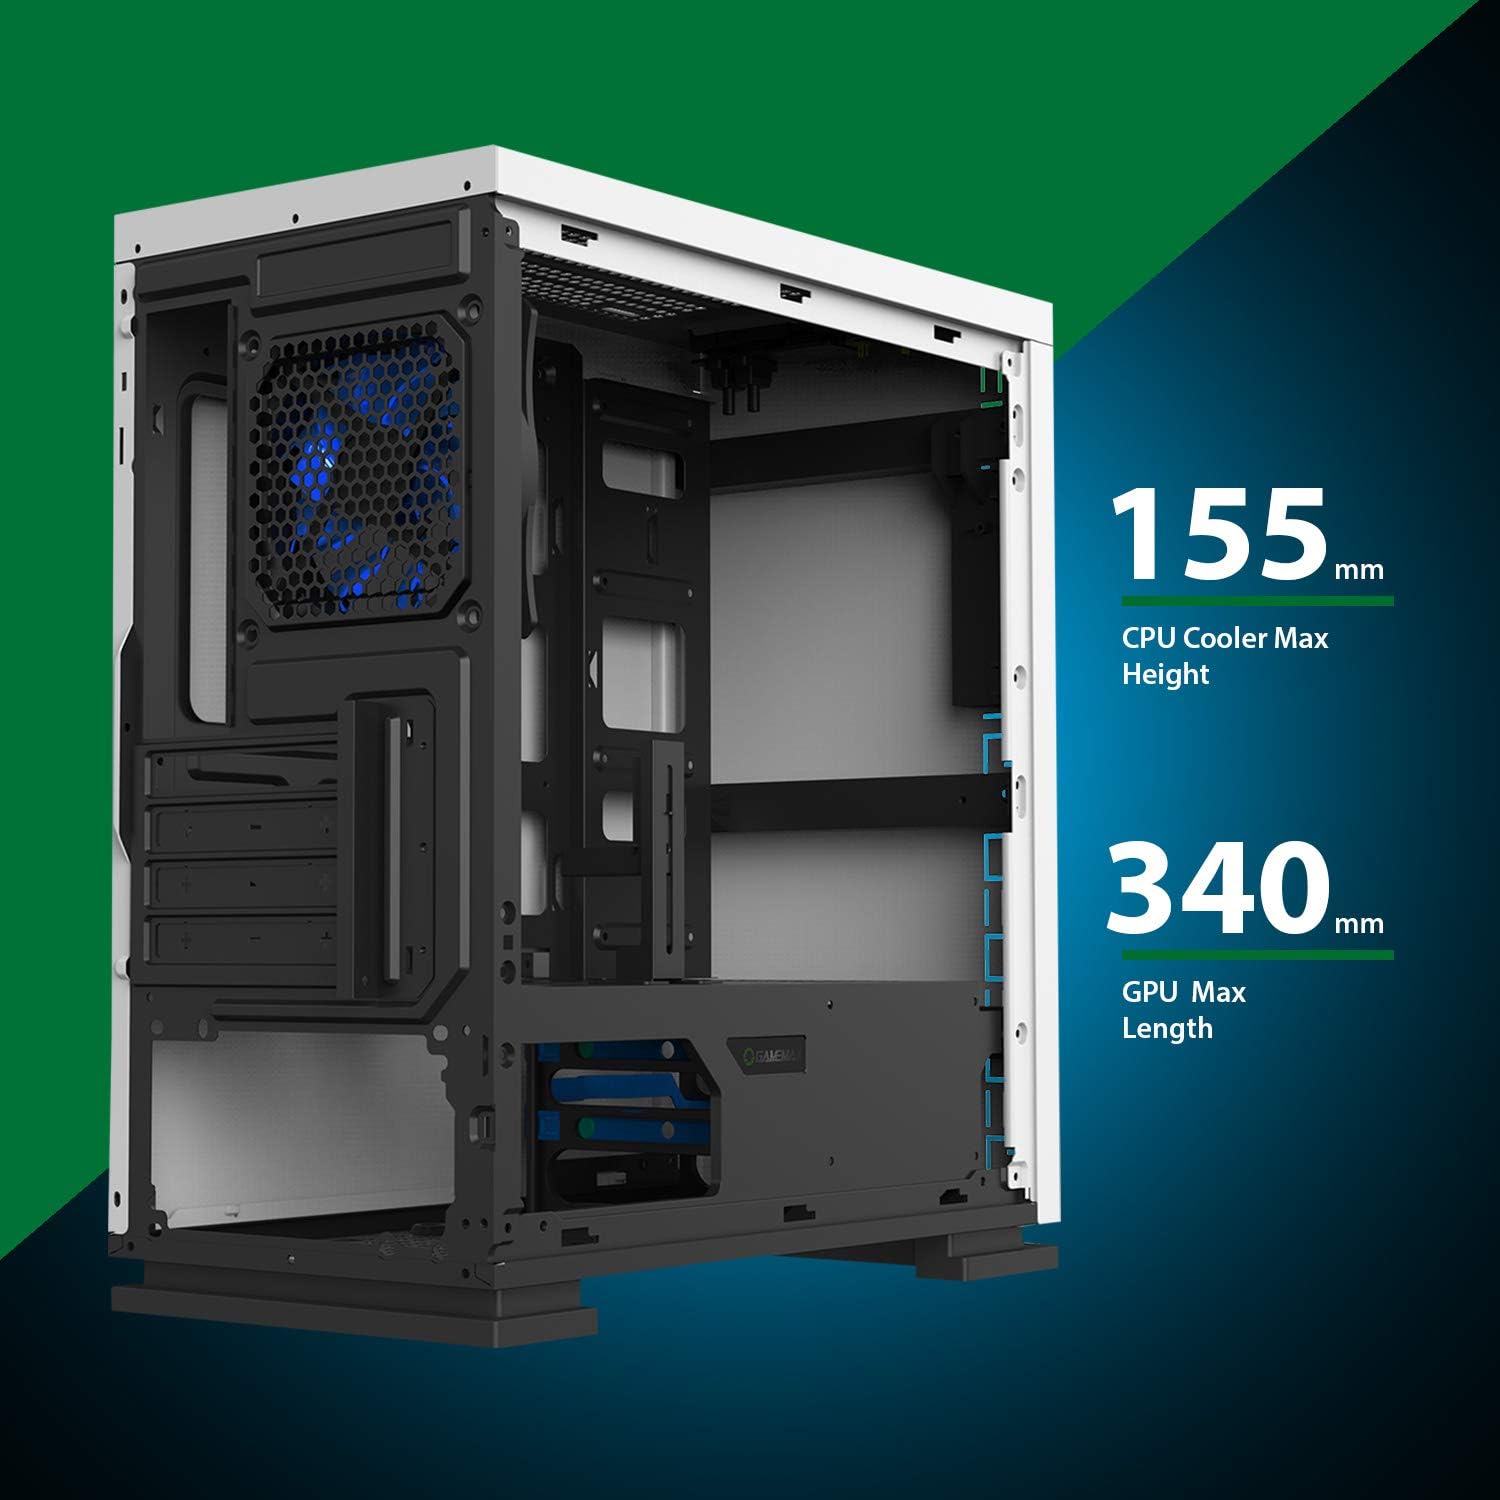
Figure 5.8: Maximum clearance for CPU coolers (155mm) and GPUs (340mm).
6. დაყენება და ინსტალაცია
6.1 მომზადება
- Unpack the chassis and remove all packaging materials.
- Remove the side panels by unscrewing the thumbscrews at the rear.
- Gather necessary tools: Phillips head screwdriver, cable ties.
6.2 დედაპლატის ინსტალაცია
- Install the I/O shield into the rear opening of the chassis.
- Align the motherboard with the pre-installed standoffs. Ensure the standoffs match your Micro ATX motherboard's mounting holes.
- დაამაგრეთ დედა დაფა მოწოდებული ხრახნებით.
6.3 კვების წყაროს მონტაჟი
- Place the power supply unit (PSU) into the dedicated compartment at the bottom rear of the case.
- Align the PSU with the screw holes on the rear of the chassis.
- დაამაგრეთ კვების ბლოკი მოწოდებული ხრახნებით.
6.4 მეხსიერების დისკის ინსტალაცია
- 2.5" Drives: Mount 2.5" SSDs/HDDs to the dedicated mounting points on the motherboard tray or within the drive cage using the provided screws.
- 3.5" Drives: დაამონტაჟეთ 3.5 დიუმიანი მყარი დისკები დისკის კორპუსში, რომელიც კვების ბლოკის ქვეშ მდებარეობს. ჩასვით დისკი უჯრაში და დაამაგრეთ.
6.5 Expansion Card (GPU) Installation
- Remove the necessary expansion slot covers from the rear of the chassis.
- ჩადეთ თქვენი ვიდეო ბარათი ან სხვა გაფართოების ბარათი დედაპლატზე შესაბამის PCIe სლოტში.
- Secure the card with a screw.
- Utilize the adjustable GPU bracket to provide additional support for heavier graphics cards.
6.6 ვენტილატორის და გაგრილების სისტემის მონტაჟი
- The case comes with one 120mm Blue LED fan pre-installed at the rear.
- Additional 120mm fans can be installed at the top and front positions as needed.
- Ensure fans are oriented correctly for optimal airflow (intake or exhaust).
6.7 Front Panel Connector Installation
Connect the front panel cables (USB 3.0, USB 2.0, HD Audio, Power SW, Reset SW, Power LED, HDD LED) to their corresponding headers on your motherboard. Refer to your motherboard manual for exact pin layouts.
7. მოქმედებს
Once all components are installed and cables are connected, replace the side panels. Connect your monitor, keyboard, mouse, and power cable. Press the power button on the top panel to start your system. The pre-installed LED fan will illuminate upon power-on.
8. მოვლა
- მტვრის ფილტრის გაწმენდა: Regularly remove and clean the magnetic dust filter located on the top panel to maintain optimal airflow and prevent dust buildup inside the case.
- ზოგადი წმენდა: გამოიყენეთ რბილი, დamp cloth to clean the exterior surfaces of the case. Avoid abrasive cleaners.
- შიდა მტვრის მოცილება: Periodically use compressed air to clear dust from internal components and fans. Ensure the system is powered off and unplugged before performing internal cleaning.
9. Დიაგნოსტიკა
- სისტემა არ ირთვება: Check all power connections, including the PSU to the wall outlet, PSU to motherboard, and front panel power switch cable to the motherboard.
- ვენტილატორები არ ბრუნავენ: Verify fan cables are securely connected to the motherboard or fan controller.
- USB პორტები არ მუშაობს: Ensure the front panel USB cables are correctly connected to the motherboard's USB headers.
- ეკრანის გამომავალი არ არის: Confirm the graphics card is properly seated and connected to power, and the monitor cable is connected to the graphics card, not the motherboard's integrated graphics port (unless using integrated graphics).
10. სპეციფიკაციები
| ფუნქცია | სპეციფიკაცია |
|---|---|
| მოდელის სახელი | GMX EXPEDITION |
| ბრენდი | GAMEMAX |
| საქმის ტიპი | Micro Tower (MATX) |
| დედაპლატის თავსებადობა | მიკრო ATX |
| ფერი | Expedition White |
| მასალა | პოლიკარბონატი (PC) |
| პროდუქტის ზომები (LxWxH) | 14.96 x 7.4 x 13.78 ინჩი (380 x 188 x 350 მმ) |
| ნივთის წონა | 8.58 ფუნტი (3.9 კგ) |
| USB 3.0 პორტები | 1 |
| USB 2.0 პორტები | 2 |
| გაგრილების მეთოდი | ჰაერი, წყალი |
| მოყვება ფანი | 1 x 120mm Blue LED (Rear) |
| CPU გამაგრილებლის მაქსიმალური სიმაღლე | 155 მმ |
| მაქსიმალური GPU სიგრძე | 340 მმ |
11. გარანტია და მხარდაჭერა
For warranty information and technical support, please visit the official GameMax webსაიტზე ან დაუკავშირდით თქვენს ადგილობრივ საცალო მოვაჭრეს.
ოფიციალური Webსაიტი: gamemaxpc.com