
1. შესავალი
The GameMax Mirage 120mm PC Cooling Fan is designed to provide efficient cooling for computer components while offering customizable RGB lighting. This fan features a dual-ring Rainbow LED design, a hydraulic bearing for quiet operation, and a 7-blade fan structure. It is compatible with 5V addressable 3-pin Aura Sync systems, allowing for synchronized lighting effects with compatible motherboards or controllers.

სურათი 1.1: წინა view of the GameMax Mirage fan with active Rainbow LED lighting.
2. უსაფრთხოების ინფორმაცია
- ინსტალაციამდე ან მოვლა-პატრონობამდე დარწმუნდით, რომ თქვენი კომპიუტერული სისტემა გამორთულია და დენის წყაროდან გამორთულია.
- Handle components with care to avoid damage from static electricity. Consider using an anti-static wrist strap.
- არ დააჭიროთ კონექტორებს ძალით. კაბელების შეერთებამდე დარწმუნდით, რომ მათი ორიენტაცია სწორია.
- Keep the fan away from liquids and excessive moisture.
- Do not attempt to disassemble the fan unit beyond what is described in this manual.
3. პაკეტის შიგთავსი
დარწმუნდით, რომ თქვენს პაკეტში ყველა ნივთია:
- 1 x GameMax Mirage 120mm PC Cooling Fan
- 4 x სამონტაჟო ხრახნები
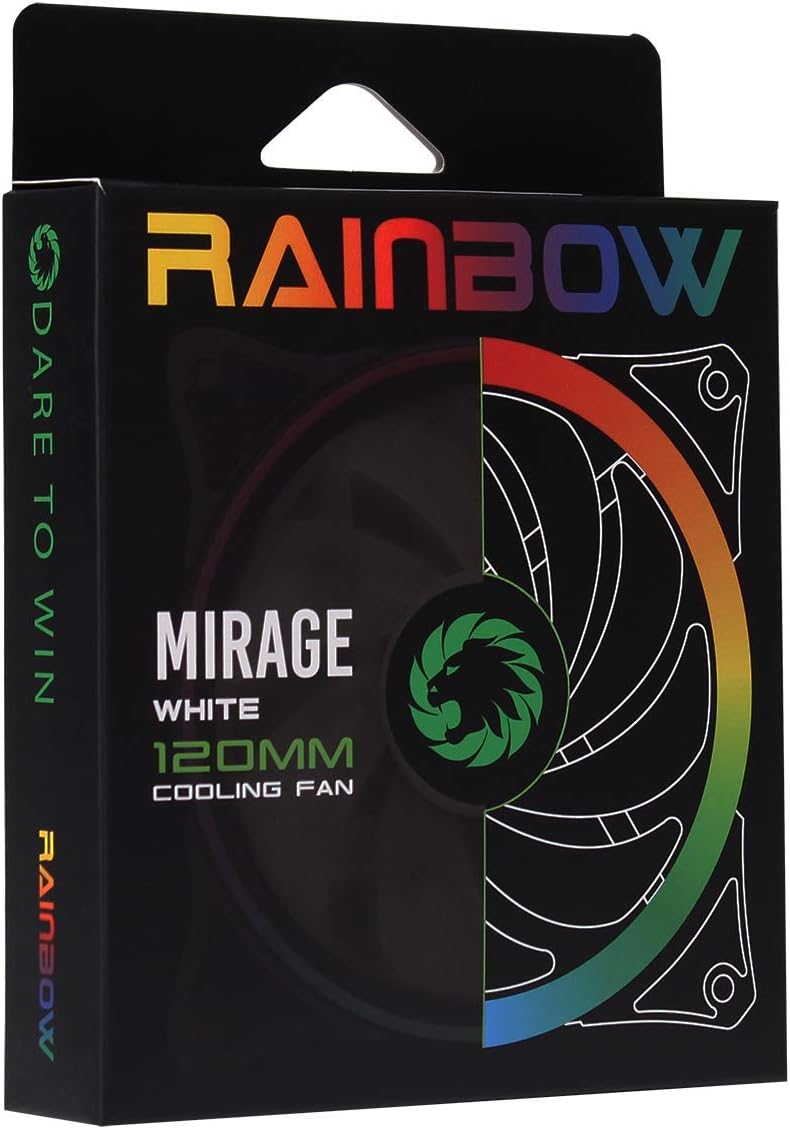
Image 3.1: Retail packaging for the GameMax Mirage fan.
4. დაყენება და ინსტალაცია
Follow these steps to install your GameMax Mirage 120mm PC Cooling Fan:
- მოამზადეთ თქვენი სისტემა: Power off your computer and unplug it from the power outlet. Open your computer case to access the fan mounting locations.
- ვენტილატორის დამაგრება: Position the fan in your desired location (e.g., case front, rear, top, or radiator). Ensure the airflow direction is correct for your cooling setup. Use the four included mounting screws to secure the fan to the chassis or radiator. The fan features rubber pads on the corners to help reduce vibration.
- ვენტილატორის კვების ბლოკის შეერთება: Locate the 3-pin power connector on the fan cable. Connect this cable to an available 3-pin fan header on your motherboard or a fan controller.
- RGB განათების დაკავშირება: Locate the 5V addressable 3-pin Aura connector on the fan cable. Connect this to a compatible 5V ARGB header on your motherboard (often labeled 'VDG' or 'ARGB') or an external RGB controller/hub. Warning: Do not connect this to a 12V RGB header, as it will damage the LEDs.

Image 4.1: The 3-pin power connector (top) and 5V addressable 3-pin Aura connector (bottom).
The fan cables are braided for improved aesthetics and durability, helping to keep your build neat and tidy.
5. საოპერაციო ინსტრუქციები
Once installed, the GameMax Mirage fan operates as follows:
- ვენტილატორის სიჩქარის კონტროლი: The fan speed is controlled via the 3-pin power connector. If connected to a motherboard fan header, the speed can typically be adjusted through your motherboard's BIOS/UEFI settings or dedicated software.
- RGB განათების კონტროლი: The Rainbow LED lighting is controlled via the 5V addressable 3-pin Aura connector.
- If connected to a compatible motherboard (e.g., ASUS Aura Sync, MSI Mystic Light, Gigabyte RGB Fusion, ASRock Polychrome Sync), you can use the motherboard's software to customize lighting effects, colors, and synchronization with other ARGB components.
- If connected to an external RGB hub/controller, refer to the instructions provided with your specific hub/controller for lighting customization options.

სურათი 5.1: დახრილი view of the GameMax Mirage fan showcasing its dual-ring Rainbow LED lighting.
6. მოვლა
Regular maintenance helps ensure optimal performance and longevity of your cooling fan:
- მტვრისგან გაწმენდა: Periodically inspect the fan blades and frame for dust accumulation. Use compressed air or a soft brush to gently remove dust. Ensure the fan is powered off and unplugged before cleaning.
- საკაბელო შემოწმება: Occasionally check the power and RGB cables for any signs of wear or damage.
7. Დიაგნოსტიკა
- ვენტილატორი არ ბრუნავს:
- Ensure the 3-pin power connector is securely plugged into a functional fan header on the motherboard or controller.
- Check motherboard BIOS/UEFI settings to ensure the fan header is enabled and configured correctly.
- LEDs Not Lighting Up or Incorrect Colors:
- Verify the 5V addressable 3-pin Aura connector is securely connected to a compatible 5V ARGB header (not 12V RGB).
- Ensure your motherboard's RGB software or external controller is properly installed and configured.
- If using a splitter or hub, ensure it is powered and functioning correctly.
- გადაჭარბებული ხმაური:
- Check for any cables or obstructions interfering with the fan blades.
- Ensure the fan is securely mounted and the rubber pads are properly seated to absorb vibrations.
- Dust accumulation can cause imbalance and noise; clean the fan as described in the Maintenance section.
8. სპეციფიკაციები
| ფუნქცია | სპეციფიკაცია |
|---|---|
| მოდელი | MIRAGEWHITE FINS |
| ვენტილატორის ზომა | 120 მმ x 120 მმ x 25 მმ (0.98 x 4.72 x 4.72 ინჩი) |
| ტარების ტიპი | ჰიდრავლიკური საკისარი |
| გულშემატკივართა პირები | 7 პირები |
| LED ტიპი | Addressable Rainbow LED (Dual-Ring) |
| ვენტილატორის დენის კონექტორი | 3-პინი |
| RGB კონექტორი | 5V Addressable 3-Pin Aura Connector |
| საოპერაციო ტომიtage | 5 Volts (for RGB) / 12 Volts (for fan motor, typical for 3-pin) |
| რეიტინგული ვატიtage | 3 ვატი |
| ბრუნვის მაქსიმალური სიჩქარე | 1800 RPM |
| ხმაურის დონე | დაახლოებით 25 dB(A) |
| მასალა | Rubber (for vibration dampსაღამო) |

სურათი 8.1: უკანა მხარე view of the GameMax Mirage fan, displaying the product label with model and electrical specifications.
9. გარანტია და მხარდაჭერა
For warranty information and technical support, please refer to the official GAMEMAX webადგილზე ან დაუკავშირდით თქვენს საცალო მოვაჭრეს. შეინახეთ შეძენის დამადასტურებელი საბუთი გარანტიის მოთხოვნებისთვის.