1. შესავალი
This manual provides instructions for the safe and effective operation of the SMART SENSOR AS8906 Handheld NO2 Gas Leak Detector. This device is designed for detecting Nitrogen Dioxide (NO2) gas concentrations in various environments. Please read this manual thoroughly before using the product.
1.1 უსაფრთხოების ინფორმაცია
- Always operate the device in accordance with the instructions provided.
- Do not attempt to modify or repair the device yourself. Refer to qualified personnel for service.
- Ensure the device is charged using the provided charging adapter and USB cable.
- Avoid exposing the device to extreme temperatures or humidity outside the specified operating conditions.
- This device is intended for professional use and should be handled with care.
2. პროდუქტი დასრულდაview
2.1 პაკეტის შიგთავსი
სტანდარტული პაკეტი მოიცავს შემდეგ ნივთებს:
- 1 x Nitrogen Dioxide Gas Monitor (AS8906)
- 1 x მომხმარებლის სახელმძღვანელო
- 1 x დამტენი ადაპტერი
- 1 x USB კაბელი
- 1 x Hand Carry Case
- 1 x კალიბრაციის სერთიფიკატი
- 1 x CNEX Certificate
- 1 x Gift Paper Box

სურათი 2.1: სტანდარტული შეფუთვის შიგთავსი.
2.2 მოწყობილობის კომპონენტები
Familiarize yourself with the main components of the AS8906 detector:

სურათი 2.2: წინა view and labeled components of the AS8906 detector.
- High Sensitive Sensor: Detects NO2 gas concentration.
- Sampling Pump Connecting Port: For attaching the optional sampლინგის ტუმბო.
- LCD ეკრანი: Displays gas concentration, battery status, and other information.
- ქვემოთ ღილაკი: Used for navigation and decreasing მნიშვნელობები.
- ზემოთ ღილაკი: Used for navigation and increasing მნიშვნელობები.
- ხმოვანი სიგნალიზაცია: Emits an audible alert when gas concentration exceeds set limits.
- დატენვის პორტი: USB დამტენი კაბელის შესაერთებლად.
- მსუბუქი სიგნალიზაცია: Visual alert (LED) when gas concentration exceeds set limits.
- ჩართვის/გამორთვის ღილაკი: აკონტროლებს მოწყობილობის ენერგიას.
- შეყვანის ღილაკი: ადასტურებს არჩევანს და პარამეტრებს.
2.3 ზომები
The AS8906 detector features a compact design for portability.
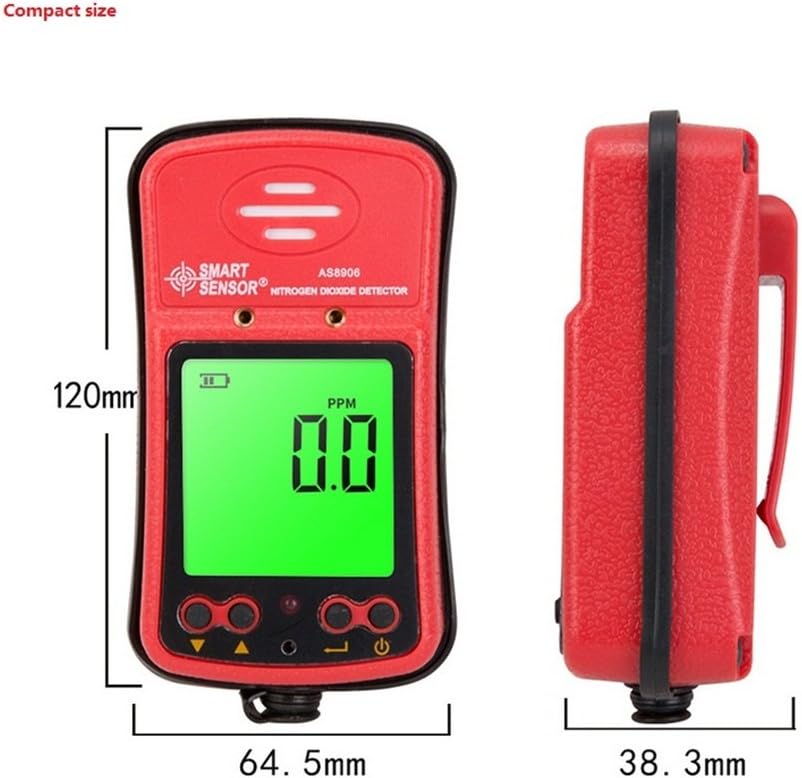
სურათი 2.3: მოწყობილობის ზომები.
ზომები: 120.2 მმ (სიმაღლე) x 64.5 მმ (სიგანე) x 38.3 მმ (სიღრმე).

Figure 2.4: The compact size allows for easy portability.
3. დაყენება
3.1 მოწყობილობის დატენვა
The AS8906 detector is powered by a built-in 3.7V Li-battery. Before first use, ensure the device is fully charged.
- Locate the charging port at the bottom of the device.
- შეაერთეთ მოწოდებული USB კაბელი დატენვის პორტში.
- Connect the other end of the USB cable to the charging adapter.
- Plug the charging adapter into a standard power outlet.
- The battery indicator on the LCD screen will show charging status. A full charge typically provides up to 12 hours of continuous operation.
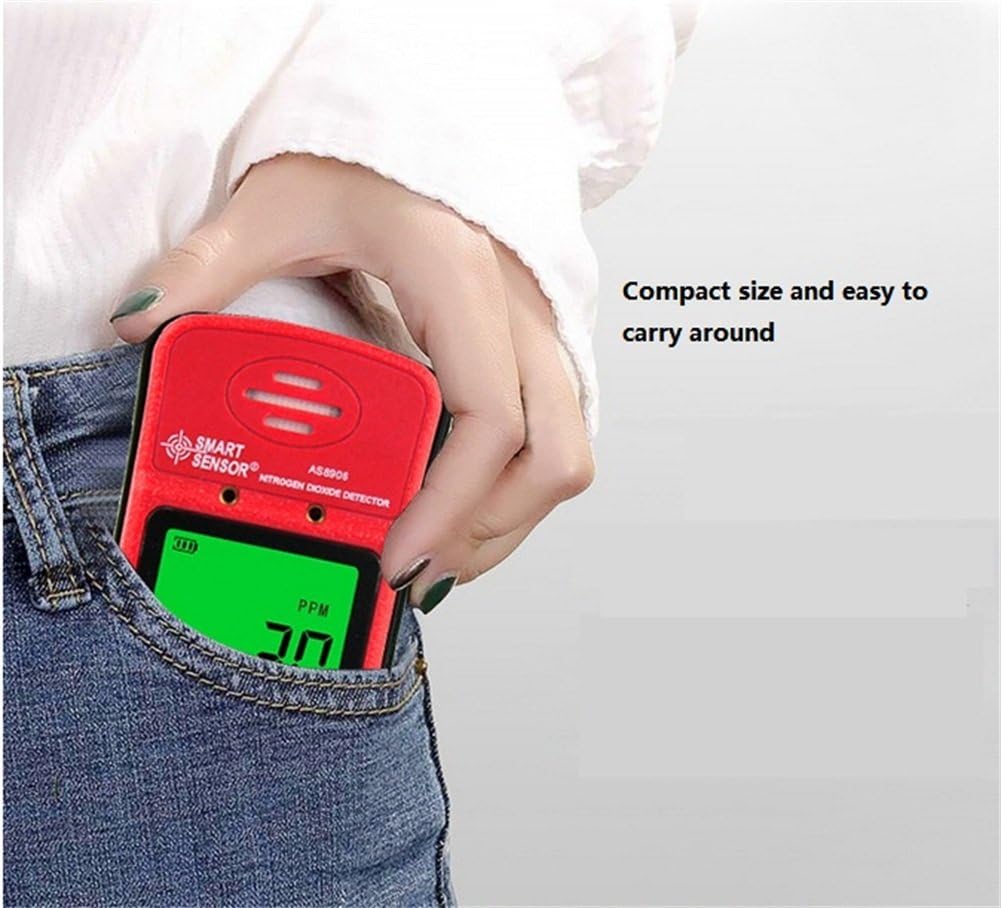
Figure 3.1: Charging port location.

Figure 3.2: Gas detector with recharge adapter.
3.2 S-ის შეერთებაampling Pump (Optional)
The optional sampling pump (AS8930) is designed to assist the gas detector in environments with limited access or poor air circulation. It does not operate independently and requires power from the gas detector.
- გასწორება სampling pump with the gas detector's sampling pump connecting port.
- Securely attach the sampling pump to the gas detector using the two closed-type screws. Ensure a tight connection to avoid poor contact.
- Connect the soft rubber tube (500mm long) to the nozzle of the sampლინგის ტუმბო.
- მნიშვნელოვანია: Do not connect any other voltage power supply to the sampling pump to prevent damage.
სურათი 3.3: სampling pump and accessories.
4. ოპერაცია
4.1 ჩართვა/გამორთვა
- ჩართვა: დააჭირეთ და გააჩერეთ ჩართვის/გამორთვის ღილაკი until the LCD screen illuminates. The device will perform a self-test.
- გამორთვა: დააჭირეთ და გააჩერეთ ჩართვის/გამორთვის ღილაკი სანამ ეკრანი არ გამოირთვება.
4.2 დისპლეის გაგება
The high-density digital LCD screen displays real-time gas concentration values, battery status, and other operational indicators. The backlight function allows for use in dark areas.
- PPM: Indicates parts per million, the unit for gas concentration.
- ბატარეის ხატულა: აჩვენებს ბატარეის მიმდინარე დატენვის დონეს.
- განგაშის ინდიკატორები: Visual cues for alarm status.
4.3 სიგნალიზაციის ფუნქცია
The device features high and low alarm functions with three alert methods: sound, light, and vibration. Alarm values are adjustable.
- When the gas concentration reaches a preset high or low alarm value, the device will activate its sound, light, and vibration alarms.
- The alarm sound can reach up to 80dB.
4.4 Adjusting Alarm Values
Refer to the on-screen menu for adjusting high and low alarm thresholds. Use the Up და ქვემოთ buttons to navigate and change values, and the შედი ღილაკი დასადასტურებლად.
4.5 Using the Sampლინგის ტუმბო
როდესაც სampling pump is connected, it will draw air into the detector, allowing for gas concentration measurement in remote or confined spaces. The air flow velocity is approximately 0.5 cubic inches per hour, with a maximum gas sample collecting distance of about 50 feet.
5. მოვლა
5.1 ბატარეის მოვლა
- Recharge the device when the battery indicator shows low power to ensure continuous operation.
- ბატარეის ხანგრძლივობის გასახანგრძლივებლად, მოერიდეთ მის სრულ დაცლას ხშირად.
- If storing the device for an extended period, charge it to approximately 50% and recharge every few months.
5.2 დასუფთავება
- გაწმინდეთ მოწყობილობის გარე ნაწილი რბილი, დamp ქსოვილი.
- არ გამოიყენოთ აბრაზიული საწმენდები ან გამხსნელები, რადგან მათ შეუძლიათ დააზიანონ კომპიუტერიasing ან ეკრანი.
- Ensure no liquids enter the sensor area or charging port.
5.3 კალიბრაცია
The device comes with a calibration certificate. For optimal accuracy and compliance, periodic professional calibration is recommended. Refer to the manufacturer or authorized service centers for calibration services.
6. Დიაგნოსტიკა
If you encounter issues with your AS8906 detector, refer to the following common problems and solutions:
| პრობლემა | შესაძლო მიზეზი | გამოსავალი |
|---|---|---|
| მოწყობილობა არ ჩაირთვება. | დაბალი ან დაცლილი ბატარეა. | Charge the device using the provided adapter and USB cable. |
| არაზუსტი წაკითხვები. | Sensor contamination or need for calibration. | Ensure the sensor area is clean. Consider professional calibration if readings remain inconsistent. |
| Alarm not sounding/lighting/vibrating. | Alarm settings configured incorrectly or disabled. | Check alarm settings in the device menu. Ensure volume and vibration are enabled. |
| Sampling pump not working. | Poor connection to the detector or pump malfunction. | უზრუნველყოს სampling pump is securely attached with screws. Verify the detector is powered on. |
If the problem persists after attempting these solutions, contact customer support for further assistance.
7. სპეციფიკაციები
7.1 დეტექტორის სპეციფიკაციები
| ფუნქცია | დეტალი |
|---|---|
| ბრენდი | სმარტ სენსორი |
| მოდელი | AS8906 |
| გაზის ტიპი | აზოტის დიოქსიდი (NO2) |
| გაზომვის დიაპაზონი | 0-20 ppm |
| რეზოლუცია | 0.1 ppm |
| მუშაობის პრინციპი | ელექტროქიმიური სენსორი |
| სიგნალიზაცია | Sound, Light, Vibration (adjustable values) |
| სიგნალიზაციის ხმის დონე | 80 დბ-მდე |
| ოპერაციული ტემპერატურა | -10~50°C |
| ოპერაციული ტენიანობა | 15~95% RH (standard) |
| დენის წყარო | 3.7V Li-battery (Built-in) |
| სამუშაო დენი | 16 mA |
| უწყვეტი ოპერაცია | დაახლოებით 12 საათი (სრული დატენვით) |
| მასალა | ABS პლასტიკური |
| წმინდა წონა | 200 გ (7.1 უნცია) |
| ზომები | 120.2 x 64.5 x 38.3 მმ |
| სერთიფიკატები | JJG693; JJG695: JJG915 and GB3836 series anti-explosion standard, CNEX |
7.2 სampling Pump Specifications (Optional Accessory)
| ფუნქცია | დეტალი |
|---|---|
| საოპერაციო ტომიtage დიაპაზონი | DC 2.2V-3.2V |
| სამუშაო დენი | <280 mA |
| საქშენის დიამეტრი | 2.5 მმ |
| ხმაური | <75 დბ |
| ზომები | 100.8 x 62.3 x 50 მმ |
| მაქს სample Distance | დაახლ. 50 ფუტი |
| Air Flow Velocity | Approx. 0.5 cubic inches per hour |
8. გარანტია და მხარდაჭერა
8.1 ინფორმაცია გარანტიის შესახებ
Your SMART SENSOR AS8906 Handheld NO2 Gas Leak Detector comes with a warranty. Please refer to the included Warranty Card in your package for specific terms and conditions, including warranty period and coverage details.
8.2 მომხმარებელთა მხარდაჭერა
For technical assistance, troubleshooting beyond this manual, or warranty claims, please contact SMART SENSOR customer support. Contact information can typically be found on the product packaging, the warranty card, or the official SMART SENSOR webსაიტი.