BESDER BES-MH03
BESDER Home Security IP Camera User Manual
Model: BES-MH03
1. შესავალი
Thank you for choosing the BESDER Home Security IP Camera. This wireless smart WiFi camera is designed to provide reliable surveillance, audio recording, and baby monitoring capabilities with high-definition video. This manual will guide you through the setup, operation, and maintenance of your new device to ensure optimal performance and security.
2. უსაფრთხოების ინფორმაცია
- Ensure the camera is powered by the correct voltage (DC 5V) as specified.
- Do not expose the camera to water or moisture. It is designed for indoor use only.
- მოერიდეთ კამერის პირდაპირ მზის სხივებზე ან სითბოს წყაროებთან ახლოს განთავსებას.
- არ სცადოთ კამერის დამოუკიდებლად დაშლა ან შეკეთება. მომსახურებისთვის დაუკავშირდით კვალიფიციურ პერსონალს.
- შეინახეთ კამერა და მისი აქსესუარები ბავშვებისთვის მიუწვდომელ ადგილას.
- დაზიანების თავიდან ასაცილებლად გამოიყენეთ მხოლოდ მოწოდებული კვების ადაპტერი და კაბელი.
3. პაკეტის შიგთავსი
გთხოვთ, შეამოწმოთ შეფუთვა, რათა დარწმუნდეთ, რომ ყველა ნივთი ადგილზეა და კარგ მდგომარეობაშია:
- BESDER Home Security IP Camera
- USB დენის კაბელი
- დენის ადაპტერი (DC 5V)
- სამონტაჟო ხრახნები და კედლის შტეფსელები
- მომხმარებლის სახელმძღვანელო (ეს დოკუმენტი)

Image showing the BESDER IP Camera along with its accessories: a USB power cable, a power adapter, and a packet of mounting screws.
4. პროდუქტი დასრულდაview
Familiarize yourself with the main components of your BESDER IP Camera:
- კამერის ობიექტივი: იღებს ვიდეოსtage.
- ინფრაწითელი LED-ები: ღამის ხედვისთვის.
- მიკროფონი: აუდიო შეყვანისთვის.
- სპიკერი: ორმხრივი აუდიო კომუნიკაციისთვის.
- SD ბარათის სლოტი: ლოკალური ვიდეო შენახვისთვის (მხარს უჭერს 64 გბ-მდე).
- Power Interface (DC 5V): უერთდება კვების ადაპტერს.
- გადატვირთვის ღილაკი: გამოიყენება ქარხნული პარამეტრების აღსადგენად.

Diagram illustrating the side view of the BESDER IP Camera, highlighting the SD Card slot, Power interface (DC 5V), and Reset button.
5. დაყენება
5.1. ჩართვა
- Connect the USB power cable to the camera's power interface.
- შეაერთეთ კვების ადაპტერი სტანდარტულ ელექტრო განყოფილებაში.
- The camera will power on, and its indicator light will begin to flash, indicating it's ready for setup.
5.2. App Installation (iCSee)
The BESDER IP Camera uses the iCSee application for remote monitoring and control.
- Download the iCSee app from your mobile device's app store (App Store for iOS or Google Play Store for Android).
ჩამოტვირთეთ iOS-ისთვის | ჩამოტვირთეთ Android-ისთვის - დარეგისტრირდით ახალი ანგარიში ან შედით სისტემაში, თუ უკვე გაქვთ ერთი.
5.3. Wi-Fi კავშირი
Follow these steps to connect your camera to your home Wi-Fi network:
- გახსენით iCSee აპლიკაცია და შეეხეთ „+“ ხატულას ახალი მოწყობილობის დასამატებლად.
- Select "Add My Device" or "Add Camera".
- Choose the "Wi-Fi Camera" option.
- Follow the on-screen prompts to enter your Wi-Fi network name (SSID) and password. Ensure your phone is connected to a 2.4GHz Wi-Fi network, as the camera may not support 5GHz.
- The app will generate a QR code. Position your phone's screen in front of the camera lens (approx. 15-20 cm away) until you hear a confirmation sound from the camera.
- Once connected, the camera's indicator light will turn solid blue. You can now name your camera and start monitoring.
5.4. მონტაჟი
კამერა შეიძლება განთავსდეს ბრტყელ ზედაპირზე ან დამონტაჟდეს კედელზე ან ჭერზე.
- აირჩიეთ შესაფერისი ადგილი გამჭვირვალე view და Wi-Fi-ს დიაპაზონში.
- If mounting, use the provided mounting screws and wall plugs to secure the camera base.
- Adjust the camera's angle as needed within the app after mounting.
6. მოქმედებს
6.1. იცხოვრე View
Access real-time video feed from your camera through the iCSee app.
- Open the iCSee app and select your camera from the device list.
- The live video feed will appear. You can pan and tilt the camera remotely using the controls in the app.

Screenshot of a multi-camera monitoring interface, likely from the iCSee application, displaying live feeds from multiple cameras and recording controls.
6.2. ჩაწერა და შენახვა
The camera supports local storage via a MicroSD card.
- Insert a MicroSD card (up to 64GB, Class 10 recommended) into the SD card slot.
- In the iCSee app settings, navigate to "Storage Settings" to format the SD card and configure recording modes (e.g., continuous, motion-triggered).
- ჩაწერილი ფუtagშეიძლება იყოს viewრედაქტირებულია და გადმოწერილია პირდაპირ აპლიკაციიდან.
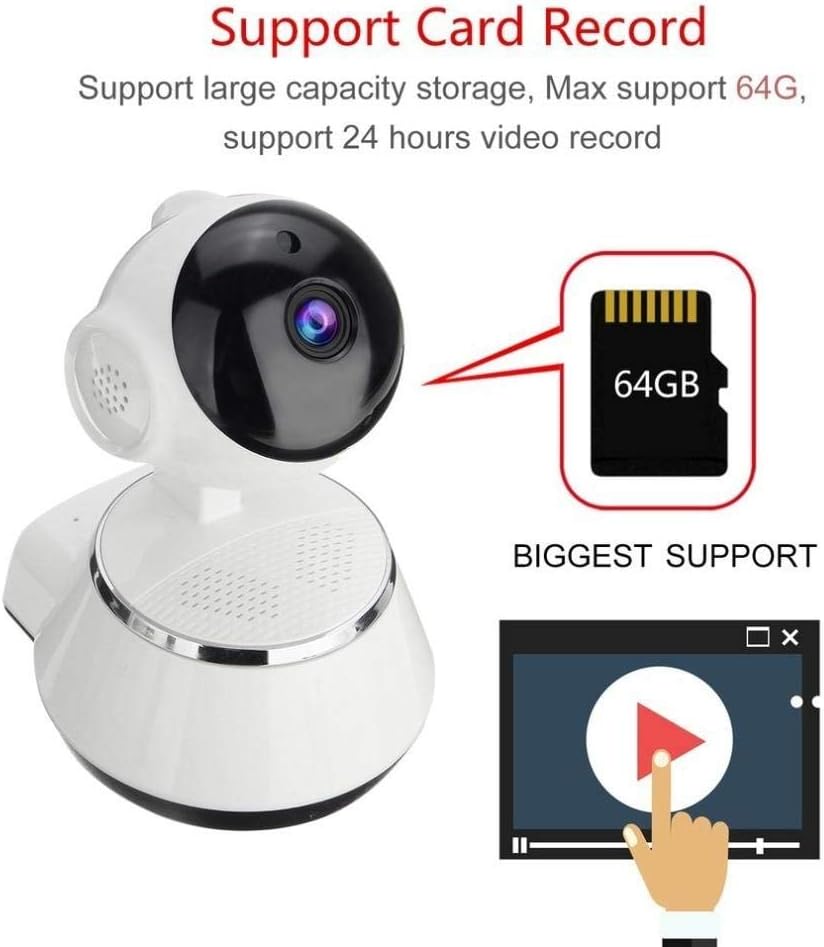
Image demonstrating the camera's support for large capacity storage, specifically showing a 64GB MicroSD card, indicating support for 24-hour video recording.
6.3. მოძრაობის გამოვლენა
Receive alerts when motion is detected in the camera's field of view.
- Enable "Motion Detection" in the camera settings within the iCSee app.
- Adjust sensitivity levels and set up notification preferences (e.g., push notifications, email alerts).
6.4. ღამის ხედვა
კამერა ავტომატურად გადადის ღამის ხედვაზე დაბალი განათების პირობებში.
- Infrared LEDs provide clear black-and-white video up to 10 meters in complete darkness.
- No manual intervention is required for night vision activation.

Comparison image displayed on a smartphone screen, showing the difference between daytime and nighttime monitoring views, highlighting the infrared night vision capability.
6.5. ორმხრივი აუდიო
Communicate through the camera using the built-in microphone and speaker.
- ცოცხალი ყოფნისას view, tap the microphone icon in the iCSee app to speak through the camera.
- კამერის გარემოდან აუდიოს მოსასმენად შეეხეთ დინამიკის ხატულას.
6.6. დისტანციური წვდომა
Monitor your property from anywhere with an internet connection.
- As long as your camera is connected to Wi-Fi and your phone has internet access, you can view live feeds and manage settings remotely via the iCSee app.
7. მოვლა
- დასუფთავება: კამერის ლინზისა და კორპუსის გასაწმენდად გამოიყენეთ რბილი, მშრალი ქსოვილი. არ გამოიყენოთ თხევადი საწმენდი საშუალებები ან აეროზოლები.
- Firmware განახლებები: Regularly check for firmware updates through the iCSee app to ensure your camera has the latest features and security patches.
- SD ბარათის მენეჯმენტი: Periodically back up important recordings and format the SD card to maintain optimal performance.
- შენახვა: When not in use for extended periods, store the camera in a cool, dry place away from direct sunlight.
8. Დიაგნოსტიკა
| პრობლემა | შესაძლო მიზეზი / გამოსავალი |
|---|---|
| კამერა არ ჩართულია | Ensure the power adapter is securely connected to both the camera and the power outlet. Try a different outlet. |
| Wi-Fi-თან დაკავშირება შეუძლებელია | Check if your Wi-Fi network is 2.4GHz. Ensure the Wi-Fi password is correct. Move the camera closer to the router. Reset the camera and try again. |
| ცოცხალი view is blurry or dark | Clean the camera lens. Check lighting conditions. Ensure night vision is functioning correctly in low light. |
| SD ბარათი არ იწერს | Ensure the SD card is inserted correctly and formatted in the app. Check if the card is full or corrupted. Try a different SD card. |
| ხმა არ არის ან ხმის ხარისხი ცუდია | Check microphone and speaker settings in the app. Ensure there are no obstructions blocking the microphone or speaker. |
| კამერა ხშირად ითიშება | Weak Wi-Fi signal. Move the camera closer to the router or consider a Wi-Fi extender. Reduce network congestion. |
9. სპეციფიკაციები
| ფუნქცია | დეტალი |
|---|---|
| მოდელის ნომერი | BES-MH03 |
| დაკავშირების ტექნოლოგია | უსადენო (Wi-Fi) |
| რეკომენდებული გამოყენება | Baby Monitoring, Home Security |
| განსაკუთრებული თვისებები | Motion Sensor, Night Vision (Infrared distance 10m) |
| ფორმის ფაქტორი | გუმბათი |
| ვატtage | 3 ვატი |
| შენახვის მხარდაჭერა | MicroSD ბარათი (მაქსიმუმ 64 GB) |
| აუდიო | Two-way audio (Audio Record) |
10. გარანტია და მხარდაჭერა
BESDER products are manufactured to high-quality standards. For warranty information, please refer to the terms and conditions provided at the point of purchase or contact your retailer. For technical support or further assistance, please refer to the support section within the iCSee application or visit the official BESDER webსაიტი (თუ შესაძლებელია).
Ask a question about this manual
Ask about setup, troubleshooting, compatibility, parts, safety, or missing instructions. Manuals+ will review the question and use this page’s manual context to help answer it.