1. შესავალი
This manual provides detailed instructions for setting up, operating, maintaining, and troubleshooting your HUAWEI 4G Wireless Router B311As-853. Please read this manual thoroughly before using the device to ensure proper and safe operation.
2. პაკეტის შიგთავსი
დარწმუნდით, რომ თქვენი პაკეტი შეიცავს შემდეგ ელემენტებს:
- HUAWEI 4G Wireless Router B311As-853
- დენის ადაპტერი
- სწრაფი დაწყების სახელმძღვანელო (ეს დოკუმენტი)
- Ethernet კაბელი (შეიძლება განსხვავდებოდეს რეგიონის მიხედვით)
Note: Actual contents may vary. Please check the packaging for a complete list.
3. პროდუქტი დასრულდაview
Familiarize yourself with the main components and indicators of your router.
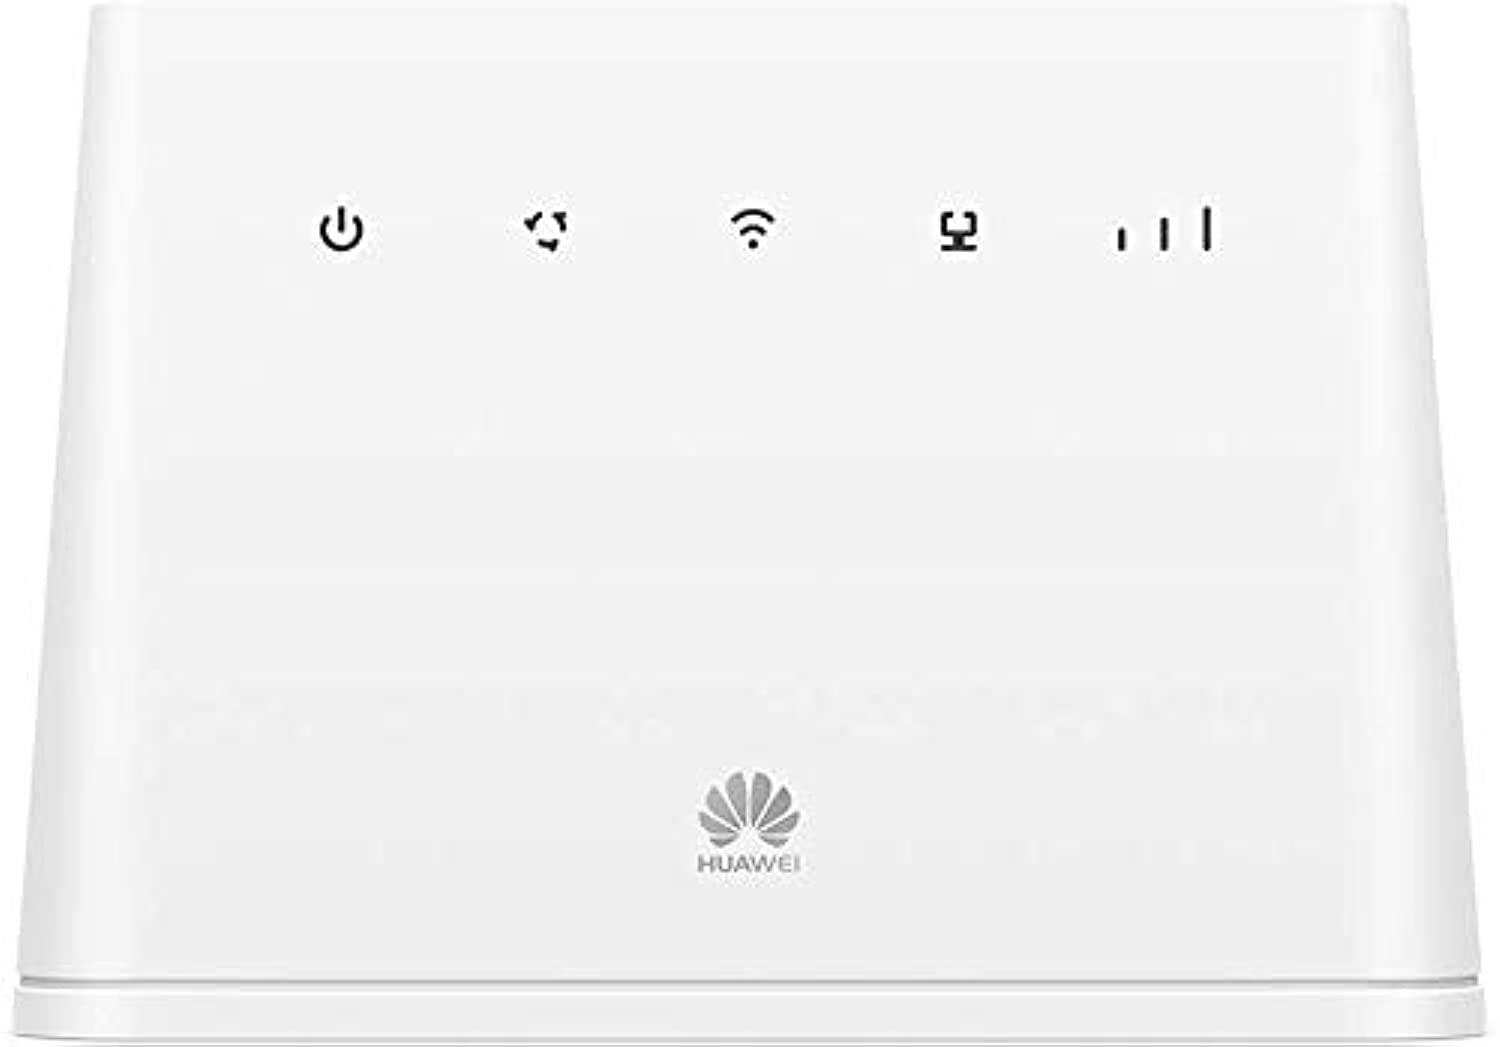
სურათი 1: წინა view of the HUAWEI 4G Wireless Router B311As-853, showing power and WPS buttons, and indicator lights for power, network status, Wi-Fi, and signal strength.
ინდიკატორის ნათურები:
- დენის ინდიკატორი: მიუთითებს დენის სტატუსზე.
- ქსელის სტატუსის ინდიკატორი: Shows connection to the 4G network.
- Wi-Fi ინდიკატორი: Shows Wi-Fi status.
- სიგნალის სიძლიერის ინდიკატორი: Displays the strength of the 4G signal.
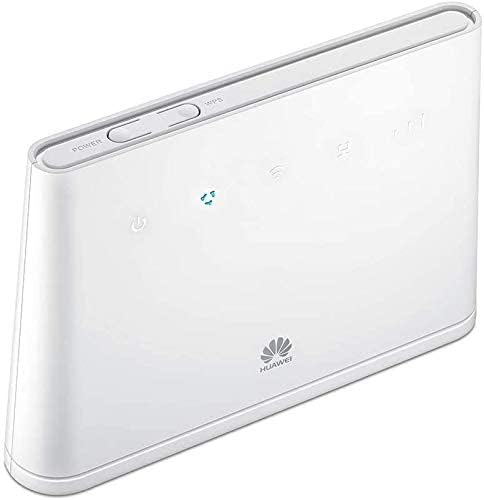
სურათი 2: მხარე view of the HUAWEI 4G Wireless Router B311As-853, showing ports and SIM card slot.
პორტები და ღილაკები:
- დენის პორტი: უერთდება კვების ადაპტერს.
- LAN/WAN პორტი: Connects to a computer or other network devices.
- SIM ბარათის სლოტი: ჩადეთ თქვენი 4G SIM ბარათი აქ.
- გადატვირთვის ღილაკი: გამოიყენება ქარხნული პარამეტრების აღსადგენად.
- WPS ღილაკი: Wi-Fi Protected-ის სწრაფი დაყენებისთვის.
4. დაყენების გზამკვლევი
4.1. SIM ბარათის ჩასმა
- დარწმუნდით, რომ როუტერი გამორთულია.
- Locate the SIM card slot, usually on the side or bottom of the device.
- Insert a standard 4G SIM card into the slot with the gold contacts facing down and the notched corner oriented correctly. Push until it clicks into place.
4.2. დამაკავშირებელი სიმძლავრე
- შეაერთეთ კვების ადაპტერი როუტერის კვების პორტთან.
- შეაერთეთ დენის ადაპტერის მეორე ბოლო კედლის განყოფილებაში.
- Press the Power button to turn on the router. The Power indicator should light up.
4.3. საწყისი კონფიგურაცია
You can connect to the router via Wi-Fi or an Ethernet cable.
დაკავშირება Wi-Fi-ით:
- On your computer or smartphone, search for available Wi-Fi networks.
- აირჩიეთ Wi-Fi ქსელის სახელი (SSID), რომელიც დაბეჭდილია თქვენი როუტერის ქვედა ნაწილში არსებულ ეტიკეტზე.
- შეიყვანეთ Wi-Fi პაროლი (Key), რომელიც ასევე მითითებულია როუტერის ეტიკეტზე.
Connecting via Ethernet:
- Connect one end of an Ethernet cable to the LAN/WAN port on the router.
- Ethernet კაბელის მეორე ბოლო შეაერთეთ თქვენი კომპიუტერის Ethernet პორტთან.
წვდომა Web მართვის გვერდი:
- გახსენით ა web ბრაუზერი (მაგ., Chrome, Firefox, Edge).
- მისამართის ზოლში შეიყვანეთ ნაგულისხმევი IP მისამართი (ჩვეულებრივ
192.168.8.1or192.168.1.1) ან web address printed on the router's label, then press Enter. - შეიყვანეთ ნაგულისხმევი მომხმარებლის სახელი და პაროლი (ჩვეულებრივ
adminორივესთვის, ან როგორც მითითებულია როუტერის ეტიკეტზე). - საწყისი დაყენების დასასრულებლად, უსაფრთხოების მიზნით, ნაგულისხმევი Wi-Fi სახელისა და პაროლის შესაცვლელად, მიჰყევით ეკრანზე მოცემულ ინსტრუქციებს.
5. საოპერაციო ინსტრუქციები
5.1. მოწყობილობების დამაკავშირებელი
Once the router is set up and connected to the internet, you can connect multiple devices:
- Wi-Fi მოწყობილობები: Connect smartphones, tablets, laptops, and other Wi-Fi enabled devices using the Wi-Fi name (SSID) and password you configured.
- სადენიანი მოწყობილობები: Use Ethernet cables to connect devices like desktop computers, smart TVs, or gaming consoles to the LAN ports.
5.2. Understanding Indicator Lights
The indicator lights provide important information about the router's status:
- სიმძლავრე: უწყვეტი მწვანე ფერი მიუთითებს ჩართვაზე.
- ქსელის სტატუსი: Solid blue/green indicates connected to 4G network; blinking indicates searching for network; red indicates no network or error.
- Wi-Fi: Solid green indicates Wi-Fi is active; blinking indicates data transmission.
- სიგნალის სიძლიერე: Multiple bars indicate strong signal; fewer bars indicate weaker signal.
5.3. პარამეტრების მართვა
წვდომა web management page (as described in Section 4.3) to manage advanced settings such as:
- Wi-Fi-ს სახელისა და პაროლის შეცვლა.
- Configuring network settings (APN, data limits).
- დაკავშირებული მოწყობილობების მართვა.
- მიმდინარეობს firmware- ის განახლება.
6. მოვლა
6.1. დასუფთავება
Regularly clean the router to prevent dust buildup:
- Power off the device and unplug it from the power outlet.
- გარე ზედაპირის გასაწმენდად გამოიყენეთ რბილი, მშრალი ქსოვილი.
- არ გამოიყენოთ თხევადი საწმენდი საშუალებები ან აეროზოლები.
6.2. პროგრამული უზრუნველყოფის განახლებები
Periodically check for and install firmware updates through the web management page. Firmware updates can improve performance, add new features, and enhance security.
6.3. ქარხნულ პარამეტრებზე გადატვირთვა
If you encounter persistent issues or forget your login credentials, you can reset the router to its factory default settings:
- With the router powered on, use a pointed object (like a paperclip) to press and hold the Reset button for approximately 5-10 seconds.
- Release the button when the indicators flash. The router will restart with factory settings.
- You will need to reconfigure the router after a factory reset.
7. Დიაგნოსტიკა
ეს განყოფილება განიხილავს გავრცელებულ პრობლემებს, რომლებსაც შეიძლება წააწყდეთ.
7.1. ინტერნეტთან კავშირი არ არის
- შეამოწმეთ SIM ბარათი: დარწმუნდით, რომ SIM ბარათი სწორად არის ჩასმული და აქტიურია.
- ქსელის სიგნალი: Check the Network Status and Signal Strength indicators. If the signal is weak or red, try moving the router to a location with better reception.
- APN პარამეტრები: Verify that the Access Point Name (APN) settings in the web management page are correct for your mobile operator.
- როუტერის გადატვირთვა: Power off the router, wait a few seconds, then power it back on.
7.2. Wi-Fi-ს ნელი სიჩქარე
- სიგნალის სიძლიერე: Ensure your connected device is within a good Wi-Fi signal range.
- ჩარევა: Move the router away from other electronic devices that might cause interference (e.g., cordless phones, microwaves).
- ძალიან ბევრი მოწყობილობა: Disconnect some devices if too many are simultaneously using the network.
- Firmware: დარწმუნდით, რომ როუტერის firmware განახლებულია.
7.3. წვდომა შეუძლებელია Web მართვის გვერდი
- IP მისამართი: Double-check the IP address entered in the browser.
- კავშირი: დარწმუნდით, რომ თქვენი მოწყობილობა სწორად არის დაკავშირებული როუტერთან Wi-Fi-ს ან Ethernet-ის საშუალებით.
- ბრაუზერის ქეში: გაასუფთავეთ თქვენი ბრაუზერის ქეში და ქუქი-ფაილები, ან სცადეთ სხვა ბრაუზერი.
- გადატვირთვა: თუ ყველაფერი ვერ მოხერხდა, გადატვირთეთ ქარხნული პარამეტრები (იხილეთ ნაწილი 6.3).
8. სპეციფიკაციები
Key technical specifications for the HUAWEI 4G Wireless Router B311As-853:
| ფუნქცია | აღწერა |
|---|---|
| ბრენდი | HUAWEI |
| მოდელის სახელი | B311As-853 |
| დაკავშირების ტექნოლოგია | უსადენო |
| უსადენო კომუნიკაციის სტანდარტი | 802.11ac |
| სიხშირის ჯგუფის კლასი | Dual-Band |
| თავსებადი მოწყობილობები | სმარტფონი |
| რეკომენდებული გამოყენება | მთავარი |
| მოყვება კომპონენტები | როუტერი |
| ოპერაციული სისტემა | როუტერი |
| მიწოდების ზომები | 22.8 x 18.6 x 6.2 სმ; 670 გრამი |
| მწარმოებლის მითითება | 545542 |
9. უსაფრთხოების ინფორმაცია
გთხოვთ, დაიცვან შემდეგი უსაფრთხოების ზომები:
- არ დაუშვათ მოწყობილობის ექსპრეს ტემპერატურაზე, მზის პირდაპირ სხივებზე ან ნესტიან გარემოში ყოფნა.
- გამოიყენეთ მხოლოდ მოწყობილობასთან ერთად მოწოდებული ორიგინალი კვების ადაპტერი.
- შეინახეთ მოწყობილობა წყლისა და სხვა სითხეებისგან მოშორებით.
- არ სცადოთ მოწყობილობის გახსნა ან შეკეთება დამოუკიდებლად. მიმართეთ კვალიფიციურ სერვის პერსონალს.
- უზრუნველყოს სათანადო ვენტილაცია მოწყობილობის ირგვლივ გადახურების თავიდან ასაცილებლად.
10. გარანტია და მხარდაჭერა
For warranty information and technical support, please refer to the warranty card included in your package or visit the official HUAWEI website. You can also contact HUAWEI customer service for assistance.
HUAWEI Official Webსაიტი: customers.huawei.com


