
Docooler XUH6362338938855GM
Docooler JINGSHA X99-8D3 Motherboard User Manual
Model: XUH6362338938855GM
1. შესავალი და მეტიview
The Docooler JINGSHA X99-8D3 is a high-performance ATX gaming motherboard designed for LGA2011 V3 processors. It features four-channel DDR3 memory support, an M.2 NVME slot for high-speed storage, and multiple PCI-E expansion slots, making it suitable for demanding computing tasks and gaming setups. This manual will guide you through the installation, configuration, and maintenance of your motherboard.
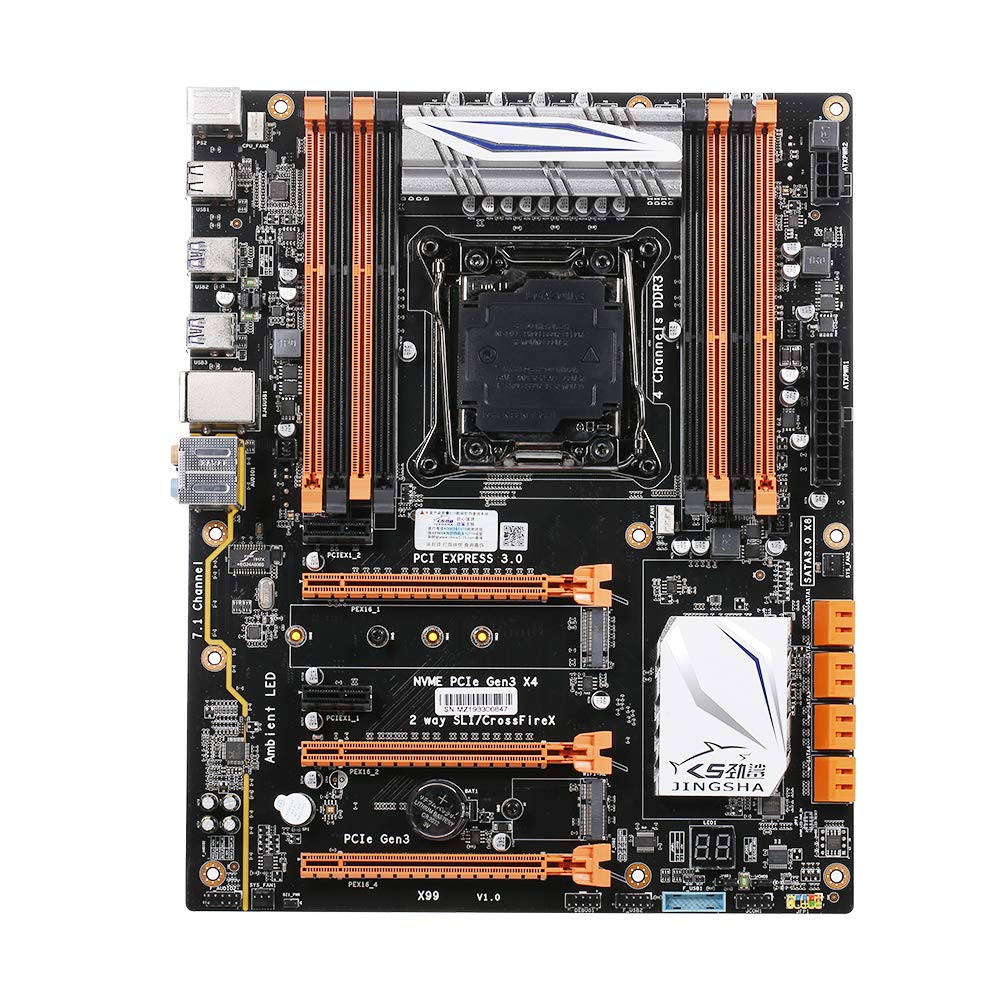
სურათი 1.1: ზემოდან ქვემოთ view of the Docooler JINGSHA X99-8D3 Motherboard, showcasing its layout with CPU socket, RAM slots, and various expansion slots.
2. ძირითადი მახასიათებლები
- M.2 NVME Support: Equipped with an M.2 hard disk port, supporting high-speed PCI-E NVME X4 for optimal operating system and application driver performance.
- Quad-Channel DDR3 Memory: Features 8 DDR3 memory slots across 4 channels, significantly improving capacity and performance, supporting up to 256GB.
- Digital Diagnostic Card: Integrated digital diagnostic card automatically tests hardware devices to ensure proper operation and assist in troubleshooting.
- Multiple PCI-E Expansion Slots: Provides 3 PCI-E expanded slots, configurable as X16/X8 to handle various workloads and multi-GPU setups.
- გამძლე კონსტრუქცია: Built with a 10-layer PCB and high-quality capacitors for enhanced stability and heat resistance.

Figure 2.1: Diagram illustrating the six core technologies and features of the motherboard, including 4-channel DDR3*8, M.2 hard disk interface, digital diagnostic card, 7.1 channel audio, SATA3.0*8 interface, and Crossfire support.
3. პაკეტის შიგთავსი
გთხოვთ, დარწმუნდეთ, რომ ქვემოთ ჩამოთვლილი ყველა ნივთი თქვენს პაკეტშია:
- 1x Docooler JINGSHA X99-8D3 Motherboard
- 1x SATA კაბელი
- 1x I/O Baffle (Backplate)
- 1x CPU Fan Board
- A bag of screws
4. სპეციფიკაციები
| ფუნქცია | სპეციფიკაცია |
|---|---|
| მოდელი | X99-8D3 |
| ფორმის ფაქტორი | ATX |
| Graphic Slot | PCIE3.0 16X*3 |
| ქსელის ბარათი | გიგაბიტიანი ქსელის ბარათი |
| აუდიო არხი | 7.1 არხი |
| CPU Type Support | LGA2011 V3 (2629V3/2649V3/2669V3/2678V3/2696V3/2676V3/2673V3) |
| PCB ფენები | 10 ფენა |
| მეხსიერების სლოტი | DDR3*8 |
| მაქსიმალური მეხსიერების მოცულობა | 256 GB |
| SATA ინტერფეისი | SATA3.0*8, M.2 NVME |
| PS/2 ინტერფეისი | მაუსი/კლავიატურა |
| ელექტრომომარაგება | 8 PIN*1, 24 PIN*1 |
| USB ინტერფეისი | USB3.0*6, USB2.0*6 |
| Expanded Interface | PCIE 1X*2, M.2 WIFI*1 |
| ნივთის ზომა | 30.2 x 24.4 სმ (11.89 x 9.61 დუიმი) |
| ნივთის წონა | 930.5 გ (32.82 უნცია) |

სურათი 4.1: დეტალური view of the motherboard's rear I/O panel, showing PS/2 ports, USB 2.0, USB 3.0, Gigabit Network Port, and 7.1 Audio Ports.
5. დაყენება და ინსტალაცია
ინსტალაციის დაწყებამდე დარწმუნდით, რომ თქვენი სისტემა გამორთულია და დენის წყაროდან გამორთულია. სტატიკური განმუხტვის თავიდან ასაცილებლად, დედა დაფა კიდეებით მოეჭიდეთ.
5.1 პროცესორის დაყენება
- Locate the LGA2011 V3 CPU socket on the motherboard.
- Gently push down the CPU retention lever and swing it open.
- Align the triangular mark on your CPU with the corresponding mark on the socket. Carefully place the CPU into the socket without forcing it.
- დახურეთ შემაკავებელი ბერკეტი ცენტრალური პროცესორის დასამაგრებლად.
- პროცესორის ზედა ნაწილზე წაისვით თერმული პასტის თხელი, თანაბარი ფენა.
- Install the CPU cooler according to its manufacturer's instructions, ensuring proper contact and pressure.

სურათი 5.1: ახლოდან view of the LGA2011 V3 CPU socket on the motherboard, ready for CPU installation.
5.2 Installing RAM Modules
- გახსენით კლიპები DDR3 მეხსიერების სლოტების ორივე ბოლოში.
- Align the notch on the RAM module with the key in the memory slot.
- Press down firmly on both ends of the RAM module until the clips snap into place, securing the module.
- For optimal performance, install RAM modules in matching pairs across the four channels as indicated in the motherboard manual or silkscreen.

სურათი 5.2: View of the eight DDR3 RAM slots on the motherboard, showing their arrangement for quad-channel memory configuration.
5.3 Installing Storage Devices (M.2 NVME & SATA)
- M.2 NVME SSD: Locate the M.2 slot. Insert the M.2 SSD at an angle into the slot, then gently push it down and secure it with the provided screw.
- SATA დისკები: Connect your SATA SSDs or HDDs to the SATA 3.0 ports using SATA data cables. Ensure the power supply SATA power connectors are also attached to the drives.

Figure 5.3: Close-up of the M.2 interface on the motherboard, highlighting its position and the PCI-E Gen3 X4 connection for high-speed data transfer.
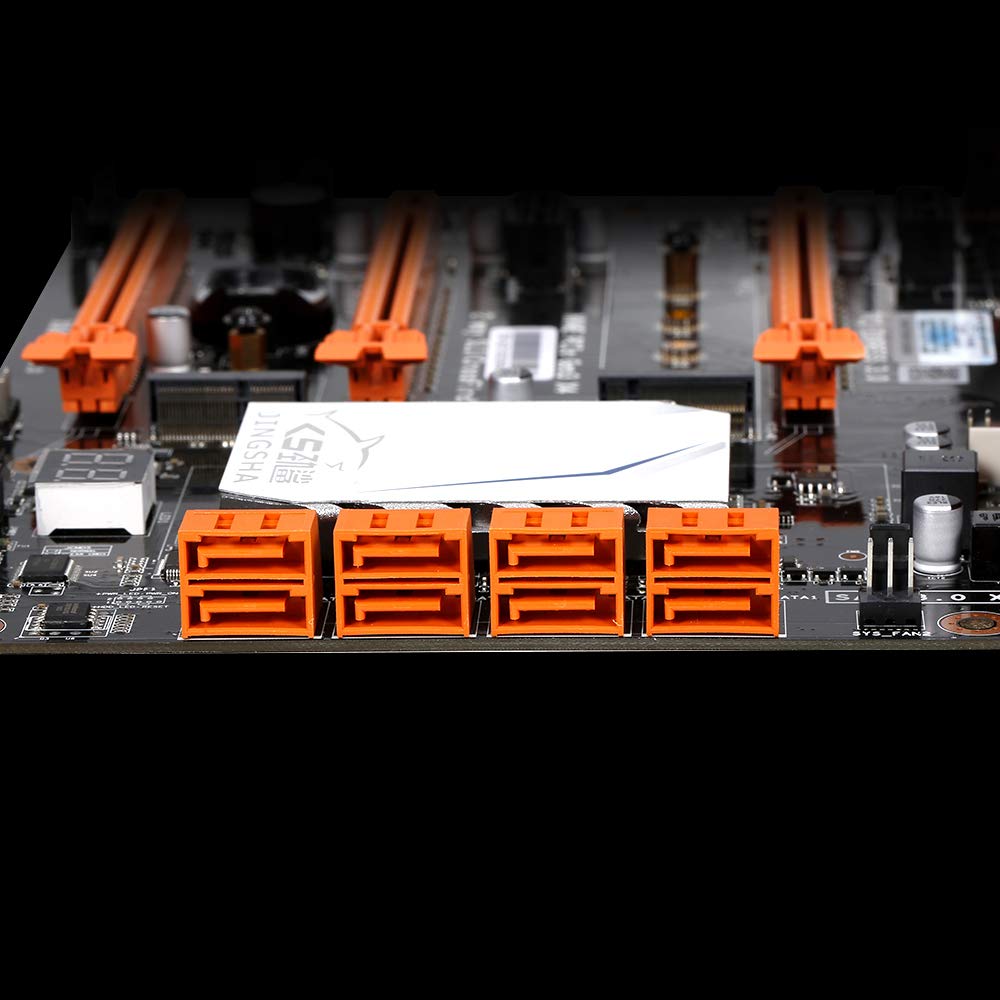
სურათი 5.4: View of the eight orange SATA 3.0 ports on the motherboard, providing ample connectivity for storage devices.
5.4 კვების წყაროს დაკავშირება
- შეაერთეთ თქვენი კვების ბლოკის (PSU) 24-პინიანი ATX კვების კონექტორი დედაპლატზე არსებულ შესაბამის პორტთან.
- Connect the 8-pin CPU power connector (EPS12V) from your PSU to the 8-pin port near the CPU socket.
5.5 გაფართოების ბარათების (PCIe) ინსტალაცია
- Locate the desired PCI-E 3.0 x16 or x1 slots.
- მოხსენით შესაბამისი გაფართოების სლოტის საფარი თქვენი კომპიუტერის ქეისიდან.
- Align the expansion card with the slot and press down firmly until it is fully seated. Secure the card with a screw to the case.

სურათი 5.5: დახრილი view of the motherboard, highlighting the three PCI Express 3.0 x16 slots and the smaller PCIe x1 slots, ready for graphics cards and other expansion cards.
6. დედაპლატის მართვა
6.1 პირველი ჩატვირთვა და BIOS-ის დაყენება
- ყველა კომპონენტის აწყობის შემდეგ, შეაერთეთ მონიტორი, კლავიატურა და მაუსი.
- Power on your system. During the initial boot sequence, repeatedly press the DEL or F2 key (common for JINGSHA motherboards) to enter the BIOS/UEFI setup utility.
- BIOS-ში შეამოწმეთ, რომ ყველა დაინსტალირებული კომპონენტი (პროცესორი, ოპერატიული მეხსიერება, მეხსიერება) სწორად არის აღმოჩენილი.
- დააკონფიგურირეთ ჩატვირთვის თანმიმდევრობა თქვენი ოპერაციული სისტემის ინსტალაციის მედიის (USB დისკი ან DVD) პრიორიტეტულობის დასადგენად.
- Save changes and exit BIOS. The system will restart.
6.2 ოპერაციული სისტემის ინსტალაცია
Follow the instructions provided with your operating system (e.g., Windows, Linux) to complete the installation process. Ensure you install all necessary drivers for the motherboard's chipsets, network, audio, and other components from the manufacturer's webსაიტი ან თანდართული დრაივერის დისკი.
7. მოვლა
სათანადო მოვლა უზრუნველყოფს თქვენი დედაპლატის ხანგრძლივ და სტაბილურ მუშაობას.
- მტვრის მოცილება: რეგულარულად გაწმინდეთ დედაპლატა და კომპონენტები მტვერიდან შეკუმშული ჰაერის გამოყენებით. გაწმენდამდე დარწმუნდით, რომ სისტემა გამორთულია და დენის წყაროდან გამორთულია.
- BIOS-ის განახლებები: Periodically check the Docooler or JINGSHA official website for BIOS updates. BIOS updates can improve compatibility, stability, and performance. Follow update instructions carefully to avoid damaging the motherboard.
- დრაივერის განახლებები: განაახლეთ თქვენი სისტემის დრაივერები, რათა უზრუნველყოთ ოპტიმალური მუშაობა და თავსებადობა ახალ პროგრამულ და აპარატურულ უზრუნველყოფასთან.
- გარემო პირობები: Operate the motherboard in a well-ventilated environment with stable temperature and humidity to prevent overheating and component degradation.
8. Დიაგნოსტიკა
ეს განყოფილება განიხილავს გავრცელებულ პრობლემებს, რომლებსაც შეიძლება წააწყდეთ.
8.1 კვების წყაროს არქონა / ჩატვირთვის არქონა
- Ensure the 24-pin ATX and 8-pin CPU power connectors are securely plugged into the motherboard.
- Check if the power supply unit (PSU) is switched on and connected to a working power outlet.
- Verify that the front panel power button cable is correctly connected to the motherboard's header.
8.2 ეკრანის გამომავალი არ არის
- Ensure your graphics card (if dedicated) is properly seated in its PCI-E slot and has all necessary power cables connected.
- Check that your monitor cable is securely connected to the graphics card or motherboard (if integrated graphics are used, though X99 typically requires a dedicated GPU).
- Try reseating your RAM modules. Incorrectly seated RAM is a common cause of no display.
8.3 POST Code Display (Digital Diagnostic Card)
The motherboard is equipped with a digital diagnostic card (POST code display) that shows a two-digit code during boot-up. Refer to the motherboard's detailed technical documentation (often available on the manufacturer's website) for a list of POST codes and their meanings. This can help pinpoint the exact component causing a boot failure.

სურათი 8.1: ახლოდან view showing the integrated digital diagnostic card (POST code display) on the motherboard, which assists in identifying hardware issues during boot.
9. გარანტია და მხარდაჭერა
For warranty information and technical support, please refer to the documentation provided with your purchase or visit the official Docooler or JINGSHA webსაიტი. შეინახეთ შეძენის დამადასტურებელი საბუთი გარანტიის მოთხოვნისთვის.
Ask a question about this manual
Ask about setup, troubleshooting, compatibility, parts, safety, or missing instructions. Manuals+ will review the question and use this page’s manual context to help answer it.