1. შესავალი
This user manual provides detailed instructions for the proper use and maintenance of your Zebra DS8178 Wireless 2D/1D Barcode Scanner. Please read this manual thoroughly before operating the device to ensure optimal performance and safety. The DS8178 is designed for efficient and reliable barcode scanning in various environments, offering both 1D and 2D barcode reading capabilities with wireless connectivity.
2. უსაფრთხოების ინფორმაცია
მოწყობილობის დაზიანების ან დაზიანების თავიდან ასაცილებლად, დაიცავით შემდეგი უსაფრთხოების ზომები:
- Do not expose the scanner or cradle to extreme temperatures, moisture, or corrosive substances.
- მოერიდეთ სკანერის სინათლის წყაროსთან თვალის პირდაპირ კონტაქტს.
- Use only the specified power adapter and USB cable for charging.
- არ სცადოთ მოწყობილობის დაშლა ან მოდიფიცირება. ყველა სახის მომსახურება მიმართეთ კვალიფიციურ პერსონალს.
- შეინახეთ მოწყობილობა ძლიერი მაგნიტური ველებისგან.
3. პაკეტის შიგთავსი
დარწმუნდით, რომ თქვენს პაკეტში ყველა ნივთია:
- Zebra DS8178 Wireless Barcode Scanner
- USB Communication/Charging Cradle
- USB კაბელი
- სწრაფი დაწყების სახელმძღვანელო (არ შედის ამ სახელმძღვანელოში)
4. პროდუქტი დასრულდაview
Familiarize yourself with the components of your Zebra DS8178 scanner and its cradle.

სურათი 4.1: მხარე view of the Zebra DS8178 Wireless Barcode Scanner, showing its ergonomic design.

სურათი 4.2: წინა view of the Zebra DS8178 Wireless Barcode Scanner, highlighting the scanning window and trigger button.

სურათი 4.3: წინა view of the USB Communication/Charging Cradle, featuring the pairing button.
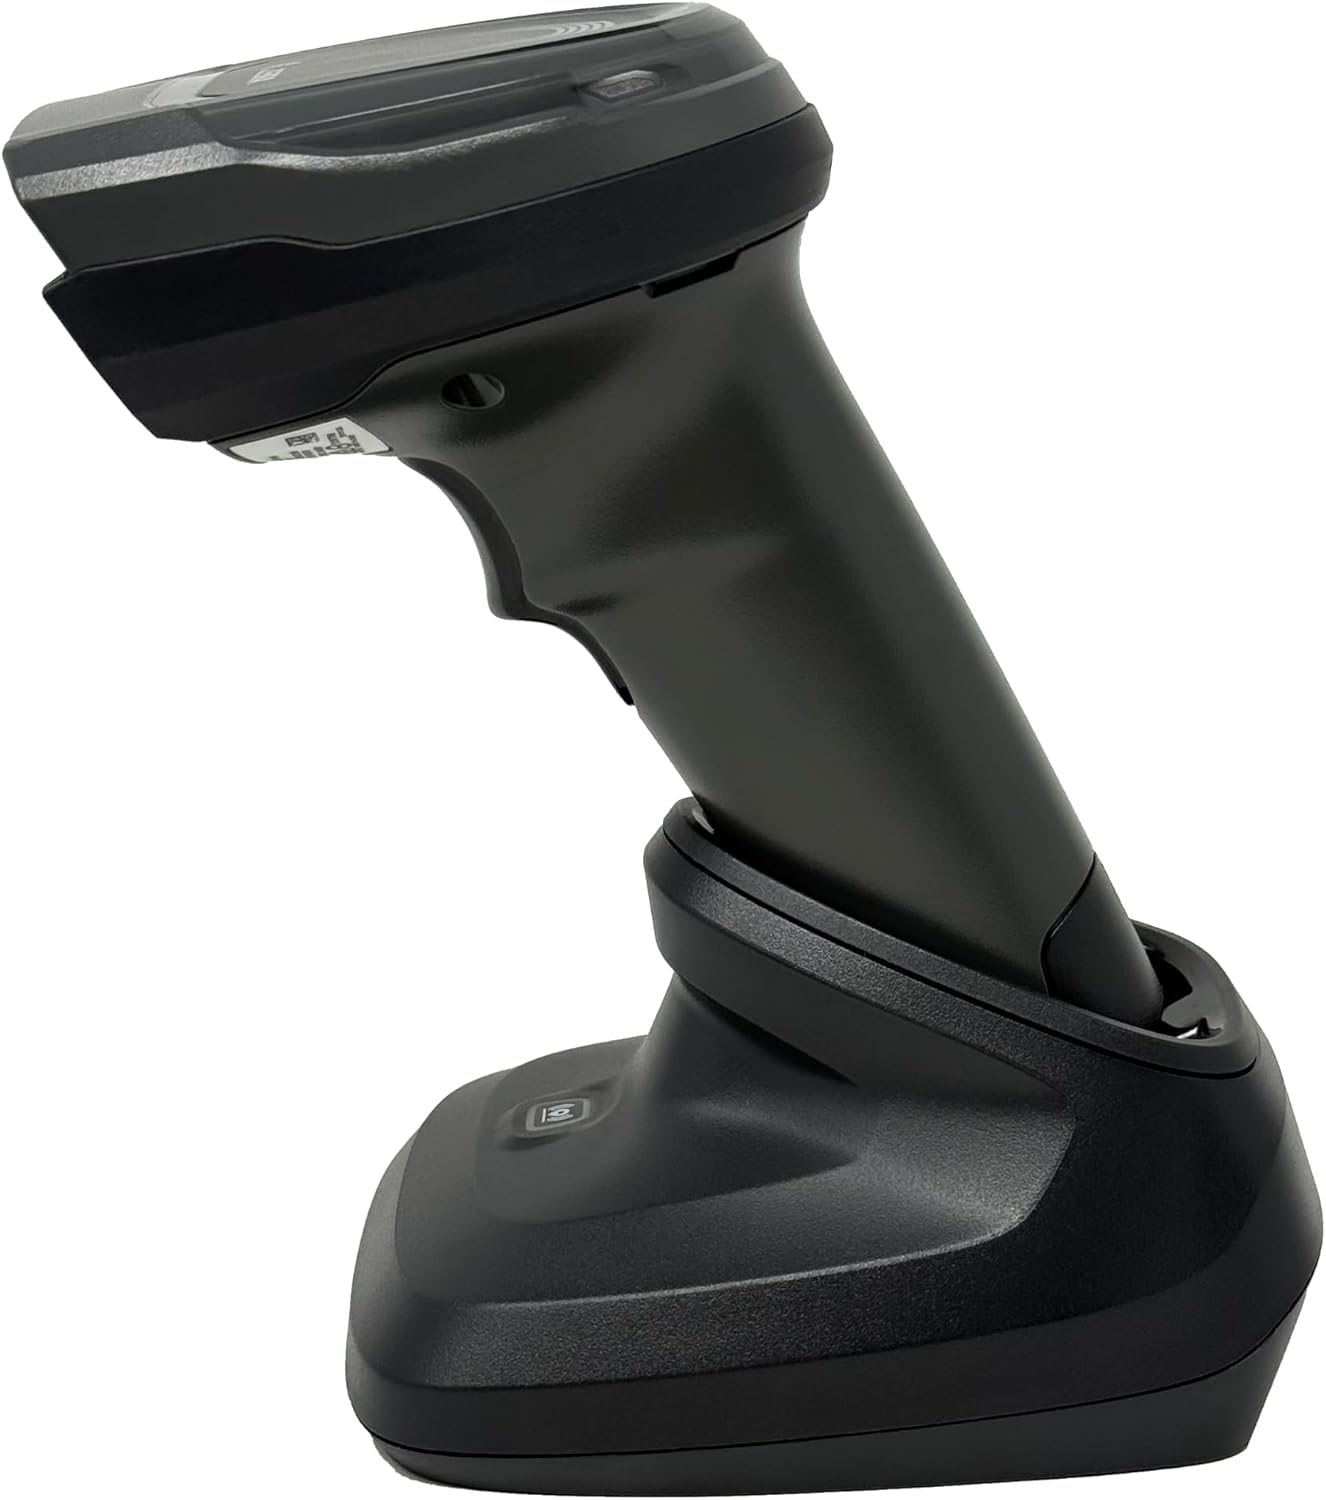
სურათი 4.4: The Zebra DS8178 scanner securely docked in its USB cradle, ready for charging or communication.
4.1 სკანერის კომპონენტები
- ფანჯრის სკანირება: არე, რომლის მეშვეობითაც იკითხება შტრიხკოდები.
- გამომწვევი: Activates the scanning beam.
- LED ინდიკატორები: Provide status feedback (e.g., battery, scan success).
- ბატარეის განყოფილება: Houses the removable/rechargeable battery.
4.2 Cradle Components
- Scanner Slot: Where the scanner docks for charging and communication.
- USB პორტი: Connects the cradle to a host device (PC, laptop).
- დაწყვილების ღილაკი: Initiates Bluetooth pairing with the scanner.
- LED ინდიკატორები: Show cradle status (e.g., power, connection).
5. დაყენება
5.1 სკანერის დატენვა
- Connect the USB cable to the cradle's USB port.
- Connect the other end of the USB cable to a powered USB port on your computer or a USB wall adapter.
- Place the DS8178 scanner into the cradle. Ensure it is seated correctly.
- The scanner's LED indicator will show charging status. A full charge typically takes approximately 3-4 hours.
5.2 Connecting the Cradle to a Host Device
The cradle connects to your computer via a standard USB cable.
- Plug the USB cable into the USB port on the back of the cradle.
- Connect the other end of the USB cable to an available USB port on your desktop or laptop computer.
- ოპერაციულმა სისტემამ ავტომატურად უნდა ამოიცნოს და დააინსტალიროს საჭირო დრაივერები.
5.3 Bluetooth დაწყვილება
The DS8178 offers two primary Bluetooth pairing methods: via the cradle or direct to a host device.
5.3.1 Pairing via Cradle (Recommended for PC/Laptop)
- Ensure the cradle is connected to your host device (PC/Laptop) via USB.
- Place the DS8178 scanner into the cradle.
- The scanner will automatically pair with the cradle. Once paired, the scanner can be removed from the cradle and will communicate wirelessly with the host device through the cradle.
- A successful connection is indicated by a specific LED pattern on both the scanner and cradle (refer to the scanner's LED guide for details).
5.3.2 Direct Bluetooth Pairing (for Phones/Tablets or PC/Laptop without cradle)
- Power on the DS8178 scanner.
- Scan the "Pairing Barcode" (usually found in a quick start guide or on the scanner itself) to put the scanner into discoverable mode. Alternatively, press and hold the Bluetooth pairing button on the scanner (if available) or scan a specific Bluetooth pairing configuration barcode.
- On your phone, tablet, or computer, navigate to the Bluetooth settings.
- ძიება available devices. The DS8178 should appear in the list (e.g., "Zebra DS8178").
- Select the scanner to initiate pairing. You may be prompted to confirm a passkey or scan a pairing barcode displayed on your screen.
- Once paired, the scanner's LED will indicate a successful connection.
6. ოპერაცია
6.1 შტრიხკოდების სკანირება
- Point the scan window of the DS8178 scanner at the barcode you wish to read.
- Press and hold the trigger button. A red aiming pattern will appear.
- Center the aiming pattern over the barcode. For 1D barcodes, the aiming line should cross the entire barcode. For 2D barcodes, the aiming pattern should encompass the entire code.
- Once the barcode is successfully read, the scanner will emit an audible beep and/or the LED indicator will flash green.
- გაათავისუფლეთ გამშვები.
6.2 Cordless Range
The Zebra DS8178 offers a cordless range of up to 330 feet (100 meters) from its cradle or directly paired host device, depending on environmental conditions and line of sight. Obstructions such as walls or other electronic devices may reduce the effective range.
6.3 სკანირების რეჟიმები
- გამომწვევი რეჟიმი: The scanner reads a barcode only when the trigger is pressed.
- Presentation Mode (Hands-Free): When placed in the presentation cradle, the scanner can be configured to automatically detect and read barcodes placed within its field of view without requiring a trigger press. This mode is ideal for high-volume scanning applications.
7. მოვლა
7.1 სკანერის გაწმენდა
To maintain optimal scanning performance, keep the scan window clean.
- გამოიყენეთ რბილი, სუფთა, ბუსუსებისგან თავისუფალი ქსოვილი dampened with water or a mild cleaning solution (e.g., isopropyl alcohol).
- ფრთხილად გაწმინდეთ სკანირების ფანჯარა და სკანერის გარე ზედაპირი.
- არ გამოიყენოთ აბრაზიული საწმენდები, გამხსნელები ან უხეში ქიმიკატები.
- Ensure the scanner is powered off before cleaning.
7.2 ბატარეის მოვლა
The DS8178 features a 2500mAh removable and rechargeable battery. Proper battery care extends its lifespan.
- ბატარეა სრულად დატენეთ პირველი გამოყენებამდე
- Avoid completely discharging the battery regularly.
- სკანერი შეინახეთ გრილ, მშრალ ადგილას, თუ დიდი ხნის განმავლობაში არ იყენებთ.
- If the battery performance significantly degrades, it may need replacement. Contact support for genuine replacement batteries.
8. Დიაგნოსტიკა
| პრობლემა | შესაძლო მიზეზი | გამოსავალი |
|---|---|---|
| სკანერი არ ირთვება. | დაბალი ან დაცლილი ბატარეა. | Charge the scanner using the USB cradle and cable. |
| სკანერი არ უკავშირდება Bluetooth-ის საშუალებით. | Not in pairing mode; out of range; interference; host device Bluetooth off. | Ensure scanner is in pairing mode. Check host device Bluetooth settings. Move closer to the host device. Reduce interference. |
| სკანერი არ კითხულობს შტრიხკოდებს. | Barcode damaged/poor quality; scan window dirty; incorrect symbology enabled; scanner not aimed correctly. | Try scanning a different barcode. Clean the scan window. Ensure correct aiming. Check scanner configuration for enabled symbologies. |
| No data transmitted to host. | Not paired; application not in focus; incorrect interface settings. | Confirm successful Bluetooth pairing. Ensure the target application (e.g., text editor, POS software) is active and ready to receive input. |
9. სპეციფიკაციები
| ფუნქცია | დეტალი |
|---|---|
| მოდელი | DS8178 |
| ბრენდი | Zebra (formerly Symbol) |
| დაკავშირების ტექნოლოგია | Bluetooth, USB კაბელი, უსადენო |
| თავსებადი მოწყობილობები | Desktop, Laptop, Phones, Tablets |
| დენის წყარო | Battery Powered, Corded Electric, Rechargeable |
| ბატარეის ტევადობა | 2500mAh (Removable/Rechargeable) |
| Cordless Range | 330 ფუტამდე (100 მეტრი) |
| სკანირების შესაძლებლობა | 1D and 2D Barcodes |
| რეალური კუთხე View | 17 გრადუსი |
| UPC / GTIN | 649661651499 |
10. გარანტია და მხარდაჭერა
This Zebra DS8178 Barcode Scanner comes with a 90 დღიანი შეზღუდული გარანტია. This warranty covers defects in materials and workmanship under normal use. It does not cover damage caused by misuse, accidents, unauthorized modifications, or external causes.
For technical support, warranty claims, or to purchase genuine replacement parts (such as batteries), please contact your reseller or visit the official Zebra support website. Please have your model number (DS8178) and any purchase information ready when contacting support.