Royal 91006H
HP - Hot & Cold Laminator Machine User Manual
Model: 91006H | Brand: Royal
შესავალი
This manual provides essential information for the safe and efficient operation of your Royal HP Laminator Machine. This compact laminator is designed for home or small business use, offering both hot and cold lamination options to protect your documents and photos.
ძირითადი მახასიათებლები
- HOT & COLD: This machine features cold lamination options to laminate your documents faster and protect the ink, moreso than the hot lamination. However, the hot lamination is more durable for daily use.
- PROFESSIONAL FINISH: Four rollers to create a bubble- and wrinkle-free finish that gives your documents and photos a professional appearance.
- კომპაქტური: Its small and compact design makes it easy to transport and store wherever you need it most, whether at home or the office.
- დაცვა: Ideal for creating tear-proof and spill-proof documents and photos; this laminator machine is a great addition to your home, office, and school.
დაყენება
1. გახსნა და განთავსება
Carefully remove the laminator from its packaging. Place the laminator on a stable, flat surface with adequate ventilation. Ensure there is enough space around the machine for proper operation and heat dissipation.

სურათი 1: დასრულდაview of the HP Hot & Cold Laminator Machine.
The HP Hot & Cold Laminator Machine features a sleek white and gray design, compact for easy placement on any desk or workspace. The main feed slot is visible at the front, with control buttons on the right side.
2. დენის კავშირი
Plug the power cord into a standard electrical outlet. Locate the power switch, typically on the side or rear of the unit, and turn it to the "ON" position.
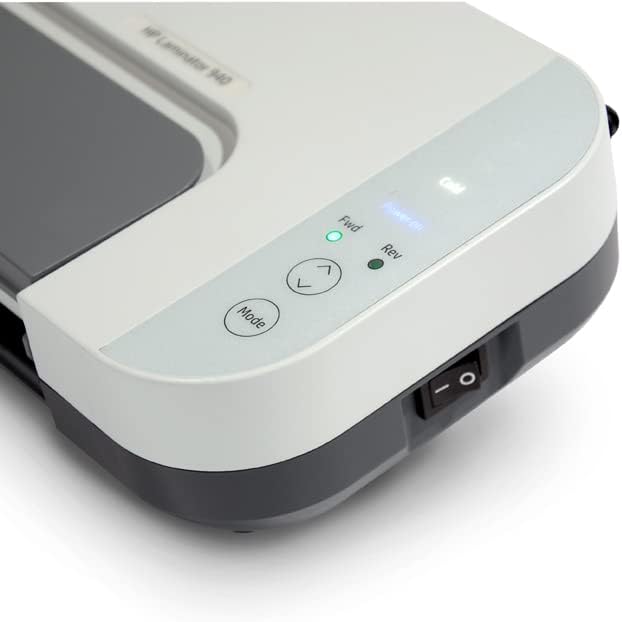
Figure 2: Close-up of the laminator's control panel and power switch.
This image shows the control panel of the laminator, featuring buttons for mode selection, forward/reverse, and indicator lights for power, hot, and cold settings. The main power switch is located on the side of the unit.
3. Warm-up (for Hot Lamination)
If using hot lamination, allow the machine to warm up. The indicator light will change (e.g., from red to green, or a specific light will illuminate) when it is ready for use. This typically takes a few minutes.
ოპერაციული ინსტრუქციები
1. Preparing Documents for Lamination
Place your document or photo inside a laminating pouch. Ensure the document is centered and flat within the pouch, leaving a small margin around the edges. For optimal results, ensure the sealed edge of the pouch is fed into the laminator first.
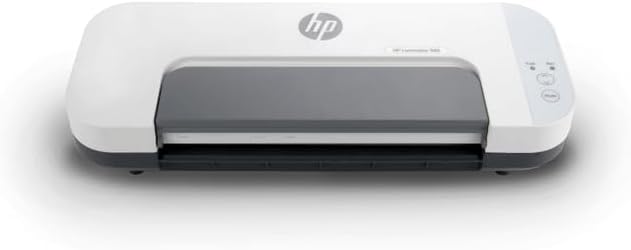
Figure 3: A laminating pouch being prepared for insertion into the machine.
The image displays the laminator with its output tray extended, and a laminating pouch containing a document is positioned, ready to be fed into the machine's input slot. The pouch is clear, allowing the contents to be seen.
2. Selecting Lamination Mode
- ცხელი ლამინირება: For most standard documents and photos, select the hot lamination mode. This provides a durable, permanent seal. Ensure the machine is fully warmed up before proceeding.
- ცივი ლამინირება: Use cold lamination for heat-sensitive materials, such as certain types of photographs, thermal paper, or documents printed with heat-sensitive inks. Select the cold mode on the control panel.
3. Feeding the Pouch
Carefully insert the sealed edge of the laminating pouch into the machine's input slot. The laminator's rollers will automatically grip the pouch and pull it through. Do not force the pouch or pull it during the lamination process.

Figure 4: A document actively being laminated by the machine.
This image captures the laminator in action, with a document partially emerged from the output slot, encased in a clear laminating pouch. The process appears smooth, indicating the rollers are effectively sealing the document.
4. Retrieving the Laminated Document
Once the pouch has fully passed through the laminator, it will emerge from the output slot. Allow the laminated document to cool and flatten on a clean, flat surface before handling or trimming. This ensures a smooth, professional finish.
მოვლა
1. დასუფთავება
Always unplug the laminator and allow it to cool completely before cleaning. Use a soft, dry cloth to wipe down the exterior of the machine. Do not use abrasive cleaners or solvents. For internal cleaning, refer to specific instructions in a full product manual if available, or consult customer support.
2. შენახვა
Store the laminator in a cool, dry place away from direct sunlight and extreme temperatures. Ensure the power cord is neatly coiled and not kinked. Keep the machine covered to prevent dust accumulation.
პრობლემების მოგვარება
- მანქანა არ ჩართულია:
- Check if the power cord is securely plugged into both the laminator and the electrical outlet.
- დარწმუნდით, რომ დენის ჩამრთველი „ჩართვის“ მდგომარეობაშია.
- შეამოწმეთ ელექტროგადამცემი სხვა მოწყობილობით, რათა დარწმუნდეთ, რომ ის ფუნქციონირებს.
- Pouch Jam:
- Immediately turn off the laminator and unplug it.
- Refer to the machine's specific instructions for jam release, often involving a reverse button or lever.
- Carefully pull the jammed pouch out. Avoid tearing the pouch inside the machine.
- Poor Lamination Quality (Bubbles, Wrinkles):
- Ensure the machine has fully warmed up for hot lamination.
- Check that the laminating pouch is appropriate for the document size and thickness.
- Make sure the document is flat and centered within the pouch before feeding.
- Consider using a carrier sheet if recommended by the pouch manufacturer.
სპეციფიკაციები
| ატრიბუტი | დეტალი |
|---|---|
| ბრენდი | სამეფო |
| მოდელის ნომერი | 91006 სთ |
| ნივთის წონა | 6.37 ფუნტი |
| პროდუქტის ზომები | 14.75 x 5.75 x 3.5 ინჩი |
| ფერი | თეთრი |
| ფურცლის ზომა | წერილი |
| ლილვაკების რაოდენობა | 4 |
გარანტია და მხარდაჭერა
ამ პროდუქტში შედის ა 1 year parts / 90 days labor warranty. For technical assistance, troubleshooting, or warranty claims, please contact Royal Consumer Products customer support. Refer to the product packaging or the official Royal webსაიტი უახლესი საკონტაქტო ინფორმაციისთვის.