
1. შესავალი
This manual provides detailed instructions for the safe and effective use of your OLIGHT Marauder 2 Rechargeable Handheld Flashlight and OLIGHT I3T 2 EOS Pocket EDC Flashlight. Please read this manual thoroughly before operation and retain it for future reference.
2. პროდუქტი დასრულდაview
2.1 OLIGHT Marauder 2
The Marauder 2 is a powerful, rechargeable handheld flashlight designed for versatile lighting needs, featuring both spotlight and floodlight capabilities.
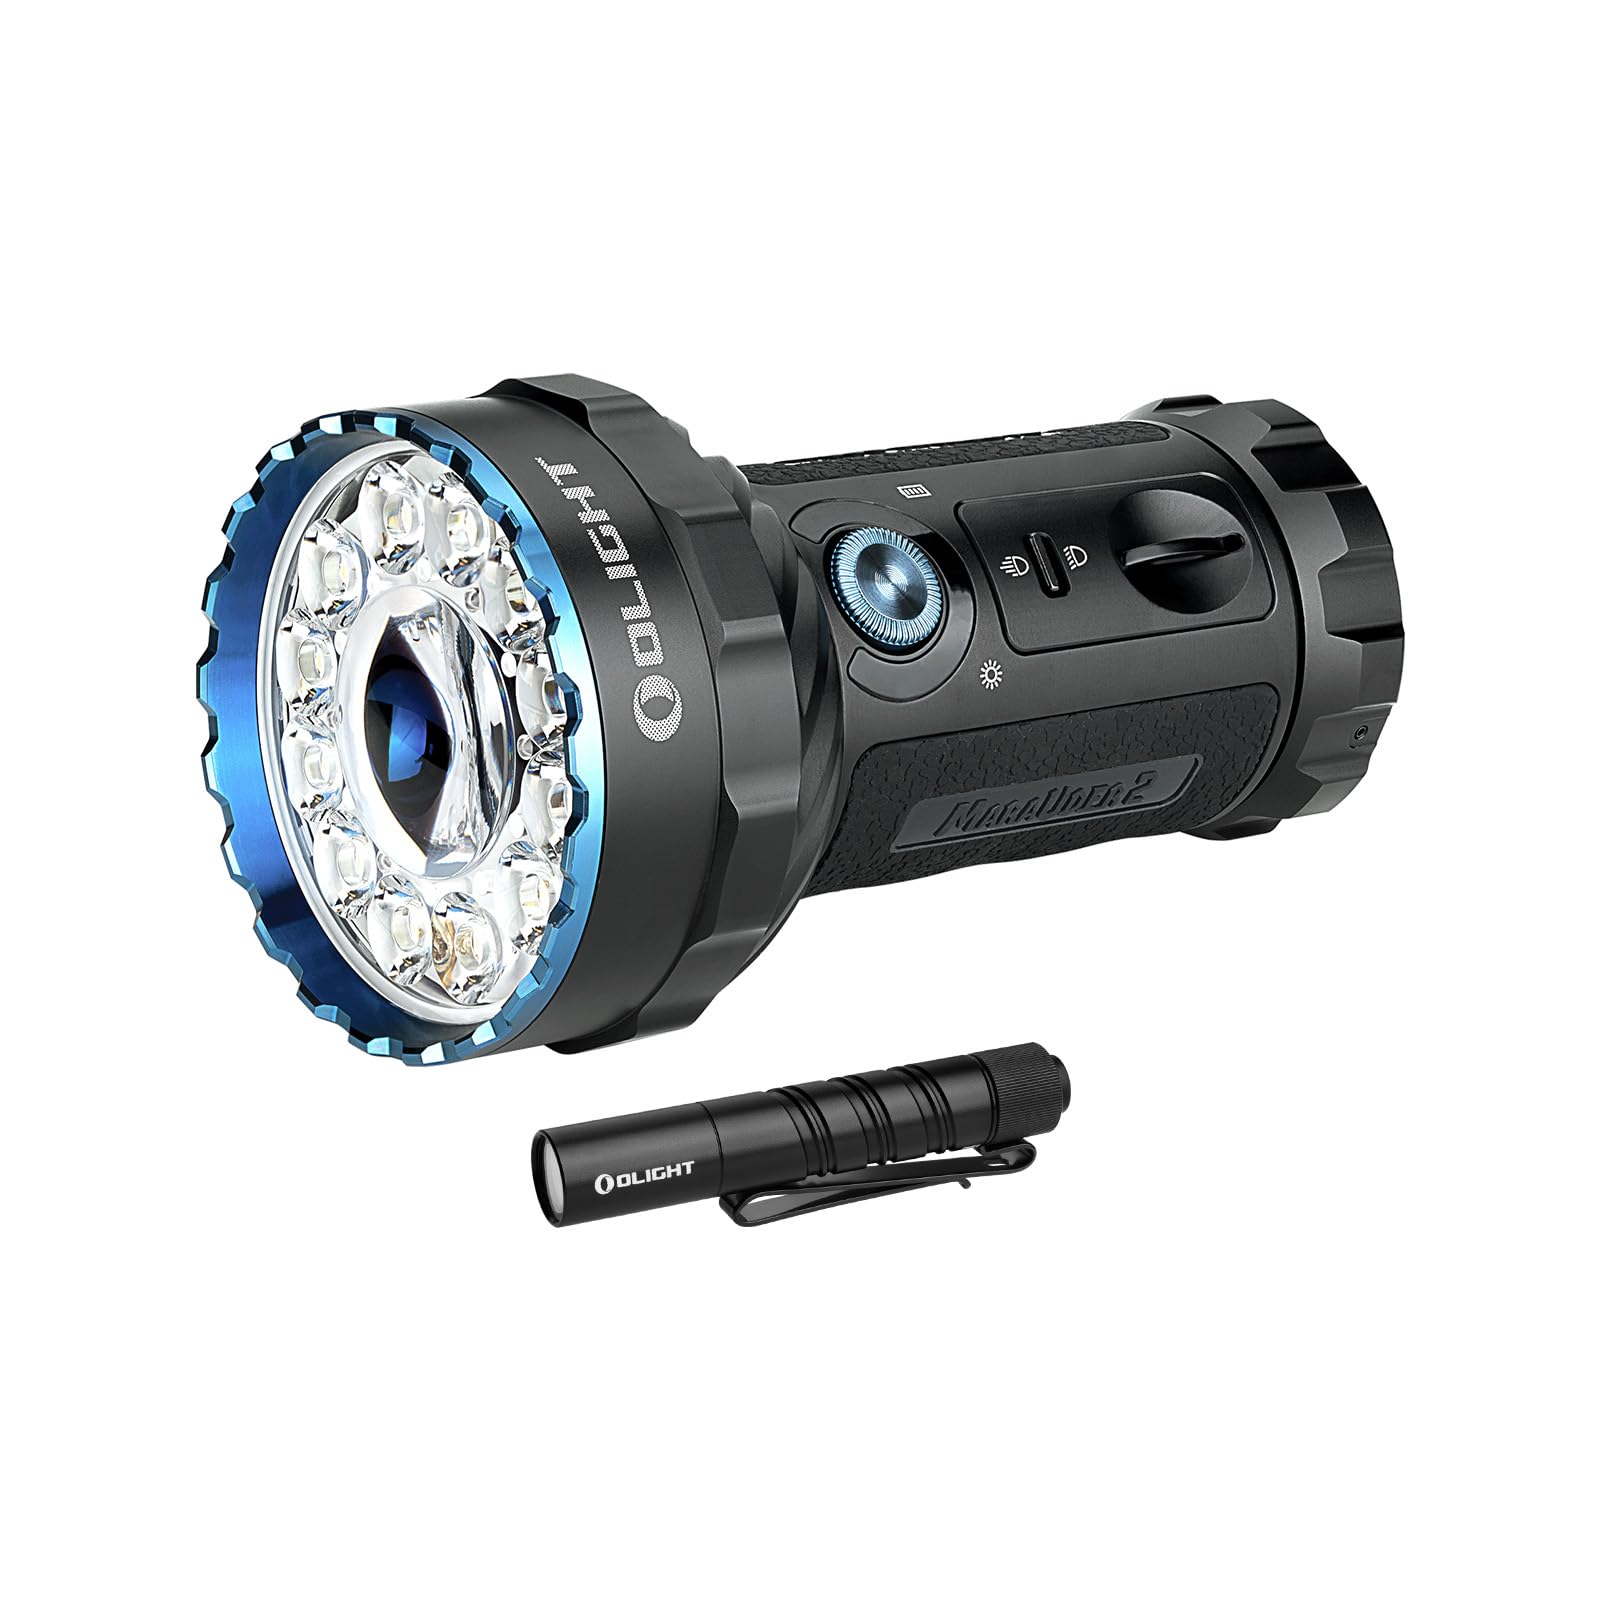
Image: The OLIGHT Marauder 2 flashlight, showcasing its robust design with a large central LED for spotlight and multiple surrounding LEDs for floodlight, along with control switches.

სურათი: ოვერview of the Marauder 2's key features, including its maximum output of 14,000 lumens, 800-meter throw, 59-hour runtime, 1-meter drop test rating, customized rechargeable battery, and IPX8 waterproof rating.
2.2 OLIGHT I3T 2 EOS
The I3T 2 EOS is a compact, pocket-sized EDC (Everyday Carry) flashlight, offering convenient illumination in a small form factor.

Image: The OLIGHT I3T 2 EOS flashlight, a sleek black cylindrical design with a pocket clip, demonstrating its compact size.

Image: Two I3T 2 EOS flashlights, one black and one green, resting on a book, highlighting their small, simple, and strong design with a max output of 200 lumens and 62-meter throw.
3. დაყენება და დატენვა
3.1 Marauder 2 Initial Setup and Charging
The Marauder 2 features a built-in 54Wh rechargeable battery pack. Before first use, ensure the flashlight is fully charged.
- დამუხტვა: Connect the included charging cable to the charging port. The charging status indicator will provide feedback on the charging process.
- განბლოკვა: The rotary knob switch may be locked to prevent accidental activation. Rotate the knob switch quickly over 90 degrees to unlock it.
3.2 I3T 2 EOS Battery Installation
The I3T 2 EOS is powered by a single AAA battery. It is compatible with both AAA alkaline batteries and rechargeable AAA batteries.

Image: A person holding the I3T 2 EOS flashlight, illustrating its use in a dark environment, with text indicating flexible battery options including AAA alkaline and rechargeable batteries for up to 300 lumens output.
- გახსენით ფანრის კუდის თავსახური.
- Insert one AAA battery with the positive (+) end facing towards the head of the flashlight.
- კუდის თავსახური საიმედოდ დააბრუნეთ.
4. საოპერაციო ინსტრუქციები
4.1 Marauder 2 Operation
The Marauder 2 features a dual-button cooperative power system for intuitive control.

Image: A comparison of the Marauder 2's spotlight mode (850 lumens, 800 meters) and floodlight mode (14,000 lumens, 450 meters), showing the distinct beam patterns. Below, an illustration of the toggle switch: flip up for max distance (spotlight) and flip down for max lumens (floodlight).

Image: A close-up of the Marauder 2's control panel, detailing the rotary knob for cycling through 7 brightness levels and the indicator dashboard showing brightness level, charging status, and battery level.
- რეჟიმის შერჩევა: Use the simple toggle switch to select between spotlight (max distance) and floodlight (max lumens) modes.
- Power On/Off & Brightness Adjustment: Use the intuitive rotary knob switch.
- Rotate the knob to turn on the light and cycle through 7 output levels.
- Rotate the knob quickly over 90 degrees to unlock it if it is locked.
- ინდიკატორები: The integrated indicator dashboard provides real-time information on brightness level, charging status, and battery level.
4.2 I3T 2 EOS Operation
The I3T 2 EOS offers dual-output options with a simple tail switch.

Image: A person using the I3T 2 EOS flashlight in a dark outdoor setting, demonstrating the difference between high mode (wide, bright beam) and low mode (focused, less intense beam). An inset diagram shows the flashlight's dimensions (3.5 inches long, 0.59 inches diameter).
- ჩართვა/გამორთვა: დააჭირეთ კუდის გადამრთველს, რომ ჩართოთ ან გამორთოთ ფანარი.
- რეჟიმის შერჩევა: The flashlight can be initially powered on in your preferred low or high mode. It offers both constant and momentary-on options.
- გამომავალი: Delivers up to 200 lumens with an AAA alkaline battery, and up to 300 lumens with a rechargeable battery.
5. მოვლა
To ensure optimal performance and longevity of your OLIGHT flashlights, follow these maintenance guidelines:
- დასუფთავება: Regularly clean the lens and body of the flashlight with a soft, damp ქსოვილი. მოერიდეთ აბრაზიული მასალების ან უხეში ქიმიკატების გამოყენებას.
- Threads and O-rings: For the I3T 2 EOS, periodically lubricate the threads and O-rings with silicone grease to maintain water resistance.
- ბატარეის მოვლა:
- For Marauder 2, ensure regular charging to maintain battery health.
- For I3T 2 EOS, remove the AAA battery if the flashlight will not be used for an extended period to prevent leakage.
- შენახვა: Store flashlights in a cool, dry place away from direct sunlight and extreme temperatures.
6. Დიაგნოსტიკა
If you encounter issues with your OLIGHT flashlights, refer to the following common troubleshooting steps:
- Marauder 2 Overheating/Obstruction Protection: The Marauder 2 is equipped with a thermal sensor, a proximity sensor, and cooling fins. If the flashlight becomes excessively hot or detects an obstruction, its output may automatically reduce to prevent damage. Ensure proper ventilation and clear any obstructions.
- Marauder 2 Rotary Knob Unresponsive: If the rotary knob does not respond, it may be locked. Rotate the knob quickly over 90 degrees to unlock it.
- I3T 2 EOS Not Turning On:
- შეამოწმეთ, სწორად არის თუ არა ჩასმული აკუმულატორი, დადებითი (+) ბოლო კი თავისკენ.
- დარწმუნდით, რომ კუდის თავსახური მჭიდროდ არის დამაგრებული.
- შეცვალეთ AAA ბატარეა ახალი ბატარეით.
- შემცირებული სიკაშკაშე:
- For Marauder 2, check the battery level indicator and recharge if necessary.
- For I3T 2 EOS, replace the battery or use a fully charged rechargeable AAA battery.
- Ensure the lens is clean and free from debris.
7. სპეციფიკაციები
7.1 OLIGHT Marauder 2
| ფუნქცია | დეტალი |
|---|---|
| Max Output (Floodlight) | 14,000 ლუმენი |
| Max Throw (Spotlight) | 800 მეტრი |
| ბატარეა | Built-in 54Wh Rechargeable Battery Pack |
| მაქსიმალური გაშვების დრო | 59 საათამდე |
| უსაფრთხოების მახასიათებლები | Thermal sensor, Proximity sensor, Cooling fins |
| საკონტროლო ინტერფეისი | Toggle switch for mode, Rotary knob for brightness |
| მასალა | მეტალი |
| ფერი | შავი |
7.2 OLIGHT I3T 2 EOS
| ფუნქცია | დეტალი |
|---|---|
| Max Output (Alkaline) | 200 ლუმენი |
| Max Output (Rechargeable) | 300 ლუმენი |
| დენის წყარო | 1 x AAA Battery (Alkaline or Rechargeable) |
| ოპერაცია | Tail switch, Constant and Momentary-on |
| მასალა | მეტალი |
| ფერი | შავი |
8. გარანტია და მხარდაჭერა
8.1 ინფორმაცია გარანტიის შესახებ
OLIGHT provides a სიცოცხლის გარანტია for its products. For specific terms and conditions, please refer to the official OLIGHT webსაიტი ან დაუკავშირდით მომხმარებელთა მხარდაჭერას.
8.2 მომხმარებელთა მხარდაჭერა
ნებისმიერი შეკითხვის, ტექნიკური დახმარების ან გარანტიის მოთხოვნის შემთხვევაში, გთხოვთ, დაუკავშირდეთ OLIGHT-ის მომხმარებელთა მხარდაჭერის სამსახურს მათი ოფიციალური ვებგვერდის საშუალებით. webსაიტი ან საცალო ვაჭრობის ობიექტი, სადაც პროდუქტი შეიძინეთ.
ოფიციალური OLIGHT Webსაიტი: www.olightstore.com