TP-Link TL-MR3420 Wireless N300 3G/4G Router User Manual
მოდელი: TL-MR3420
1. შესავალი
The TP-Link TL-MR3420 Wireless N300 3G/4G Router is designed to share a 3G/4G mobile broadband connection wirelessly. By connecting a compatible UMTS/HSPA/EVDO USB modem to the router, a Wi-Fi hotspot is instantly established, allowing multiple devices to access the internet. This router also features a 3G/WAN connection backup strategy, ensuring a continuous internet connection by switching between 3G/4G and WAN (Ethernet) connections as needed. It supports wireless N speeds of up to 300Mbps, suitable for various online activities.
2. პაკეტის შიგთავსი
- TP-Link TL-MR3420 Wireless N300 3G/4G Router
- დენის ადაპტერი
- Ethernet კაბელი
- სწრაფი ინსტალაციის სახელმძღვანელო
3. აპარატურა დასრულდაview
3.1 Front Panel and LEDs
The front panel of the router features LED indicators that provide information about the device's status, including power, system, WLAN, WAN, LAN, and 3G/4G connection status.

სურათი: წინა მხარე view of the TL-MR3420 router, showing the TP-Link logo and status LEDs.
3.2 Side Panel (USB Port)
The side panel includes a USB 2.0 port, primarily used for connecting a compatible 3G/4G USB modem.
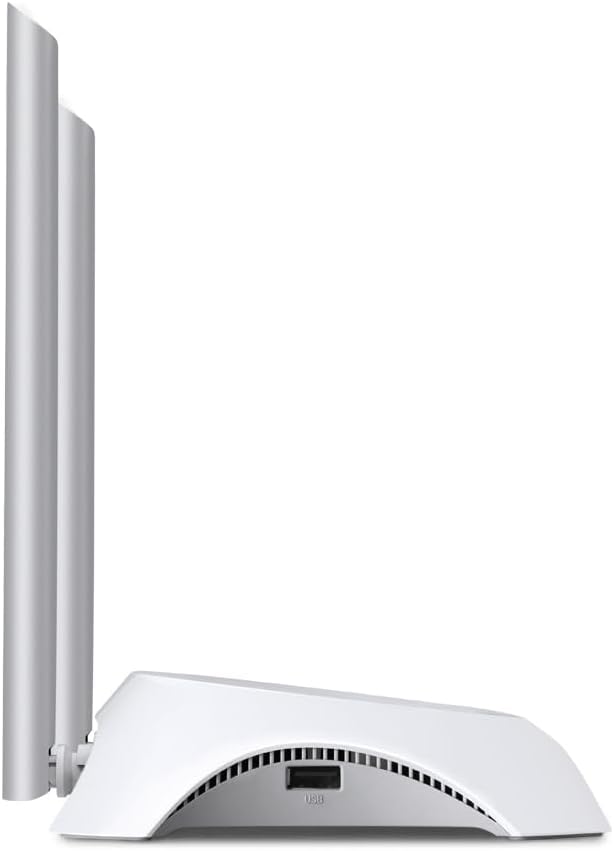
სურათი: გვერდი view of the TL-MR3420 router, highlighting the USB port for modem connection.
3.3 Rear Panel (Ports and Buttons)
The rear panel provides various ports and buttons for connectivity and control.
- დენის პორტი: უერთდება კვების ადაპტერს.
- ჩართვის/გამორთვის ღილაკი: როუტერის ჩართვა ან გამორთვა.
- WAN პორტი (ლურჯი): Connects to a DSL/Cable modem for traditional internet access.
- LAN პორტები (ყვითელი): Four ports for connecting wired devices like computers or switches.
- WPS/გადატვირთვის ღილაკი: Press for WPS function; press and hold for factory reset.
- ანტენის კონექტორები: For attaching the two external antennas.

სურათი: უკანა view of the TL-MR3420 router, displaying the power port, WAN port, LAN ports, WPS/Reset button, and antenna connectors.
4. დაყენების გზამკვლევი
4.1 ფიზიკური კავშირი
- ანტენების მიმაგრება: Screw the two detachable antennas firmly into their connectors on the rear panel.
- Connect 3G/4G USB Modem: Insert your compatible 3G/4G USB modem into the USB port on the side of the router.
- ჩართვა: შეაერთეთ კვების ადაპტერი როუტერის კვების პორტთან და შეაერთეთ ის კედლის როზეტში. საჭიროების შემთხვევაში დააჭირეთ ჩართვის/გამორთვის ღილაკს.
- (Optional) Connect to WAN: If using a wired internet connection as a backup or primary, connect an Ethernet cable from your DSL/Cable modem to the blue WAN port on the router.
- (Optional) Connect Wired Devices: Connect your computer or other wired devices to the yellow LAN ports using Ethernet cables.

Image: The TL-MR3420 router with a 3G USB modem connected to its side USB port.
4.2 საწყისი კონფიგურაცია (Web ინტერფეისი)
- როუტერთან დაკავშირება: Connect your computer to the router either via an Ethernet cable to a LAN port or wirelessly using the default Wi-Fi SSID printed on the router's label (e.g., TP-Link_XXXX).
- წვდომა Web ბრაუზერი: გახსენით ა web ბრაუზერი (მაგ., Chrome, Firefox) და აკრიფეთ
http://tplinkwifi.netorhttp://192.168.0.1(ანhttp://192.168.1.1) მისამართის ზოლში. დააჭირეთ Enter-ს. - შესვლა: შეიყვანეთ სტანდარტული მომხმარებლის სახელი და პაროლი, რომლებიც, როგორც წესი,
adminfor both. If these do not work, check the label on the bottom of your router. - სწრაფი დაყენების გაშვება: ინტერნეტ კავშირისა და უკაბელო ქსელის პარამეტრების დასაყენებლად მიჰყევით ეკრანზე გამოსახულ სწრაფი დაყენების ოსტატს.
4.3 3G/4G Connection Setup
During the Quick Setup, select 3G/4G როუტერი mode. The router will automatically detect your USB modem. You may need to select your region and ISP, and enter APN (Access Point Name) details if prompted. Ensure your 3G/4G USB modem is compatible with the TL-MR3420.
4.4 WAN Connection Setup (Optional)
If you are using a wired internet connection, configure the WAN settings. This can be done via Dynamic IP, Static IP, or PPPoE, depending on your Internet Service Provider (ISP) requirements. The TL-MR3420 supports a 3G/WAN failover strategy, allowing you to set a preferred connection (3G/4G or WAN) and use the other as a backup.
4.5 უკაბელო ქსელის დაყენება
Set your desired Wireless Network Name (SSID) and a strong password (WPA/WPA2 Personal recommended) for your Wi-Fi network. This will secure your wireless connection.
5. როუტერის მართვა
5.1 LED ინდიკატორების გაგება
| LED | სტატუსი | მითითება |
|---|---|---|
| ძალაუფლება | On | Router is powered on. |
| სისტემა | ციმციმებს | როუტერი ნორმალურად მუშაობს. |
| WLAN | ჩართულია/მოციმციმე | Wireless function is enabled/data is being transmitted. |
| WAN | ჩართულია/მოციმციმე | WAN port is connected/data is being transmitted. |
| LAN (1-4) | ჩართულია/მოციმციმე | Corresponding LAN port is connected/data is being transmitted. |
| 3G/4G | ჩართულია/მოციმციმე | 3G/4G modem is connected and working/data is being transmitted. |
5.2 მოწყობილობების დაკავშირება
- უკაბელო მოწყობილობები: ძიება your Wi-Fi network (SSID) on your device and enter the password you configured.
- სადენიანი მოწყობილობები: Connect an Ethernet cable from your device to any of the yellow LAN ports on the router.
5.3 3G/WAN-ის გადართვა
The router can be configured to use either 3G/4G or WAN as the primary internet connection, with the other serving as a backup. If the primary connection fails, the router will automatically switch to the backup, ensuring continuous internet access. This setting can be managed in the router's web interface under Network > WAN Backup.
6. მოვლა
6.1 Firmware განახლება
Regularly check for and install firmware updates from the TP-Link official website. Firmware updates can improve performance, add new features, and fix bugs. Download the correct firmware for your model and follow the instructions provided on the TP-Link support page for upgrading via the web interface (System Tools > Firmware Upgrade).
6.2 სარეზერვო ასლის შექმნისა და აღდგენის კონფიგურაცია
შეგიძლიათ შექმნათ თქვენი როუტერის კონფიგურაციის პარამეტრების სარეზერვო ასლი file on your computer. This allows you to restore your settings quickly after a factory reset or if you need to revert to a previous configuration (System Tools > Backup & Restore).
6.3 სისტემის გადატვირთვა
If the router is experiencing issues, a simple reboot can often resolve them. You can reboot the router from the web interface (System Tools > Reboot) or by unplugging and replugging the power adapter.
6.4 ქარხნული პარამეტრების გადატვირთვა
A factory reset will revert all settings to their default values. This can be done by pressing and holding the WPS/Reset button on the rear panel for approximately 5-10 seconds until the System LED flashes rapidly, or via the web interface (System Tools > Factory Defaults).
7. Დიაგნოსტიკა
- ინტერნეტთან წვდომა შეუძლებელია:
- Check LED indicators: Ensure Power, System, WLAN, and 3G/4G (or WAN) LEDs are on or flashing correctly.
- Verify physical connections: Ensure all cables are securely connected.
- Check 3G/4G modem: Ensure it is properly inserted and recognized by the router.
- Confirm ISP settings: Verify that your 3G/4G or WAN settings (APN, connection type) are correct in the router's web ინტერფეისი.
- Reboot the router and modem.
- უკაბელო კავშირის პრობლემები:
- Ensure WLAN LED is on/flashing.
- Verify correct Wi-Fi SSID and password.
- სიგნალის სიძლიერის შესამოწმებლად, როუტერთან უფრო ახლოს მიდით.
- Change wireless channel in router settings to avoid interference.
- ნელი ინტერნეტის სიჩქარე:
- Check your 3G/4G signal strength or WAN connection speed.
- Ensure no other devices are heavily using bandwidth.
- როუტერის პროგრამული უზრუნველყოფის განახლება.
8. სპეციფიკაციები
| ფუნქცია | დეტალი |
|---|---|
| მოდელის სახელი | TL-MR3420 |
| უკაბელო სტანდარტი | IEEE 802.11n, 802.11g, 802.11b |
| უკაბელო სიჩქარე | 300 Mbps-მდე |
| სიხშირის დიაპაზონი | 2.4 გჰც |
| ანტენის ტიპი | 2x 5dBi Detachable Omni Directional Antennas |
| ინტერფეისები | 1x 10/100Mbps WAN Port, 4x 10/100Mbps LAN Ports, 1x USB 2.0 Port |
| ღილაკები | WPS/Reset Button, Power On/Off Button |
| ზომები (W x D x H) | 11.34 x 8.9 x 2.8 ინჩი (პროდუქტის ზომები) |
| ნივთის წონა | 9.5 უნცია |
| ელექტრომომარაგება | 12VDC / 1A (External Power Adapter) |
| უსადენო უსაფრთხოება | 64/128-ბიტიანი WEP, WPA/WPA2, WPA-PSK/WPA2-PSK დაშიფვრა |
| თავსებადი მოწყობილობები | Personal Computer, UMTS/HSPA/EVDO USB Modems |
9. გარანტია და მხარდაჭერა
9.1 პროდუქტის გარანტია
The TP-Link TL-MR3420 Wireless N300 3G/4G Router typically comes with a 2-year limited warranty. Please refer to the warranty card included in your package or visit the official TP-Link webთქვენი რეგიონისთვის სპეციფიკური გარანტიის დეტალური პირობებისა და წესების სანახავად იხილეთ საიტი.
9.2 ტექნიკური მხარდაჭერა
ტექნიკური დახმარების, პრობლემების მოგვარების ან დამატებითი შეკითხვებისთვის, გთხოვთ, ეწვიოთ TP-Link-ის ოფიციალურ მხარდაჭერის საიტს. webსაიტი. თქვენ შეგიძლიათ იპოვოთ ხშირად დასმული კითხვები, პროგრამული უზრუნველყოფის განახლებები და საკონტაქტო ინფორმაცია მომხმარებელთა მხარდაჭერისთვის.
- TP-Link მხარდაჭერა Webსაიტი: www.tp-link.com/support/


