1. შესავალი
The Roland A-49 is a lightweight, slim-line MIDI keyboard controller designed for musicians seeking a simple, easy-to-use device with professional-quality playing feel. It features a premium-grade, full-size keyboard, making it suitable for both home studios and live performances. The A-49 is available in black and pearl white finishes.

Image: The Roland A-49 MIDI Keyboard Controller integrated into a home studio environment, showcasing its compact design alongside other music production equipment.
2. ძირითადი მახასიათებლები
- 49 სრული ზომის გასაღები: Equipped with velocity sensitivity for expressive performance.
- მსუბუქი და კომპაქტური დიზაინი: Easy to transport and fits into various setups.
- ინტუიციური კონტროლი: Features two assignable knobs, two assignable switches, and a D-BEAM controller for dynamic sound manipulation.
- USB Bus Powered: Eliminates the need for an external AC adapter, simplifying setup.
- Stable Keyboard Action: Designed to prevent key twisting and lateral movement for consistent playability.

Image: A visual representation of the Roland A-49's compact size, shown next to a human silhouette to provide a sense of scale and portability.
3. დაყენების გზამკვლევი
3.1 კომპიუტერთან დაკავშირება
- დრაივერების დაყენება: Before connecting, download and install the latest drivers for your operating system (Windows/Mac) from the official Roland webსაიტი.
- შეაერთეთ USB კაბელი: Connect the USB Type B port on the A-49 to a USB port on your computer using a standard USB cable. The A-49 is USB bus powered, so no external power adapter is typically required.
- ჩართვა: The device should power on automatically once connected to your computer.
- პროგრამული უზრუნველყოფის ამოცნობა: Open your Digital Audio Workstation (DAW) or music production software. The A-49 should be recognized as a MIDI input device. Configure your software to use the A-49 as its MIDI controller.
3.2 Connecting External Pedals
The A-49 features input jacks for external pedals, enhancing your performance capabilities:
- Damper პედალი: Connect a sustain pedal to the DAMPER jack for piano-like sustain.
- Foot Switches (FC1, FC2): Connect optional foot switches to the FC1 and FC2 jacks for assignable control over various functions within your software.

Image: The rear panel of the Roland A-49, displaying the USB Type B port for computer connection, MIDI OUT, and input jacks for Damper, FC1, and FC2 pedals.
4. საოპერაციო ინსტრუქციები
4.1 ძირითადი დაკვრა
Once connected and recognized by your music software, you can begin playing virtual instruments or controlling MIDI-compatible hardware. The 49 velocity-sensitive keys respond to your playing dynamics.
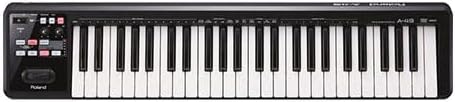
სურათი: მკაფიო ზემოდან ქვემოთ view of the Roland A-49 MIDI Keyboard Controller, highlighting its 49 full-size keys and control panel.
4.2 Control Knobs and Switches
The A-49 features two assignable control knobs (C1, C2) and two assignable switches (S1, S2). These can be mapped to various parameters within your DAW or software synthesizers, such as filter cutoff, resonance, effects send, or modulation depth. Refer to your software's manual for MIDI mapping instructions.

Image: A close-up of a hand turning one of the assignable control knobs on the Roland A-49, demonstrating interaction with the controller's features.
4.3 D-BEAM Controller
The D-BEAM controller allows for expressive control by waving your hand over an infrared sensor. It can be assigned to control pitch, volume, or other parameters, offering a unique performance element.
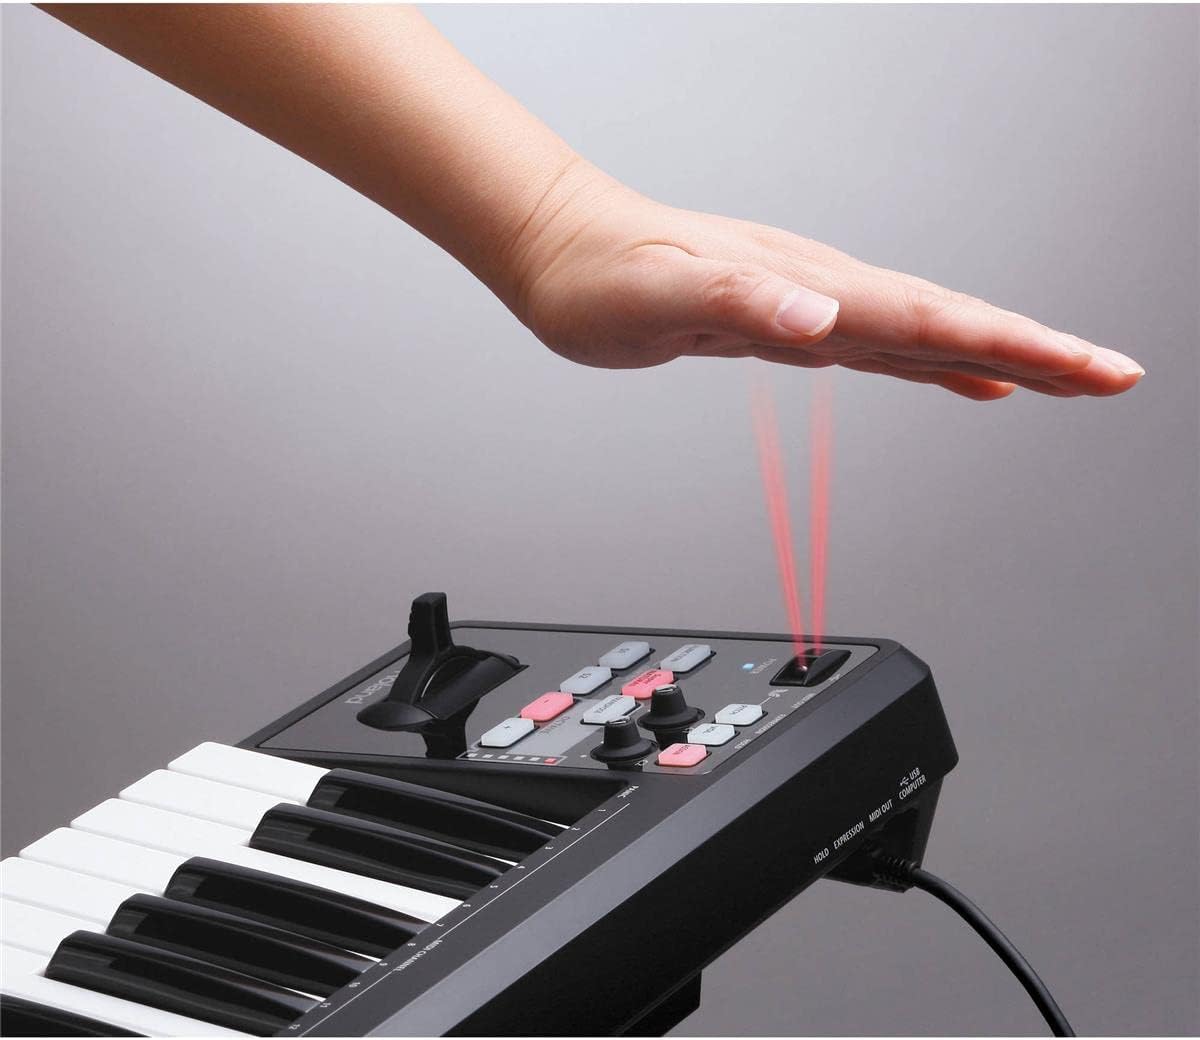
Image: A hand hovering over the D-BEAM controller on the Roland A-49, illustrating the gesture-based control mechanism.
4.4 Octave and Transpose Buttons
Use the OCTAVE +/- buttons to shift the keyboard's pitch range up or down in octave increments. The TRANSPOSE button allows for semitone adjustments. LED indicators provide visual feedback on the current octave setting.
4.5 Pitch Bend/Modulation Lever
The combined pitch bend and modulation lever provides dynamic control over pitch and modulation effects, allowing for expressive bends and vibrato.
5. პროგრამული უზრუნველყოფის თავსებადობა
The Roland A-49 is compatible with a wide range of music production software on both Windows and Mac operating systems. It is designed to integrate seamlessly with most Digital Audio Workstations (DAWs) and software synthesizers that support USB MIDI keyboards.
5.1 შეფუთული პროგრამული უზრუნველყოფა
The A-49 may come bundled with Cakewalk SONAR LE software, allowing users to start creating music immediately upon setup.
5.2 iPad Connectivity
For mobile music production, the A-49 can be connected to an Apple iPad using an Apple iPad Camera Connection Kit. This enables control over various music applications on your iPad.
Video: An official product video from Roland showcasing the features and connectivity of the A-49 MIDI Keyboard Controller, including its compatibility with various software and devices.
6. მოვლა
- დასუფთავება: Use a soft, dry cloth to clean the surface of the controller. For stubborn dirt, a slightly damp შეგიძლიათ გამოიყენოთ რბილი საპნის ნაჭერი და შემდეგ მშრალი ნაჭერი. მოერიდეთ აბრაზიული საწმენდების ან გამხსნელების გამოყენებას.
- შენახვა: Store the A-49 in a cool, dry place away from direct sunlight, extreme temperatures, and high humidity. If storing for extended periods, cover it to protect from dust.
- დამუშავება: Handle the controller with care to prevent damage to keys, knobs, and ports. Avoid dropping or placing heavy objects on it.
7. Დიაგნოსტიკა
7.1 მოწყობილობა არ არის ამოცნობილი
- დრაივერის ინსტალაცია: Ensure that the correct drivers for your operating system are installed from the Roland webსაიტი.
- USB კავშირი: Try connecting to a different USB port or using a different USB cable. Ensure the cable is securely connected.
- გადატვირთეთ კომპიუტერი: Sometimes a computer restart after driver installation can resolve recognition issues.
- Advanced MIDI Control (Mac Users): If experiencing issues on Mac, some users have reported success by turning off "advanced MIDI control" by hitting Function + ADV + the "minus" button on the controller.
7.2 Controls Not Responding
- MIDI Mapping: Verify that the controls (knobs, switches, D-BEAM) are correctly MIDI-mapped within your DAW or software instrument.
- Octave/Transpose Settings: Check the octave and transpose settings to ensure you are playing in the desired range.
8. სპეციფიკაციები
| ბრენდი | როლანდ |
| მოდელის სახელი | A-49-BK |
| გასაღებების რაოდენობა | 49 |
| გასაღების ტიპი | Full-size, Velocity-sensitive |
| დაკავშირების ტექნოლოგია | USB |
| კონექტორის ტიპი | 1/4-inch phone type (for pedals), MIDI OUT, USB Type B |
| აპარატურა ინტერფეისი | USB |
| დენის წყარო | USB Bus Powered (optional AC adapter available) |
| თავსებადი მოწყობილობები | PC, Mac, iPad (via Apple iPad Camera Connection Kit) |
| ოპერაციული სისტემა | Windows, macOS |
| ნივთის წონა | 6 ფუნტი |
| პროდუქტის ზომები | 33 x 3 x 7 ინჩი |
9. გარანტია და მხარდაჭერა
დეტალური გარანტიის ინფორმაციისთვის, გთხოვთ, იხილოთ თქვენს პროდუქტთან ერთად მოწოდებული გარანტიის ბარათი ან ეწვიეთ Roland-ის ოფიციალურ ვებგვერდს. webსაიტი. როლანდი უზრუნველყოფს მომხმარებელთა მხარდაჭერას და რესურსებს პროდუქტის რეგისტრაციის, პროგრამული უზრუნველყოფის განახლებებისა და ტექნიკური დახმარებისთვის.
ონლაინ რესურსები:
- პროდუქტის რეგისტრაცია
- დრაივერის და პროგრამული უზრუნველყოფის ჩამოტვირთვა
- FAQs and knowledge base
- დაუკავშირდით მხარდაჭერას
Always ensure you are using the latest drivers and firmware for optimal performance and compatibility.


