1. შესავალი
This manual provides comprehensive instructions for the installation, operation, and maintenance of your Hertz HDP4 4-Channel 1000W Max D-Class Amplifier. Please read this manual thoroughly before attempting installation or operation to ensure proper function and safety.
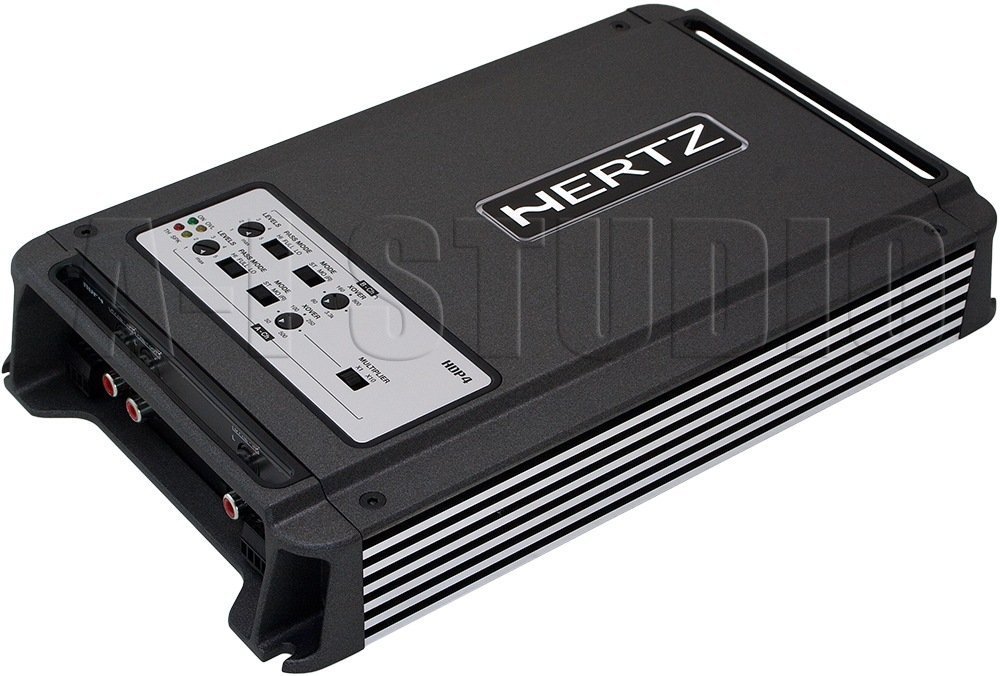
სურათი 1.1: ზემოდან ქვემოთ დახრილი view of the Hertz HDP4 ampლიფიერი, შოუasing its compact black casing and control panel on the top surface. The Hertz logo is visible on the main body.
2. უსაფრთხოების ინფორმაცია
ყოველთვის დაიცავით უსაფრთხოების შემდეგი ზომები:
- Disconnect the vehicle's battery before any installation or wiring.
- დარწმუნდით, რომ ყველა გაყვანილობა სათანადოდ არის იზოლირებული მოკლე ჩართვის თავიდან ასაცილებლად.
- დაამატე amplifier securely in a well-ventilated area, away from moisture and direct heat.
- დენის და დამიწების შეერთებისთვის გამოიყენეთ შესაბამისი ზომის გაყვანილობა, როგორც ეს მითითებულია ინსტალაციის განყოფილებაში.
- თუ ინსტალაციის პროცესის რომელიმე ნაწილთან დაკავშირებით არ ხართ დარწმუნებული, გაიარეთ კონსულტაცია პროფესიონალ ინსტალატორთან.
3. პაკეტის შიგთავსი
დარწმუნდით, რომ შეფუთვაში ყველა ნივთია:
- Hertz HDP4 Ampგამანადგურებელი ერთეული
- სამონტაჟო აქსესუარები (ხრახნები, სამაგრები)
- მომხმარებლის სახელმძღვანელო (ეს დოკუმენტი)
4. დაყენება და ინსტალაცია
4.1 მონტაჟი Ampუფრო ცოცხალი
Choose a suitable location for mounting the amplifier. It should be a dry, well-ventilated area, protected from direct sunlight and excessive vibration. Ensure there is sufficient space around the ampმაციებელი ჰაერის მიმოქცევისთვის.

სურათი 4.1: ზედა view of the Hertz HDP4 amplifier, illustrating its compact design and potential mounting points. The amplifier features a textured black finish with the Hertz logo prominently displayed.
- მოათავსეთ ampმოათავსეთ ლიფიკატორი სასურველ სამონტაჟო ადგილას და მონიშნეთ ხრახნების ხვრელები.
- Drill pilot holes if necessary, ensuring not to damage any vehicle components.
- დაიცავით ampლიფიერი მოწოდებული სამონტაჟო ხრახნების გამოყენებით.
4.2 გაყვანილობის კავშირები
Proper wiring is critical for performance and safety. Refer to the diagram below for power, ground, remote, and speaker connections.

Figure 4.2: Rear panel of the Hertz HDP4 amplifier, detailing the power input (BATT), ground (GND), remote turn-on (REM) terminals, and speaker output terminals (L/R mono for channels A and B). Two 40A fuses are also visible.
- სიმძლავრე (ბატარეა): Connect a fused power cable (minimum 8 AWG recommended) directly from the vehicle's positive battery terminal to the BATT terminal on the ampმაცოცხლებელი.
- მიწა (GND): Connect a ground cable of the same gauge as the power cable from the GND terminal to a clean, unpainted metal point on the vehicle chassis.
- დისტანციური მართვა (REM): Connect a remote turn-on wire from your head unit's remote output to the REM terminal.
- დინამიკის გამოსავალი: Connect your speakers to the appropriate L (left) and R (right) terminals for each channel (A and B). Ensure correct polarity. The amplifier supports mono bridging for increased power output to a single speaker or subwoofer.
- დაუკრავენ: The amplifier is equipped with two 40A fuses. Replace only with fuses of the same type and rating.
4.3 Input Connections and Controls
The amplifier offers both RCA (low-level) and High-Level inputs, along with various crossover and gain controls.

Figure 4.3: Input and control panel of the Hertz HDP4 amplifier. This panel includes RCA pre-inputs (A PRE-IN, B PRE-IN), high-level inputs (A HI-IN, B HI-IN), and various adjustment knobs for levels, pass mode, and crossover settings. A switch for HI-IN AUTO TURN-ON is also present.
- RCA Pre-Inputs (A PRE-IN, B PRE-IN): Connect your head unit's RCA outputs to these inputs for low-level signal.
- High-Level Inputs (A HI-IN, B HI-IN): If your head unit does not have RCA outputs, connect speaker-level signals directly to these inputs. The amplifier features an auto turn-on function for high-level inputs.
- დონეები: Adjust the input sensitivity (gain) to match the output of your head unit. Start with the gain at minimum and slowly increase until desired volume is achieved without distortion.
- გავლის რეჟიმი: Select the desired crossover mode (e.g., Full, HPF, LPF) for each channel pair.
- Crossover Frequency (XOVER): Adjust the frequency point for the selected crossover mode.
- მულტიპლიკატორი: Use this switch to multiply the crossover frequency setting by 1 or 10, depending on your system requirements.
5. საოპერაციო ინსტრუქციები
5.1 საწყისი ჩართვა
- After all connections are made and verified, reconnect the vehicle's battery.
- ჩართეთ თქვენი სათავე ბლოკი. amplifier should power on automatically (if remote wire is connected or HI-IN AUTO TURN-ON is active).
- Start with the head unit volume low and gradually increase it, listening for clear audio.
5.2 Adjusting Audio Settings
დააზუსტეთ amplifier's settings for optimal sound quality:
- Gain Matching: დაარეგულირეთ amplifier's gain controls (LEVELS) to match the output voltage of your head unit. This is crucial to prevent distortion.
- კროსოვერის პარამეტრები: Set the crossover frequencies (XOVER) and pass modes (PASS MODE) according to the specifications of your speakers. For full-range speakers, a high-pass filter (HPF) is often used to protect them from low bass frequencies. For subwoofers, a low-pass filter (LPF) is used.
6. მოვლა
To ensure the longevity and optimal performance of your Hertz HDP4 ampლიფიერი, დაიცავით შემდეგი მოვლის ინსტრუქციები:
- დასუფთავება: პერიოდულად გაასუფთავეთ ampგაწმინდეთ გამწმენდის გარე ნაწილი რბილი, მშრალი ქსოვილით. არ გამოიყენოთ უხეში ქიმიკატები ან აბრაზიული საწმენდები.
- ვენტილაცია: დარწმუნდით, რომ amplifier's cooling fins are free from dust and obstructions to maintain proper heat dissipation.
- კავშირები: Regularly check all wiring connections for tightness and corrosion. Loose connections can lead to poor performance or damage.
- დაუკრავენ: If a fuse blows, replace it only with a fuse of the exact same type and rating (2 x 40A). Using an incorrect fuse can cause severe damage to the amplifier or vehicle electrical system.

Figure 6.1: Bottom panel of the Hertz HDP4 amplifier, displaying the serial number label and important caution notes regarding insulated screws. This area should be kept clean and free from obstructions.
7. Დიაგნოსტიკა
თუ თქვენ გაქვთ პრობლემები თქვენს ampლიფიერი, დახმარების სამსახურთან დაკავშირებამდე გაეცანით შემდეგ ცხრილს:
| პრობლემა | შესაძლო მიზეზი | გამოსავალი |
|---|---|---|
| დენი არ არის / Ampგამაფხვიერებელი არ ირთვება | გაფუჭებული დაუკრავენი, ფხვიერი დენის/დამიწების/დისტანციური მართვის მავთული, გაუმართავი ხელმძღვანელის ბლოკის დისტანციური მართვის გამომავალი. | შეამოწმეთ და შეცვალეთ დაუკრავენები. დარწმუნდით, რომ ყველა კვების, დამიწების და დისტანციური მართვის შეერთება მყარადაა დამაგრებული. შეამოწმეთ დისტანციური მართვის მავთული 12 ვოლტიან სიგნალზე. |
| ხმა არ არის | Loose RCA/speaker wires, incorrect input selection, amplifier in protection mode, faulty speakers. | Check all signal and speaker connections. Ensure correct input mode is selected. Check for protection light. Test speakers. |
| დამახინჯებული ხმა | Gain set too high, incorrect crossover settings, poor quality audio source, damaged speakers. | Reduce gain. Adjust crossover settings. Test with a different audio source. Inspect speakers for damage. |
| Amplifier გადახურდება | Insufficient ventilation, impedance mismatch, prolonged high-power operation. | უზრუნველყოთ ჰაერის სათანადო ნაკადი გარშემო amplifier. Verify speaker impedance matches amplifier's capabilities. Reduce volume or operating time. |
8. სპეციფიკაციები
Technical specifications for the Hertz HDP4 4-Channel 1000W Max D-Class Ampუფრო ცოცხალი:
- მოდელი: HDP4
- ბრენდი: HERTZ
- ტიპი: 4-Channel D-Class Ampუფრო ცოცხალი
- მაქსიმალური სიმძლავრე: 1000W (as per product title, specific RMS not provided in data)
- პროდუქტის ზომები (L x W x H): 11.18 x 6.73 x 1.83 ინჩი
- წონა: 6.35 ფუნტი
- ტtage: 14.4 Volts (Operating)
- სამონტაჟო ტიპი: ზედაპირის მთა
- დაუკრავენ: 2 x 40A
- ASIN: B00AWBU1FQ
9. ინფორმაცია გარანტიის შესახებ
Hertz products are designed and manufactured to the highest quality standards. For specific warranty terms and conditions, please refer to the warranty card included with your product or visit the official Hertz webსაიტი. შეინახეთ თქვენი შესყიდვის ქვითარი, როგორც შეძენის დამადასტურებელი საბუთი გარანტიის მოთხოვნის შემთხვევაში.
10. მხარდაჭერა
For technical assistance, troubleshooting beyond this manual, or warranty inquiries, please contact Hertz customer support through their official website or authorized dealer. Ensure you have your product model (HDP4) and serial number ready when contacting support.
Official Hertz Webსაიტი: www.hertzaudiovideo.com


