1. შესავალი
The Midiplus X4 mini is a compact and versatile 49-key velocity-sensitive MIDI keyboard controller designed for music production and performance. It features a USB connection for power and data, eliminating the need for external power supplies or drivers. This manual provides detailed instructions to help you set up, operate, and maintain your X4 mini controller.
2. უსაფრთხოების ინფორმაცია
- არ დაუშვათ მოწყობილობის წვიმის, ტენიანობის ან ექსტრემალური ტემპერატურის ზემოქმედების ქვეშ მოქცევა.
- მოერიდეთ მოწყობილობის განთავსებას სითბოს წყაროებთან ახლოს ან მზის პირდაპირ სხივებში.
- არ გახსნათ casing or attempt to modify the unit. Refer all servicing to qualified personnel.
- დასაკავშირებლად გამოიყენეთ მხოლოდ მოწოდებული USB კაბელი.
- შეინახეთ ბავშვებისთვის მიუწვდომელ ადგილას.
3. პაკეტის შიგთავსი
გთხოვთ, შეამოწმოთ, რომ ქვემოთ ჩამოთვლილი ყველა ნივთი შედის თქვენს პაკეტში:
- Midiplus X4 mini MIDI Keyboard Controller
- USB კაბელი
- მომხმარებლის სახელმძღვანელო (ეს დოკუმენტი)
4. პროდუქტი დასრულდაview
Familiarize yourself with the various components of your Midiplus X4 mini controller.

სურათი 4.1: წინა view of the Midiplus X4 mini, showing the 49 mini keys, pitch and modulation touch strips, octave/transpose buttons, four assignable knobs, and function buttons.
4.1 წინა პანელის კონტროლი
- 49 Velocity-Sensitive Mini Keys: Standard piano-style keys, scaled down for portability.
- Pitch Bend Touch Strip: Provides real-time control over pitch modulation.
- Modulation Touch Strip: Provides real-time control over various modulation parameters.
- Octave/Transpose Buttons: Adjust the keyboard's octave range or transpose the pitch.
- Assignable Knobs (T1-T4): Four rotary knobs that can be assigned to control various MIDI Continuous Controller (CC) parameters.
- ფუნქციის ღილაკები: Used for various settings and advanced functions.

სურათი 4.2: Detail of the pitch and modulation touch strips, along with the Octave/Transpose buttons on the left side of the keyboard.
4.2 უკანა პანელის კავშირები
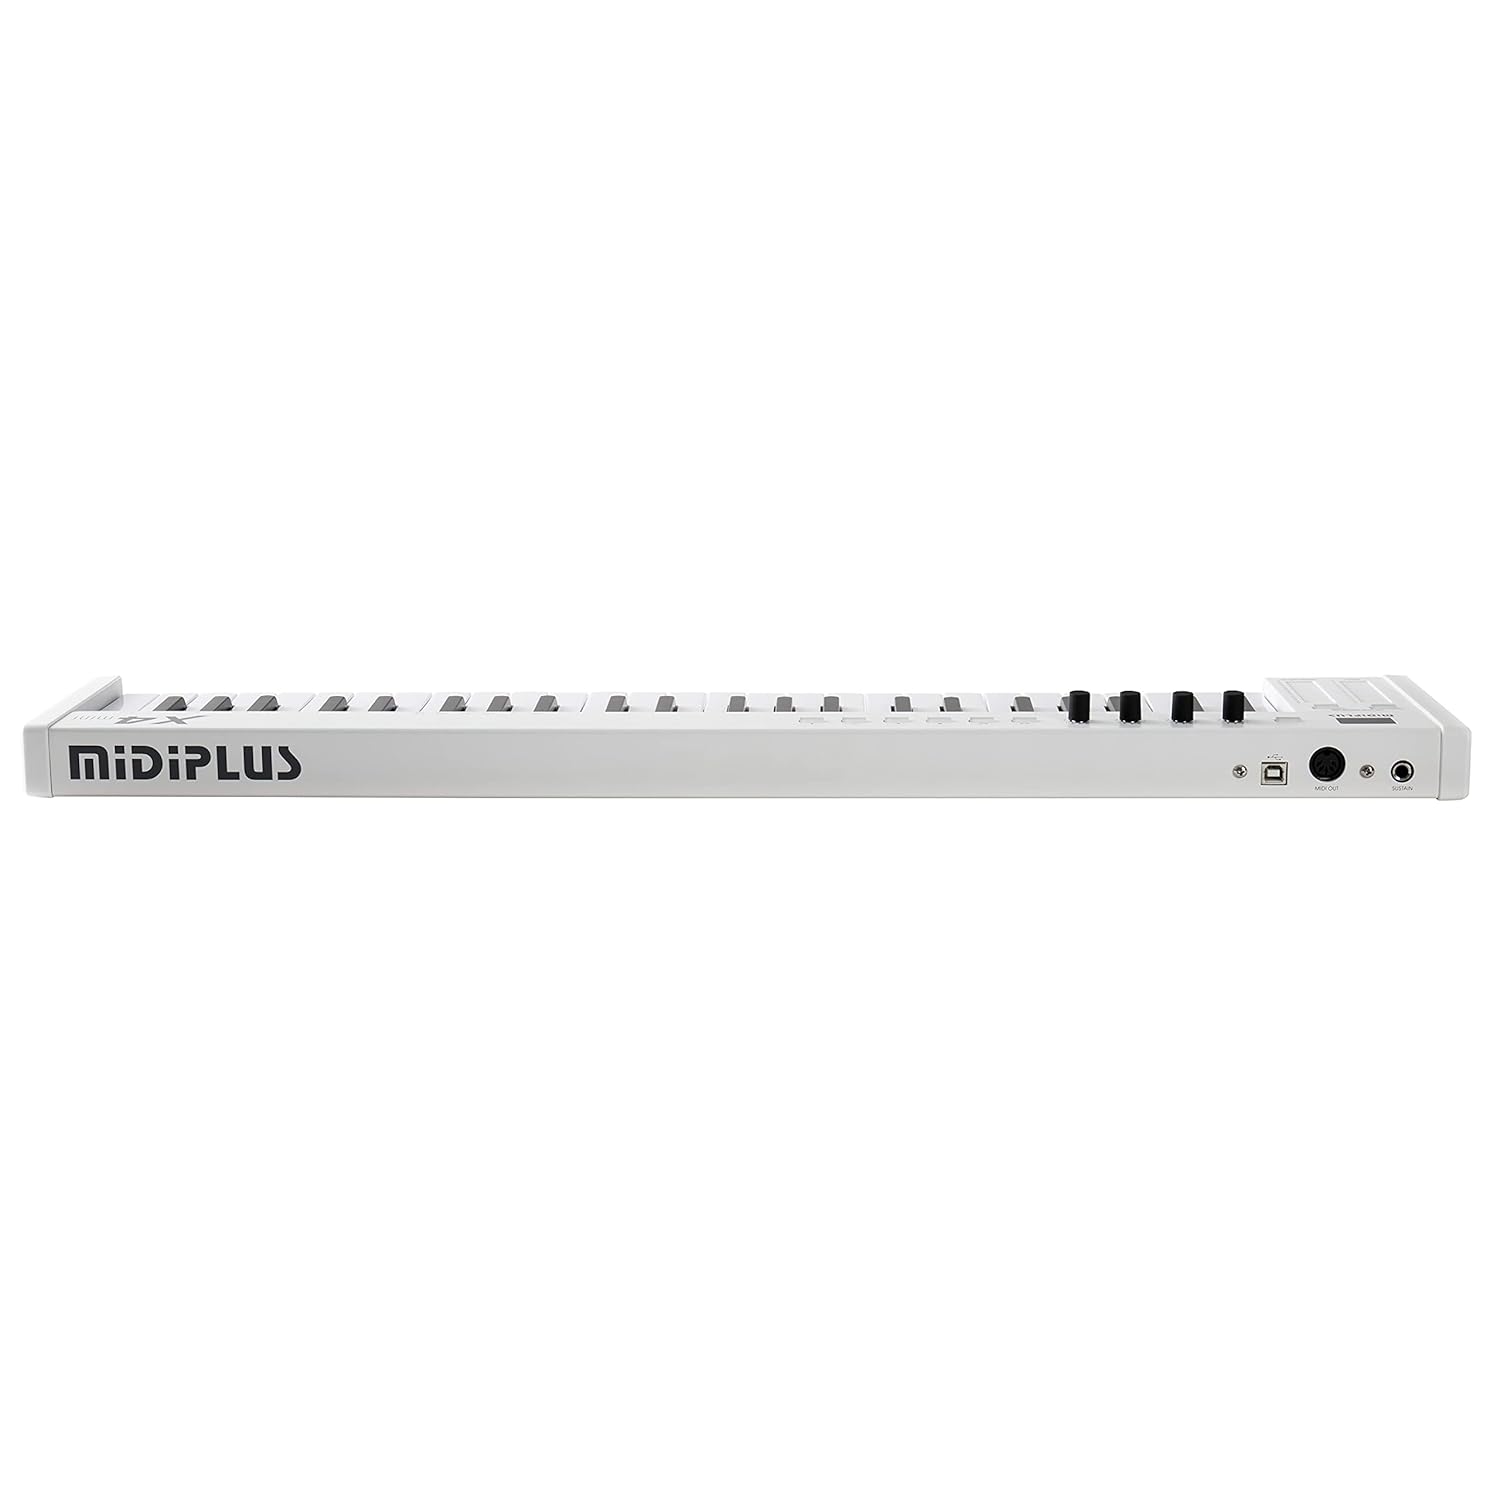
სურათი 4.3: Rear panel connections including USB, MIDI Out, and Sustain pedal input.
- USB პორტი: Connects to your computer for power and MIDI data transmission.
- MIDI გამომავალი პორტი: Standard 5-pin DIN MIDI output for connecting to external MIDI hardware.
- შეინარჩუნეთ პედლის შეყვანა: 1/4-inch jack for connecting an optional sustain pedal (not included).
5. დაყენება
5.1 კომპიუტერთან დაკავშირება
- Locate the USB port on the rear panel of your X4 mini controller.
- Connect one end of the provided USB cable to the X4 mini's USB port.
- შეაერთეთ USB კაბელის მეორე ბოლო თქვენს კომპიუტერში არსებულ USB პორტთან.
- The X4 mini is a class-compliant device, meaning no special drivers are required for Windows (7/10) or Mac operating systems. Your computer should automatically recognize the device.
- Open your Digital Audio Workstation (DAW) software (e.g., Ableton Live, Logic Pro, GarageBand, FL Studio, Cubase) and select the Midiplus X4 mini as your MIDI input device in the software's preferences or settings.
სურათი 5.1: The USB cable used for connecting the X4 mini to a computer.
5.2 Connecting to External MIDI Hardware
If you are connecting to an external synthesizer or sound module with a 5-pin DIN MIDI input:
- Connect a standard 5-pin MIDI cable (not included) from the X4 mini's MIDI OUT port to the MIDI IN port of your external hardware.
- Ensure your external hardware is powered on and configured to receive MIDI data on the appropriate channel.
6. საოპერაციო ინსტრუქციები
6.1 კლავიატურაზე დაკვრა
The 49 mini keys are velocity-sensitive, meaning the volume or intensity of a note can vary based on how hard you press the key. Experiment with different playing dynamics to achieve expressive performances.
6.2 Octave and Transpose Functions
- ოქტავის ღილაკები: Use the dedicated Octave Up and Octave Down buttons (located near the pitch/mod strips) to shift the keyboard's range up or down in full octaves.
- Transpose Function: The Octave buttons can also function as Transpose buttons when combined with the SHIFT key. Press and hold the SHIFT button, then use the Octave Up/Down buttons to transpose the keyboard by semitones.
6.3 Pitch Bend and Modulation
- Pitch Touch Strip: Slide your finger along this strip to bend the pitch of notes up or down. The pitch returns to center when released.
- Modulation Touch Strip: Slide your finger along this strip to apply modulation effects, such as vibrato or tremolo, to your sound. The specific effect depends on your software or hardware instrument's settings.
6.4 Assignable Knobs (T1-T4)
The four rotary knobs (T1-T4) send MIDI Continuous Controller (CC) messages. By default, these may control common parameters like volume or pan in your DAW. You can reassign these knobs to control specific parameters within your software instruments or effects.
- Consult your DAW or software instrument's manual for instructions on how to MIDI-learn or assign CC messages to parameters.
- The X4 mini also allows for on-the-fly reassignment of the CC messages sent by these knobs. Refer to the "Advanced Features" section for details.
7. დამატებითი ფუნქციები
7.1 Reassigning MIDI CC Messages for Knobs
The Midiplus X4 mini allows you to customize the MIDI CC messages sent by the T1-T4 knobs. This enables you to control a wider range of parameters in your software or hardware.
- დააჭირეთ და გააჩერეთ SHIFT ღილაკი.
- While holding SHIFT, press one of the function buttons (often labeled with CC numbers or functions) corresponding to the knob you wish to reassign.
- Use the keyboard keys to input the desired MIDI CC number. The specific keys for number input will be indicated on the keyboard itself or in a quick reference guide.
- დააჭირეთ ENTER or SHIFT button again to confirm the assignment.
Note: The exact procedure for CC reassignment may vary slightly. Refer to the markings on your specific unit for precise key combinations.
7.2 Changing MIDI Channels
To change the MIDI channel on which the X4 mini transmits data:
- დააჭირეთ და გააჩერეთ SHIFT ღილაკი.
- While holding SHIFT, press the dedicated MIDI Channel button (if available) or a specific key designated for MIDI channel selection.
- Use the keyboard keys to input the desired MIDI channel number (1-16).
- დააჭირეთ ENTER or SHIFT button again to confirm the new MIDI channel.
8. მოვლა
- დასუფთავება: კონტროლერის ზედაპირის გასაწმენდად გამოიყენეთ რბილი, მშრალი ქსოვილი. ჯიუტი ჭუჭყის შემთხვევაში, ოდნავamp შეგიძლიათ გამოიყენოთ ქსოვილი და შემდეგ მშრალი ქსოვილი. მოერიდეთ აბრაზიული საწმენდი საშუალებების ან გამხსნელების გამოყენებას.
- შენახვა: When not in use, store the X4 mini in a clean, dry environment away from direct sunlight and extreme temperatures.
- ტრანსპორტირება: If transporting the unit, use a protective case to prevent damage to the keys and controls.
9. Დიაგნოსტიკა
| პრობლემა | შესაძლო მიზეზი | გამოსავალი |
|---|---|---|
| No sound from software instrument. |
|
|
| Computer does not recognize the X4 mini. |
|
|
| Keys are not responding or velocity is inconsistent. |
|
|
10. სპეციფიკაციები
- გასაღებები: 49 სიჩქარისადმი მგრძნობიარე მინი კლავიში
- კონტროლი: Pitch bend touch strip, Modulation touch strip, Octave Up/Down buttons, Transpose function, 4 assignable rotary knobs (T1-T4), Function buttons.
- კავშირები: USB (Type B), MIDI OUT (5-pin DIN), Sustain Pedal Input (1/4-inch jack)
- სიმძლავრე: იკვებება USB ავტობუსით
- თავსებადობა: Windows 7/10, macOS (Class-compliant, no drivers required)
- ზომები: 27.68 x 2.01 x 5.39 ინჩი (70.3 x 5.1 x 13.7 სმ)
- წონა: 5.45 ფუნტი (2.47 კგ)
- მოყვება აქსესუარები: USB კაბელი
11. გარანტია და მხარდაჭერა
Midiplus products are designed for reliability and performance. For warranty information and technical support, please refer to the official Midiplus webადგილზე ან დაუკავშირდით თქვენს ადგილობრივ დისტრიბუტორს. შეინახეთ შეძენის დამადასტურებელი საბუთი გარანტიის მოთხოვნებისთვის.
For further assistance, you may visit the Midiplus Store on Amazon: Midiplus Store
12. ოფიციალური პროდუქტის ვიდეოები
მოწოდებულ მონაცემებში ამ პროდუქტისთვის გამყიდველისგან ოფიციალური ვიდეოები ვერ მოიძებნა.


