1. შესავალი
This manual provides detailed instructions for the installation, setup, and operation of your LoraTap WiFi Smart Relay Switch (Model RR400W). Please read this manual thoroughly before use to ensure proper functionality and safety.
პაკეტის შიგთავსი:
- LoraTap WiFi Smart Relay Switch (RR400W)
- მომხმარებლის სახელმძღვანელო
- Mounting accessories (screws, anchors, mini screwdriver, electrical wires)

Image 1.1: LoraTap WiFi Smart Relay Switch (Model RR400W) and its mobile application interface.
2. უსაფრთხოების ინფორმაცია
- გაფრთხილება: Electrical installation should only be performed by a qualified electrician or in accordance with local electrical codes.
- მოწყობილობის დამონტაჟებამდე ან მომსახურებამდე ყოველთვის გამორთეთ დენი ამომრთველიდან.
- ეს მოწყობილობა განკუთვნილია მხოლოდ შიდა გამოყენებისთვის.
- არ გადააჭარბოთ მაქსიმალურ დასაშვებ დატვირთვას 10A / 2500W.
- Ensure the device is installed in a location with a neutral wire for correct electrical supply.
- შეინახეთ ბავშვებისთვის მიუწვდომელ ადგილას.
3. პროდუქტის სპეციფიკაციები
| ფუნქცია | სპეციფიკაცია |
|---|---|
| მოდელის ნომერი | RR400W |
| შეყვანის მოცულობაtage | 100-250V AC, 50/60Hz |
| მაქსიმალური დატვირთვა | 10 ა / 2500 ვტ |
| უკაბელო პროტოკოლი | Wi-Fi 2.4 GHz (IEEE 802.11 b/g/n) |
| ზომები (L x W x H) | 4.8 x 4.2 x 2.3 სმ (1.89 x 1.65 x 0.91 ინჩი) |
| კონტროლის მეთოდი | Remote (App), Voice |
| თავსებადობა | Amazon Alexa, Google Assistant, Smart Life App, Tuya App |
| სერთიფიკატები | CE, RoHS, FCC |
4. ინსტალაციის სახელმძღვანელო
The LoraTap WiFi Smart Relay Switch is designed for easy integration into existing electrical systems. It requires a neutral wire for operation.
გაყვანილობის დიაგრამა:
- გამორთეთ ელექტროენერგია: Before starting, turn off the power at the main circuit breaker to avoid electrical shock.
- მავთულხლართების იდენტიფიცირება: Locate the Live (L) and Neutral (N) input wires from your power source, and the Live (L) and Neutral (N) load wires going to your appliance (e.g., lamp).
- დაკავშირების შეყვანა: Connect the Live input wire to the 'L in' terminal and the Neutral input wire to the 'N in' terminal on the LoraTap switch.
- გამომავალის დაკავშირება: Connect the Live load wire to the 'L out' terminal and the Neutral load wire to the 'N out' terminal on the LoraTap switch.
- უსაფრთხო კავშირები: Ensure all wire connections are secure. The device supports 26-16AWG wires.
- მოწყობილობის დამონტაჟება: The compact size allows installation in narrow spaces, such as behind a socket or in a ceiling rose. Use the provided mounting accessories if needed.
- ენერგიის აღდგენა: Once all connections are secure and the device is properly mounted, restore power at the circuit breaker.

Image 4.1: Simplified wiring diagram for the LoraTap Smart Relay Switch. Ensure a neutral wire is present for installation.
5. აპლიკაციის დაყენება და დაწყვილება
To control your LoraTap Smart Relay Switch, you need to download the Smart Life or Tuya app and pair the device.
მოთხოვნები:
- A smartphone (Android or iOS).
- A 2.4GHz Wi-Fi network. 5GHz networks are not supported.
- The Smart Life or Tuya app installed on your smartphone.
დაწყვილების ნაბიჯები:
- ჩამოტვირთეთ აპლიკაცია: ძიება "Smart Life" or "Tuya Smart" in your smartphone's app store (App Store for iOS, Google Play for Android) and install it.
- რეგისტრაცია/შესვლა: გახსენით აპლიკაცია და დარეგისტრირდით ახალი ანგარიშით ან შედით არსებულით.
- მოწყობილობის დამატება: Tap the "+" icon in the top right corner of the app to add a new device. Select "Electrical Switch" or "Switch (Wi-Fi)".
- შედით დაწყვილების რეჟიმში: Power on the LoraTap switch. If the indicator light is not blinking rapidly, press and hold the button on the switch for approximately 5 seconds until it blinks rapidly. This indicates pairing mode.
- დაუკავშირდით Wi-Fi-ს: In the app, confirm the indicator is blinking rapidly. Enter your 2.4GHz Wi-Fi network name and password.
- დაწყვილების სრული სინქრონიზაცია: The app will search for and connect to the device. Once connected, you can rename the device for easier control.

Image 5.1: Easy pairing process with the Smart Life/Tuya app. Ensure your Wi-Fi network is 2.4GHz.
6. ოპერაცია
The LoraTap Smart Relay Switch offers multiple control options for convenience.
6.1. აპლიკაციის კონტროლი
Once paired, you can control your device from anywhere using the Smart Life or Tuya app on your smartphone.
- ჩართვა/გამორთვის კონტროლი: Tap the switch icon in the app to turn your connected appliance on or off.
- რეალურ დროში სტატუსი: The app displays the current status of your appliance, allowing you to verify if it's on or off remotely.
- ჯგუფის კონტროლი: You can group multiple LoraTap switches together in the app to control them simultaneously.
- მოწყობილობის გაზიარება: აპლიკაციის საშუალებით, ოჯახის წევრებთან ერთად გააზიარეთ მოწყობილობის კონტროლი.

Image 6.1: Remote control via the Smart Life app.
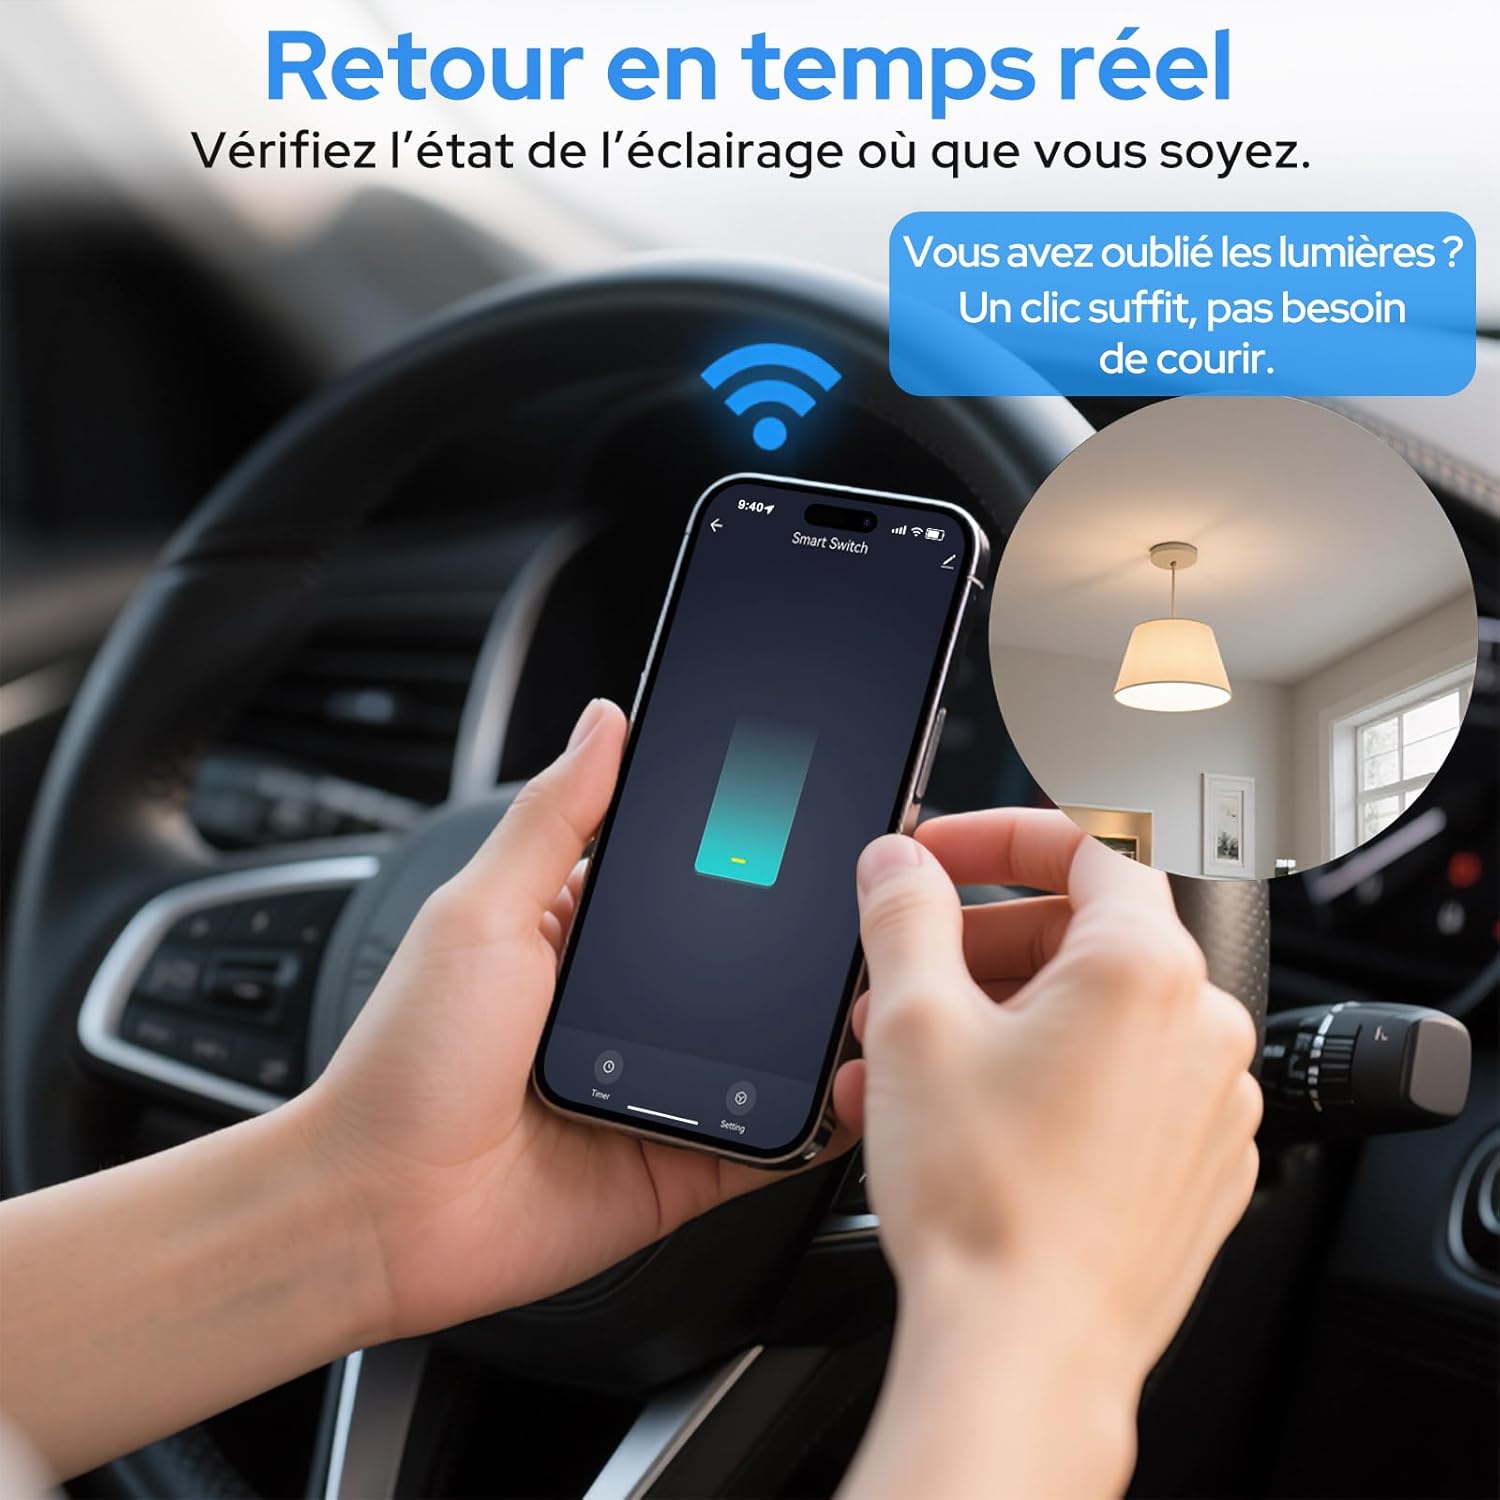
Image 6.2: Real-time status monitoring from anywhere.

Image 6.3: Device sharing feature for family members.
6.2. ხმის კონტროლი
The LoraTap Smart Relay Switch is compatible with Amazon Alexa and Google Assistant for convenient voice control.
- ანგარიშის ბმული: In the Alexa or Google Home app, link your Smart Life/Tuya account.
- აღმოაჩინეთ მოწყობილობები: Ask Alexa or Google Assistant to discover new devices.
- ხმოვანი ბრძანებები: Use commands like "Alexa, turn on [device name]" or "Hey Google, turn off [device name]".

Image 6.4: Voice control integration with Amazon Alexa and Google Assistant.

Image 6.5: Family using voice commands for smart home control.
6.3. დაგეგმვა და ტაიმერები
Automate your appliances by setting schedules and timers within the Smart Life/Tuya app.
- ტაიმერის ფუნქცია: Set a countdown timer for the switch to turn on or off automatically after a specified duration.
- განრიგი: Create daily or weekly schedules for your appliance to turn on or off at specific times (e.g., turn on lights at sunset, turn off at bedtime).
- გამეორების ფუნქცია: Configure schedules to repeat on selected days of the week.

Image 6.6: Automate lighting with countdown timers.

Image 6.7: Program your lights with custom schedules.
6.4. Restart Status Settings
Configure the power-on state of your smart switch after a power outage.
- გამორთულია: მოწყობილობა გამორთული დარჩება ელექტროენერგიის აღდგენის შემდეგ.
- ON: The device will turn on automatically after power is restored.
- ბოლო სტატუსის დამახსოვრება: The device will return to its last known state (on or off) before the power outage.

Image 6.8: Configure the device's restart status after a power interruption.
7. მოვლა
- გაწმინდეთ მოწყობილობა რბილი, მშრალი ქსოვილით. არ გამოიყენოთ უხეში ქიმიკატები ან აბრაზიული საწმენდები.
- Ensure the device is kept in a dry environment and away from direct sunlight or extreme temperatures.
- Regularly check for firmware updates in the Smart Life/Tuya app to ensure optimal performance and security.
8. Დიაგნოსტიკა
| პრობლემა | შესაძლო მიზეზი / გამოსავალი |
|---|---|
| Device not pairing / Indicator not blinking rapidly. |
|
| მოწყობილობა აპლიკაციაში ხაზგარეშეა. |
|
| ხმოვანი კონტროლი არ მუშაობს. |
|
| Device not responding to manual switch. |
|
9. გარანტია და მხარდაჭერა
LoraTap offers a 3-year warranty for this product. For technical support or warranty claims, please contact LoraTap customer service through their official webსაიტი ან საცალო ვაჭრობის ობიექტი, სადაც შეიძინეთ პროდუქტი.
საკონტაქტო ინფორმაცია: Please refer to the packaging or LoraTap's official webსაიტი უახლესი მხარდაჭერის საკონტაქტო ინფორმაციისთვის.


