1. შესავალი
Welcome to the TMEZON Wireless Security Camera System user manual. This guide provides detailed instructions for the setup, operation, and maintenance of your MZ-WF8430W system. Please read this manual thoroughly before installation and use to ensure proper functionality and safety. This system features 3-megapixel cameras, an 8-channel Network Video Recorder (NVR), and IP66 waterproof cameras suitable for both indoor and outdoor surveillance.
2. პაკეტის შიგთავსი
გთხოვთ, შეამოწმოთ შეფუთვა შემდეგი ნივთებისთვის:
- 1 x 8-Channel Wireless NVR
- 4 x 3MP უსადენო IP კამერა
- 1 x NVR კვების ადაპტერი
- 4 x კამერის კვების ადაპტერი
- 1 x USB მაუსი
- 1 x ქსელის კაბელი
- 1 x მომხმარებლის სახელმძღვანელო
- სამონტაჟო ხრახნების ნაკრები

სურათი: მეტიview of the TMEZON Wireless Security Camera System components, including the NVR and four cameras.
3. დაყენების გზამკვლევი
3.1 NVR-ის საწყისი კავშირი
NVR-ის დასაყენებლად მიჰყევით ამ ნაბიჯებს:
- შეაერთეთ NVR მონიტორთან HDMI ან VGA კაბელის გამოყენებით.
- შეაერთეთ USB მაუსი NVR-ის USB პორტთან.
- ინტერნეტთან და დისტანციურად წვდომისთვის, NVR თქვენს როუტერს მოწოდებული ქსელური კაბელის გამოყენებით შეაერთეთ. viewინგ.
- შეაერთეთ NVR-ის კვების ადაპტერი და შეაერთეთ ის დენის წყაროში. NVR ავტომატურად ჩაირთვება.

Image: Diagram illustrating the connections for the NVR, including power, monitor, and network cable to a router.
3.2 კამერის დაყენება
The cameras are IP66 waterproof, making them suitable for both indoor and outdoor use. Ensure cameras are within the NVR's wireless range.
- Choose suitable locations for your cameras, considering coverage area and power outlet proximity.
- Mount the cameras securely using the provided screw kits.
- Connect each camera to its respective power adapter and plug into an electrical outlet.
- The cameras will automatically pair with the NVR. If not, refer to the troubleshooting section for manual pairing.
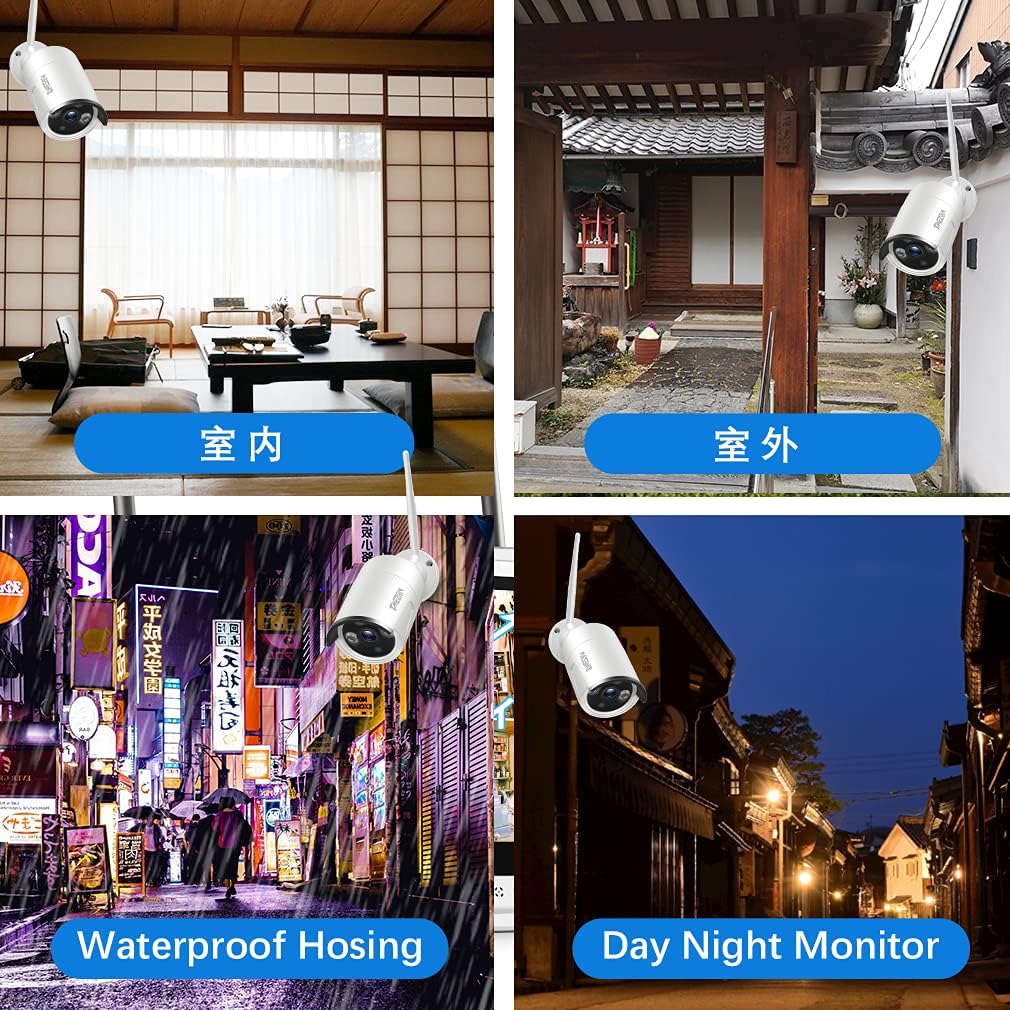
სურათი: მაგamples of camera placement for both indoor and outdoor environments.
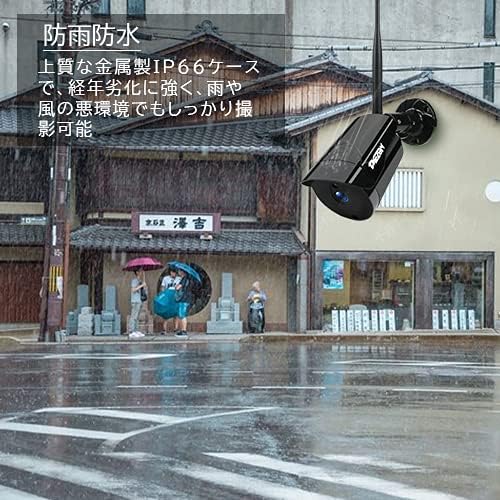
Image: A camera mounted outdoors, demonstrating its IP66 waterproof capability in a rainy setting.
3.3 Remote Access Setup (Mobile App)
რომ view your cameras remotely on a smartphone or PC, follow these steps:
- Download the 'IP PRO' app from the App Store (iOS) or Google Play Store (Android).
- Register a new account within the app.
- აპლიკაციაში სისტემის დასამატებლად, დაასკანირეთ თქვენს NVR-ზე არსებული QR კოდი ან ხელით შეიყვანეთ მოწყობილობის ID.
- დამატების შემდეგ, შეგიძლიათ view live feeds, playback recordings, and manage settings from your mobile device.

Image: Demonstrates remote access to the camera system from various devices including tablets, laptops, and smartphones.

Image: A visual guide showing the steps for easy remote access setup via the mobile application.
ვიდეო: გენერალი დასრულდაview of the system's features and setup process.
4. საოპერაციო ინსტრუქციები
4.1 ცოცხალი View და ჩაწერა
After initial setup, the NVR will display live feeds from all connected cameras. You can navigate the interface using the USB mouse. The system is configured for continuous recording by default. You can adjust recording schedules and modes (e.g., motion-triggered) in the NVR settings.
4.2 დაკვრა
ხელახლაview ჩაწერილი ფუtage:
- Right-click on the NVR interface to access the main menu.
- აირჩიეთ „დაკვრა“.
- Choose the desired camera, date, and time to view ჩანაწერები.
4.3 მოძრაობის ამოცნობა
The system supports motion detection, which can trigger recording and alerts. To configure:
- Access the NVR's main menu and go to 'Alarm' or 'Motion Detect' settings.
- Enable motion detection for specific cameras.
- Adjust sensitivity and define detection areas as needed.

Image: Highlights key features such as WiFi wireless connectivity, motion detection, night vision mode, IP66 waterproof rating, remote monitoring, and email alerts.
4.4 ღამის ხედვა
The cameras are equipped with infrared (IR) LEDs for automatic night vision, providing clear black and white video footage in low-light or no-light conditions.
4.5 Email Alerts
You can configure the system to send email notifications when motion is detected:
- In the NVR settings, navigate to 'Network' then 'Email'.
- Enter your email server details and recipient email addresses.
- Enable email alerts for motion detection events.

Image: A smartphone screen displaying an instant email notification triggered by an alarm event, showing a person attempting to break in.
Video: Demonstrates various operational aspects of the security camera system.
5. მოვლა
რეგულარული მოვლა უზრუნველყოფს თქვენი უსაფრთხოების სისტემის ოპტიმალურ მუშაობას და გამძლეობას:
- სუფთა კამერები: პერიოდულად გაწმინდეთ კამერის ლინზები რბილი, დ...amp cloth to remove dust and dirt, ensuring clear image quality.
- შეამოწმეთ კავშირები: დარწმუნდით, რომ ყველა კვების და ქსელის კაბელი საიმედოდ არის დაკავშირებული სიგნალის დაკარგვის თავიდან ასაცილებლად.
- Firmware განახლებები: Check the TMEZON official website for any available firmware updates for your NVR and cameras to enhance features and security.
- მყარი დისკის მდგომარეობა: If your NVR has a hard drive, regularly check its status in the system settings to prevent recording failures.
6. Დიაგნოსტიკა
აქ მოცემულია გადაწყვეტილებები იმ საერთო პრობლემებისთვის, რომელთა წინაშეც შეიძლება აღმოჩნდეთ:
6.1 მონიტორზე ვიდეო არ ჩანს
- შეამოწმეთ სიმძლავრე: Ensure the NVR and monitor are powered on and connected correctly.
- საკაბელო კავშირი: Verify the HDMI/VGA cable is securely connected between the NVR and monitor.
- შეყვანის წყარო: Confirm the monitor's input source is set to the correct HDMI/VGA port.
6.2 Cameras Not Showing on NVR
- კამერის სიმძლავრე: დარწმუნდით, რომ ყველა კამერა ჩართულია.
- უკაბელო დიაპაზონი: Check if cameras are within the NVR's wireless range. Obstacles like thick walls can reduce signal strength.
- ხელით დაწყვილება: If cameras do not automatically connect, you may need to manually pair them. Access the NVR's 'IPC Channel Config' or 'Wireless Add' menu and follow the on-screen instructions to add cameras.
6.3 დისტანციური წვდომა არ მუშაობს
- NVR Internet Connection: Ensure the NVR is connected to your router and has internet access. Check the network status in NVR settings.
- აპლიკაციაში შესვლა: Verify you are logged into the correct account on the mobile app.
- დამატებულია მოწყობილობა: Confirm the NVR device has been successfully added to your app account.
- როუტერის პარამეტრები: Ensure your router is not blocking the NVR's internet access.
6.4 დაბალი ხარისხის სურათი
- სუფთა ლინზა: Clean the camera lens as described in the maintenance section.
- რეზოლუციის პარამეტრები: Check the camera's resolution settings in the NVR. Ensure it's set to 3MP (2048*1536P) for optimal clarity.
- განათება: Ensure adequate lighting for color images during the day. Night vision will be black and white.
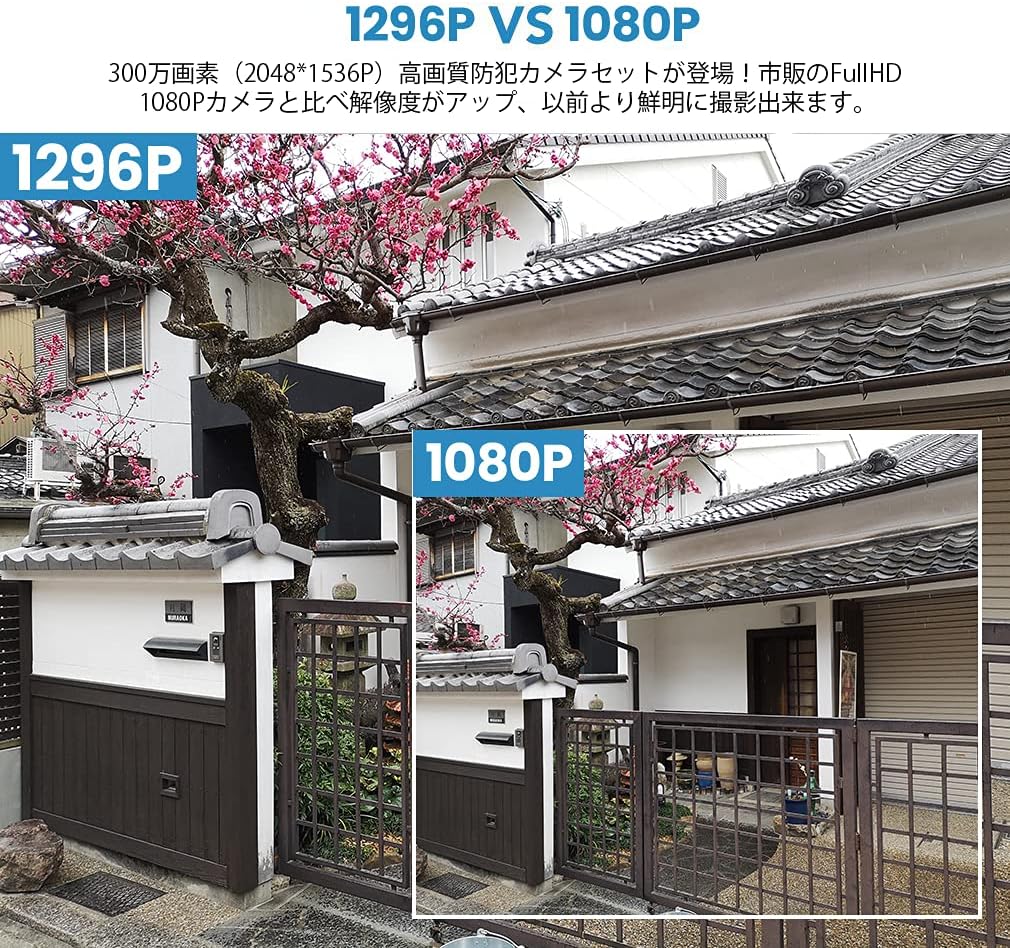
Image: A visual comparison demonstrating the improved clarity and detail of 1296P resolution compared to 1080P.

Image: A comparison showing the difference in image quality between 1080P and 720P resolutions, highlighting the superior detail of 1080P.
7. სპეციფიკაციები
| ფუნქცია | სპეციფიკაცია |
|---|---|
| ბრენდი | TMEZON |
| მოდელის ნომერი | MZ-WF8430W |
| დაკავშირების ტექნოლოგია | უსადენო |
| ვიდეო გადაღების გარჩევადობა | 1944p (3 Megapixels) |
| განსაკუთრებული თვისებები | წყალგაუმტარი (IP66) |
| არხების რაოდენობა | 8 |
| პაკეტის ზომები | 32 x 31.1 x 18.3 სმ |
| პაკეტის წონა | 3.64 კგ |
| საჭიროა ბატარეები | არა |
8. გარანტია და მხარდაჭერა
TMEZON provides customer support for its products. For warranty information, technical assistance, or any questions not covered in this manual, please contact TMEZON customer service through their official website or the contact information provided with your purchase. Please have your model number (MZ-WF8430W) and purchase details ready when contacting support.


