1. შესავალი
Thank you for choosing the Oster OS-WDA3200 Water Dispenser. This manual provides essential information for the safe and efficient operation, installation, and maintenance of your new appliance. Please read these instructions thoroughly before use and retain them for future reference.
2. უსაფრთხოების ინსტრუქციები
უსაფრთხო მუშაობის უზრუნველსაყოფად, ყოველთვის დაიცავით შემდეგი ძირითადი უსაფრთხოების ზომები:
- წაიკითხეთ ყველა ინსტრუქცია მოწყობილობის გამოყენებამდე.
- არ გამოიყენოთ მოწყობილობა დაზიანებული სადენით ან შტეფსელით, ან მას შემდეგ, რაც მოწყობილობა გაუმართავია ან რაიმე ფორმით დაზიანებულია.
- არ ჩაყოთ კვების კაბელი, შტეფსელი ან თავად მოწყობილობა წყალში ან სხვა სითხეებში.
- Keep the appliance out of reach of children. The hot water dispenser features a child safety lock, but supervision is always recommended.
- დარწმუნდით, რომ მოწყობილობა მოთავსებულია სტაბილურ, თანაბარ ზედაპირზე.
- Do not block ventilation openings. Maintain adequate space around the dispenser for proper airflow.
- Unplug the dispenser from the power outlet before cleaning or performing any maintenance.
- ეს მოწყობილობა განკუთვნილია მხოლოდ შიდა გამოყენებისთვის.
3. პროდუქტი დასრულდაview
The Oster OS-WDA3200 is a floor-standing water dispenser designed to provide hot, ambient, and cold water. It features compressor cooling for efficient performance and a child safety lock for the hot water tap.
ძირითადი მახასიათებლები:
- Three Water Outlets: Hot, Ambient, and Cold
- Efficient Compressor Cooling
- Child Safety Lock for Hot Water
- Removable Drip Tray for Easy Cleaning
- Floor Standing Design
კომპონენტები:

სურათი 3.1: წინა View. This image displays the front of the Oster OS-WDA3200 water dispenser, showing the three water taps for hot, ambient, and cold water, along with the Oster branding and indicator lights.
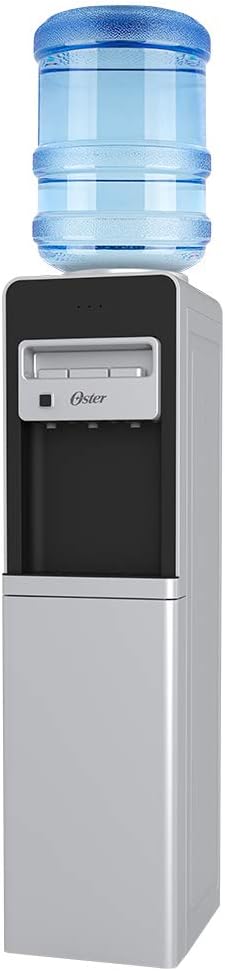
Figure 3.2: Water Bottle Installation. This image illustrates the Oster OS-WDA3200 water dispenser with a standard 5-gallon water bottle placed on top, ready for use.

Figure 3.3: Child Safety Lock. ახლოდან view of the child safety lock button, located next to the hot water tap, designed to prevent accidental dispensing of hot water.

Figure 3.4: Storage Compartment. This image shows the lower door of the dispenser open, revealing a convenient storage compartment.

სურათი 3.5: უკანა View. The back of the dispenser, displaying the compressor unit, cooling coils, and power switches for heating and cooling functions.
4. დაყენება
4.1 შეფუთვა
- ფრთხილად ამოიღეთ დისპენსერი შეფუთვიდან.
- ამოიღეთ ყველა შესაფუთი მასალა, ლენტი და დამცავი ფირი.
- Inspect the dispenser for any signs of damage. If damaged, do not use and contact customer service.
4.2 განთავსება
- მოათავსეთ დისპენსერი მყარ, სწორ ზედაპირზე, რომელსაც შეუძლია მისი წონის ატანა სავსე მდგომარეობაში.
- Ensure there is at least 10 cm (4 inches) of space between the back and sides of the dispenser and any walls or other objects for proper ventilation.
- Avoid placing the dispenser in direct sunlight or near heat sources (e.g., ovens, radiators) to maintain cooling efficiency.
- Do not place the dispenser in an area where the temperature will drop below 10°C (50°F).
4.3 წყლის ბოთლის მონტაჟი
- Clean the neck of a new 3 or 5-gallon water bottle.
- Remove the protective cap from the water bottle.
- Carefully lift the water bottle and place it upright onto the support collar on top of the dispenser. Ensure it is seated firmly.
- Water will begin to flow into the dispenser's internal reservoirs.
4.4 Initial Power-On and Flushing
- Once the water bottle is installed and water has filled the reservoirs (this may take a few minutes), plug the dispenser into a grounded 120V electrical outlet.
- Locate the power switches on the back of the unit (refer to Figure 3.5). Turn on the cooling switch (usually blue or green) and the heating switch (usually red).
- Before consuming water, flush the system: Dispense and discard at least two cups of water from each tap (hot, ambient, cold) to ensure the system is clean and free of air bubbles.
- Allow approximately 15-30 minutes for the water to reach optimal cold and hot temperatures.
5. საოპერაციო ინსტრუქციები
5.1 ცივი წყლის გაცემა
Place a cup under the cold water tap (typically blue). Press the cold water lever or button to dispense cold water. Release to stop.
5.2 Dispensing Ambient Water
Place a cup under the ambient water tap (typically gray or white). Press the ambient water lever or button to dispense room temperature water. Release to stop.
5.3 ცხელი წყლის გაცემა
The hot water tap (typically red) is equipped with a child safety lock.
- Place a heat-resistant cup under the hot water tap.
- Simultaneously press the child safety lock button (refer to Figure 3.3) and the hot water lever/button.
- Release the lever/button to stop the flow of hot water. Release the safety lock button.
WARNING: Hot water can cause severe burns. Always use caution and ensure the child safety lock is engaged when not in use.
6. მოვლა
6.1 წვეთოვანი უჯრის გაწმენდა
The drip tray (located below the taps) collects spilled water and should be emptied and cleaned regularly.
- Carefully remove the drip tray by pulling it forward.
- გადაწურეთ დაგროვილი წყალი და უჯრა გარეცხეთ რბილი საპნით და თბილი წყლით.
- ჩანაცვლებამდე კარგად გარეცხეთ და გააშრეთ.
6.2 ექსტერიერის გაწმენდა
გაწმინდეთ დისპენსერის გარე ზედაპირები რბილი, დamp ქსოვილი. არ გამოიყენოთ აბრაზიული საწმენდები, გამხსნელები ან უხეში ქიმიკატები, რადგან მათ შეუძლიათ დააზიანონ საფარი.
6.3 Draining the Unit (for storage or extended non-use)
- გამორთეთ დისპენსერი დენის წყაროდან.
- ამოიღეთ წყლის ბოთლი.
- Place a large bucket or container under the drain plug, usually located at the back or bottom of the unit.
- Remove the drain plug to allow all water to empty from the reservoirs.
- გადინების შემდეგ, საიმედოდ დაახურეთ სადრენაჟე საცობი.
- Dispense water from all taps until no more water comes out.
- Allow the interior to air dry completely before storing.
7. Დიაგნოსტიკა
If you encounter issues with your water dispenser, refer to the following common problems and solutions:
| პრობლემა | შესაძლო მიზეზი | გამოსავალი |
|---|---|---|
| არა ცივი წყალი | Cooling switch off; water bottle empty; dispenser unplugged; ventilation blocked. | Ensure cooling switch is on; replace water bottle; check power connection; clear ventilation. |
| ცხელი წყალი არ არის | Heating switch off; water bottle empty; dispenser unplugged. | Ensure heating switch is on; replace water bottle; check power connection. |
| წყლის გაჟონვა | Water bottle cracked or improperly seated; drain plug loose. | Replace water bottle; reseat bottle; tighten drain plug. |
| დისპენსერი ხმაურიანია | Normal compressor operation; dispenser not level. | This is normal during cooling cycles. Ensure dispenser is on a level surface. |
| Water has unusual taste | New dispenser (initial taste); old water bottle; dispenser needs cleaning. | Flush system thoroughly; replace water bottle; perform full cleaning. |
If the problem persists after attempting these solutions, please contact Oster customer service.
8. სპეციფიკაციები
| ფუნქცია | დეტალი |
|---|---|
| მოდელის ნომერი | OS-WDA3200 |
| ბრენდი | ოსტერი |
| ფერი | თეთრი |
| მასალა | პლასტიკური |
| ზომები (L x W x H) | 26 x 33 x 101 სმ (10.2 x 13 x 39.8 ინჩი) |
| წონა | 13.2 კგ (29.1 ფუნტი) |
| ტtage | 120 ვოლტი |
| ინსტალაციის ტიპი | სართული მდგომი |
9. გარანტია და მხარდაჭერა
For warranty information, technical support, or service inquiries, please refer to the warranty card included with your product or visit the official Oster webსაიტი. შეინახეთ თქვენი შესყიდვის ქვითარი შეძენის დასადასტურებლად.


