1. შესავალი
The Vaddio EasyIP 10 Camera is a key component of the EasyIP Ecosystem, designed for high-quality videoconferencing in various room sizes. This camera delivers 1080p/60 resolution video feeds and integrates seamlessly into an AV-over-IP solution. It connects to a 1 GB PoE+ switch, simplifying installation by eliminating the need for separate power supplies and costly USB extensions. This manual provides essential information for the proper setup, operation, and maintenance of your EasyIP 10 Camera.
2. პროდუქტი დასრულდაview
The EasyIP 10 Camera is a Power over Ethernet (PoE+) enabled Pan-Tilt-Zoom (PTZ) camera. It is optimized for use within the Vaddio EasyIP Ecosystem, providing high-definition video capture for unified communications (UC) soft clients.
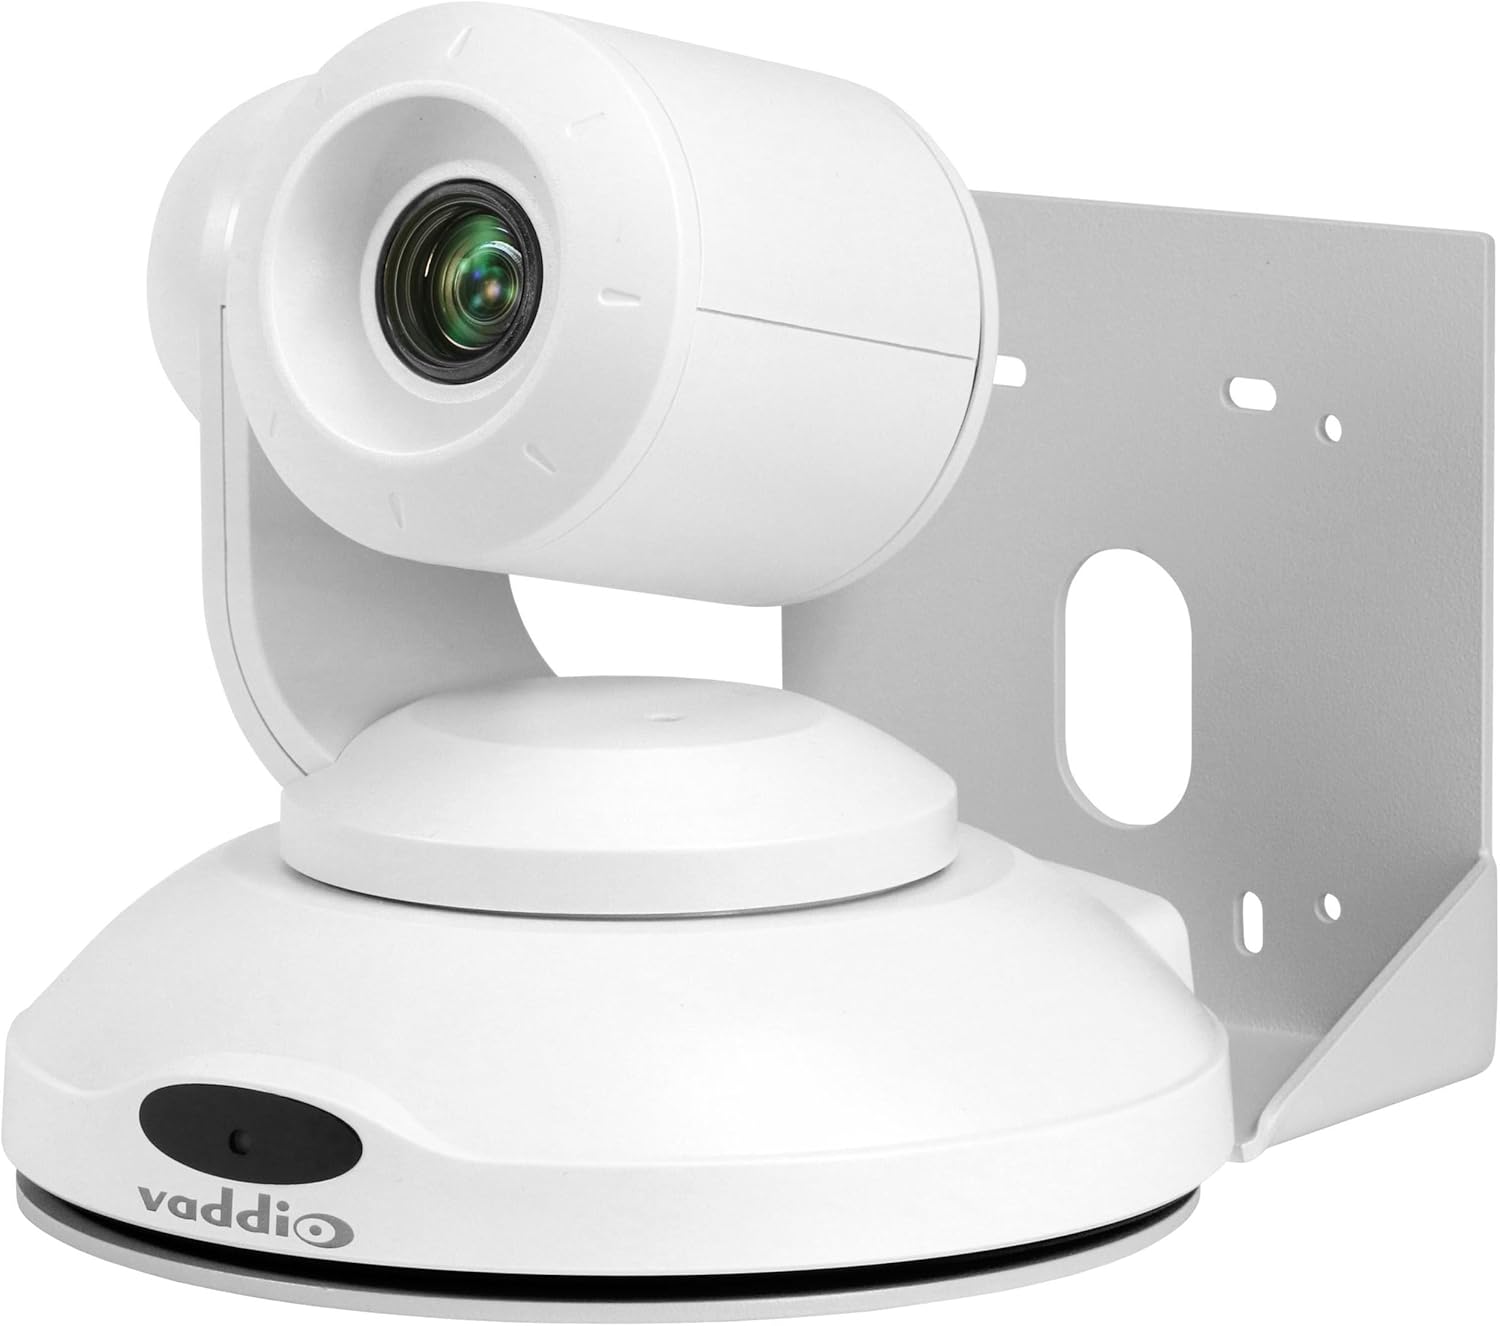
სურათი 1: Vaddio EasyIP 10 PoE PTZ Camera. This image shows the white dome-shaped camera with its lens visible, mounted on a bracket, and the Vaddio logo on its base.
ძირითადი მახასიათებლები:
- HD PTZ camera with 10x optical zoom.
- 67-გრადუსიანი ჰორიზონტალური ველი view.
- Controlled via an intuitive browser-based user interface from the EasyIP Decoder.
- One EasyIP (Network PoE+) video output.
- Supports up to two EasyIP Decoders simultaneously.
- PoE+ powered, requiring a single Ethernet cable for power and data.
3. დაყენება და ინსტალაცია
3.1 Package Contents (Typical):
- Vaddio EasyIP 10 Camera
- Mounting bracket (for wall or ceiling installation)
- სამონტაჟო აპარატურა
- Quick Start Guide (refer to Vaddio's official website for full documentation)
3.2 კამერის დამონტაჟება:
- აირჩიეთ ადგილმდებარეობა: Choose a suitable indoor location for the camera, considering the desired field of view and proximity to a network switch. The camera supports wall mount installation.
- უსაფრთხო სამაგრი: Attach the provided mounting bracket securely to the chosen surface using appropriate hardware. Ensure the bracket is level and can support the camera's weight.
- კამერის მიმაგრება: Carefully attach the EasyIP 10 Camera to the mounted bracket. Follow the specific instructions provided with the mounting hardware to ensure a stable connection.
3.3 Connecting the Camera:
- ქსელთან კავშირი: Connect a standard Ethernet cable from the camera's network port to a 1 GB PoE+ (Power over Ethernet Plus) switch. The PoE+ connection provides both power and data to the camera.
- Switch Compatibility: The camera is optimized to work with the Luxul AMS-1208P Managed PoE Switch but is compatible with other properly configured 1 GB PoE switches. Ensure your switch meets the PoE+ (802.3at) standard for adequate power delivery.
- სისტემის ინტეგრაცია: Integrate the camera into your EasyIP Ecosystem by connecting the PoE+ switch to the EasyIP Decoder.
4. კამერის მართვა
4.1 ჩართვა:
Once connected to a PoE+ switch, the camera will power on automatically. Allow a few moments for the camera to initialize and connect to the network.
4.2 Accessing Controls:
The EasyIP 10 Camera is controlled via an intuitive browser-based user interface accessible through the EasyIP Decoder. Refer to your EasyIP Decoder manual for detailed instructions on accessing and navigating this interface.
4.3 Pan-Tilt-Zoom (PTZ) Functions:
From the browser interface, you can control the camera's pan, tilt, and zoom functions to adjust the field of view. The camera features 10x optical zoom for detailed imaging.
4.4 Video Output:
The camera sends 1080p/60 resolution video feeds to the EasyIP Ecosystem. These feeds are then delivered to UC soft clients through the EasyIP Decoder. The camera supports simultaneous output to up to two EasyIP Decoders.
5. მოვლა
Regular maintenance ensures optimal performance and longevity of your EasyIP 10 Camera.
- დასუფთავება: Gently wipe the camera's exterior and lens with a soft, dry, lint-free cloth. Avoid abrasive cleaners or solvents.
- Firmware განახლებები: Periodically check the Vaddio website for firmware updates. Keeping the firmware current ensures access to the latest features and performance improvements. Follow the instructions provided by Vaddio for any update procedures.
- გარემო პირობები: Ensure the camera operates within its specified environmental conditions (temperature, humidity) to prevent damage. The camera is designed for indoor use.
6. Დიაგნოსტიკა
This section addresses common issues you might encounter with your EasyIP 10 Camera.
6.1 No Power/No Video:
- შეამოწმეთ PoE+ კავშირი: Ensure the Ethernet cable is securely connected to both the camera and a PoE+ enabled switch.
- Verify Switch: Confirm that the network switch is powered on and that the port connected to the camera is providing PoE+ power (802.3at).
- ქსელის კონფიგურაცია: Verify that the network is properly configured and that the camera can obtain an IP address.
6.2 Camera Not Responding to Controls:
- ქსელთან დაკავშირება: Ensure the camera has a stable network connection to the EasyIP Decoder.
- Decoder Status: Check the status of your EasyIP Decoder to ensure it is functioning correctly.
- ბრაუზერის ინტერფეისი: Refresh the browser interface or try accessing it from a different device to rule out browser-specific issues.
6.3 Poor Video Quality:
- ლინზის სისუფთავე: გაწმინდეთ კამერის ლინზა, როგორც ეს აღწერილია მოვლა-პატრონობის განყოფილებაში.
- განათების პირობები: Ensure adequate lighting in the camera's field of view.
- ქსელის გამტარუნარიანობა: Verify that your network has sufficient bandwidth to support 1080p/60 video streaming.
For persistent issues, consult the full Vaddio EasyIP Ecosystem documentation or contact Vaddio technical support.
7. სპეციფიკაციები
| ფუნქცია | დეტალი |
|---|---|
| მოდელის ნომერი | EasyIP 10 კამერა |
| ბრენდი | ვადიო |
| ვიდეო გადაღების გარჩევადობა | 1080p (ეფექტური 1080 პიქსელი) |
| ოპტიკური ზუმი | 10x |
| სფერო View (Ჰორიზონტალური) | 67 გრადუსი |
| დაკავშირების ტექნოლოგია | სადენიანი (Ethernet) |
| დაკავშირების პროტოკოლი | Ethernet (PoE+) |
| დენის წყარო | ჩართვა Ethernet Plus-ზე (PoE+) |
| ფორმის ფაქტორი | გუმბათი |
| სამონტაჟო ტიპი | კედლის სამაგრი |
| ფერი | თეთრი |
| ზომები (L x W x H) | 19.69 x 19.69 x 11.02 ინჩი |
| ნივთის წონა | 8.01 ფუნტი (128.15 უნცია) |
| შიდა/გარე გამოყენება | შიდა |
| UPC | 840077505950 |
8. გარანტია და მხარდაჭერა
For detailed warranty information and technical support, please refer to the official Vaddio website or contact your authorized Vaddio dealer. Keep your purchase receipt for warranty claims.
Vaddio Official Webსაიტი: www.vaddio.com


