1. შესავალი
Thank you for choosing the CREATE SILKAIR CONNECT 3-in-1 Mobile Air Conditioner. This versatile appliance is designed to provide cooling, dehumidification, and fan functions for your living space. With its Wi-Fi connectivity, you can conveniently control the unit via a mobile application. Please read this manual thoroughly before operation to ensure safe and efficient use.
მოდელი: 64274_145198
ბრენდი: შექმნა
2. უსაფრთხოების ინფორმაცია
ელექტრომოწყობილობების გამოყენებისას ყოველთვის დაიცავით უსაფრთხოების ძირითადი ზომები, რათა შეამციროთ ხანძრის, ელექტროშოკის და დაზიანებების რისკი.
- დარწმუნდით, რომ კვების წყარო ემთხვევა მოცtage მითითებულია რეიტინგის ეტიკეტზე.
- არ გამოიყენოთ მოწყობილობა დაზიანებული სადენით ან შტეფსით.
- შეინახეთ მოწყობილობა სითბოს წყაროებისა და მზის პირდაპირი სხივებისგან შორს.
- არ დაბლოკოთ ჰაერის შესასვლელი ან გასასვლელი.
- გაწმენდის ან მოვლა-პატრონობის წინ ყოველთვის გამორთეთ მოწყობილობა დენის წყაროდან.
- ეს მოწყობილობა იყენებს R290 მაცივარ აგენტს. არ გახვრიტოთ მაცივრის წრედი.
- ზედამხედველობა გაუწიეთ ბავშვებს და დარწმუნდით, რომ ისინი არ თამაშობენ მოწყობილობასთან.
3. პაკეტის შიგთავსი
Carefully unpack your air conditioner and check that all items are present and in good condition.
- CREATE SILKAIR CONNECT Mobile Air Conditioner Unit
- გამოსაბოლქვი შლანგი
- Window Sealing Kit (Adjustable window slider, hose adapter)
- დისტანციური მართვა
- მომხმარებლის სახელმძღვანელო

Figure 1: The CREATE SILKAIR CONNECT Mobile Air Conditioner unit shown alongside a smartphone displaying its control application interface.
4. პროდუქტი დასრულდაview
4.1 მართვის პანელი

Figure 2: Close-up of the top-mounted control panel, featuring an LED display and touch-sensitive buttons for various functions such as power, mode selection, fan speed, and timer.
4.2 კომპონენტები და ზომები
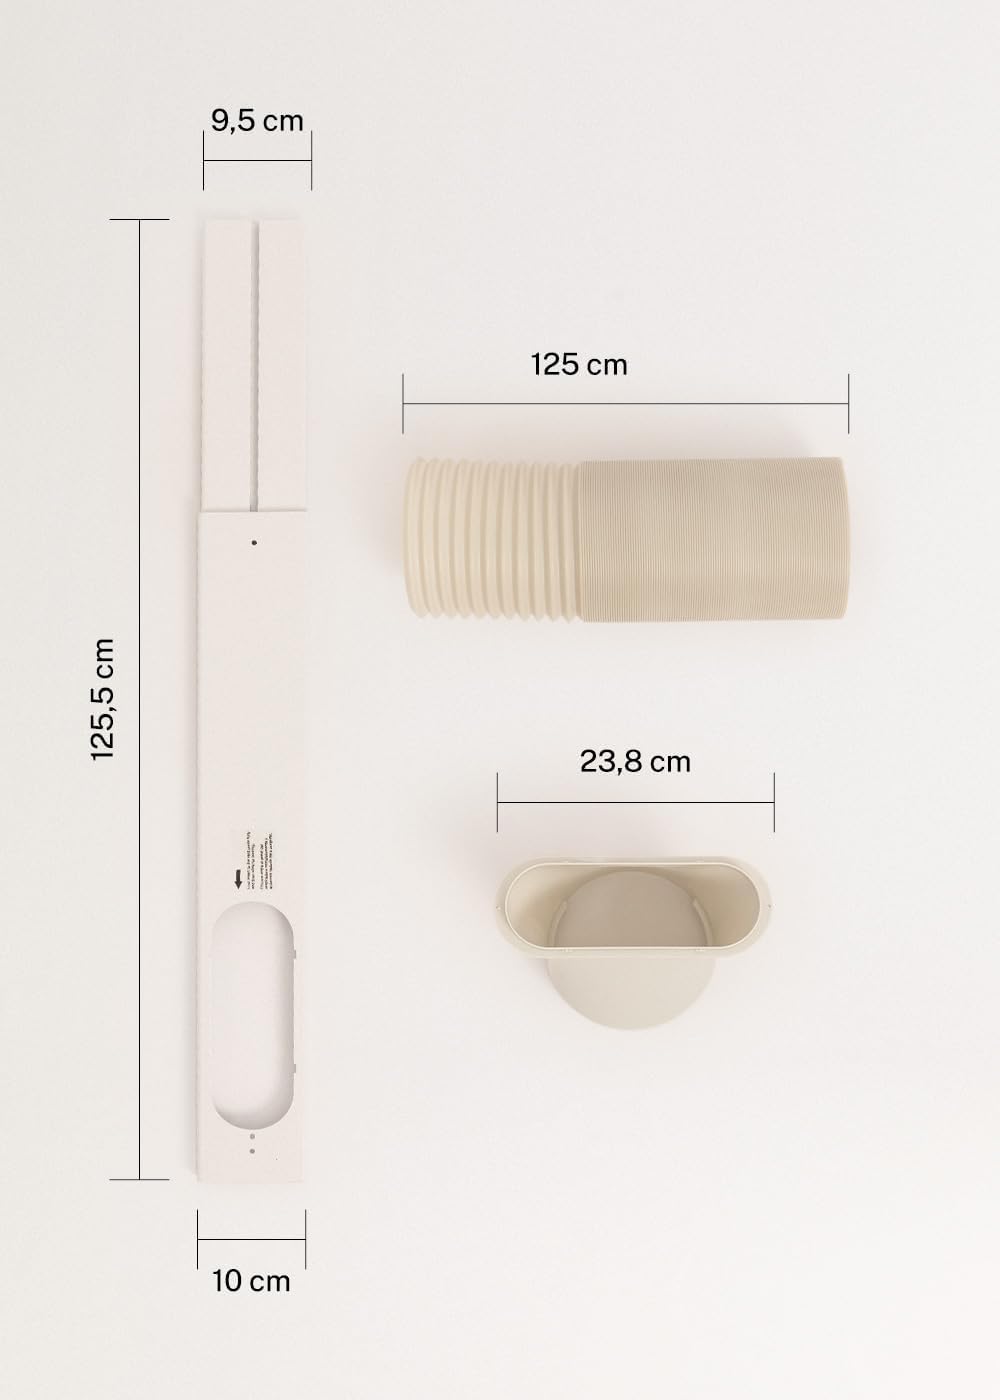
Figure 3: Detailed diagram illustrating the dimensions of the window sealing plate (125.5 cm length, 10 cm width, 9.5 cm adjustable width) and the exhaust hose (125 cm length) with its adapter (23.8 cm diameter).
5. დაყენება და ინსტალაცია
Proper installation is crucial for the efficient operation of your mobile air conditioner.
5.1 განყოფილების განლაგება
- განათავსეთ დანადგარი ბრტყელ, სტაბილურ ზედაპირზე.
- Ensure there is at least 30 cm of space around the unit for proper airflow.
- მოათავსეთ მოწყობილობა ფანჯარასთან ან გამონაბოლქვი შლანგის ღიობთან ახლოს.
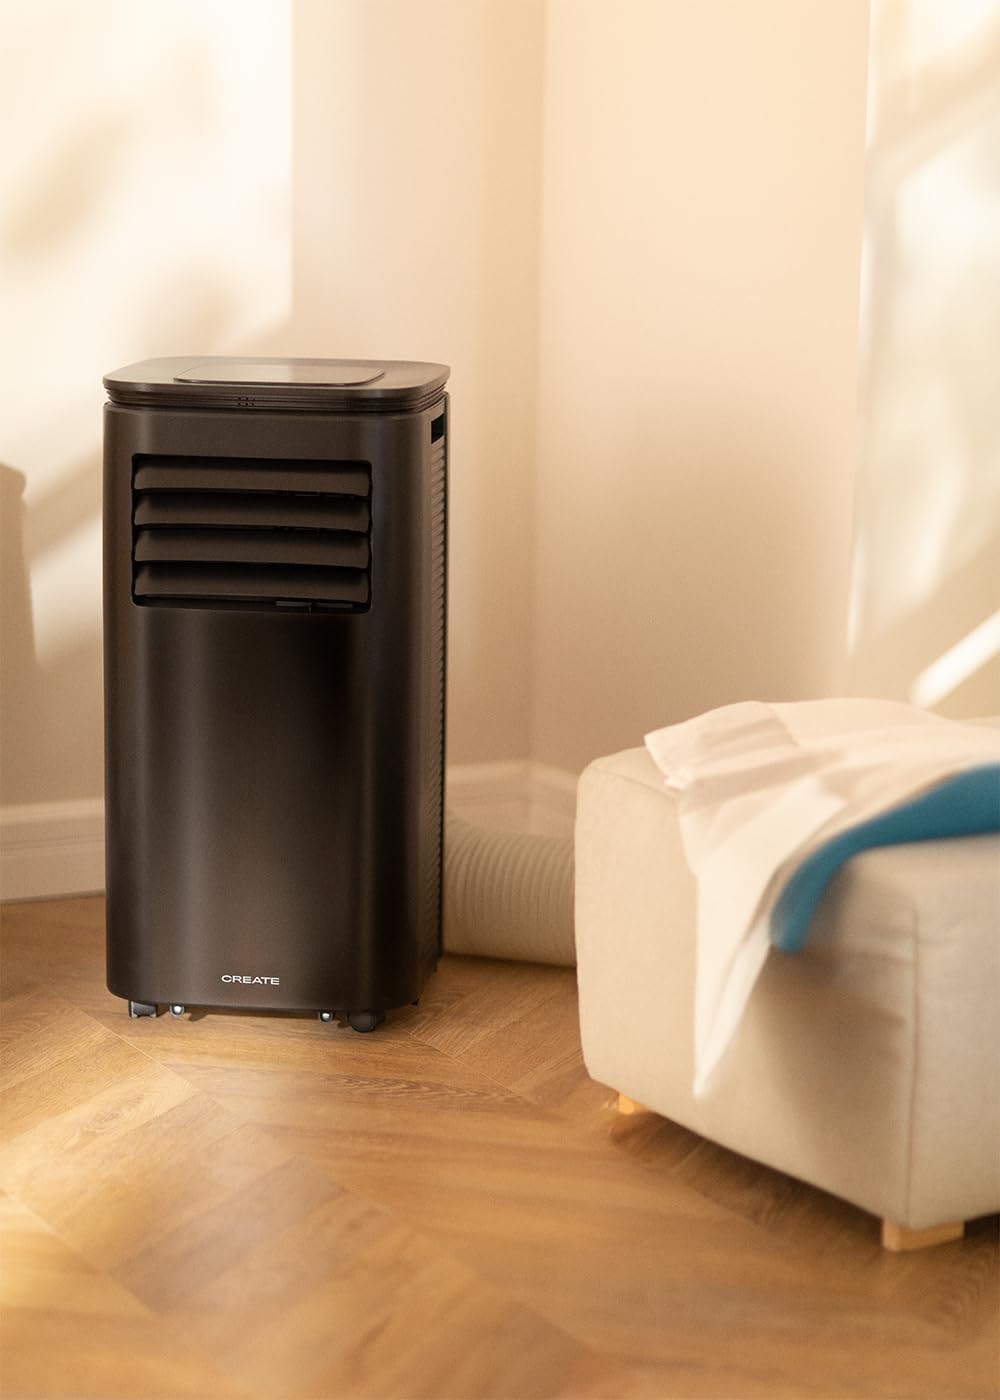
Figure 4: The air conditioner unit positioned in a room, demonstrating the typical setup with the exhaust hose directed towards a window for heat expulsion.
5.2 Installing the Exhaust Hose and Window Kit
- Attach the hose adapter to one end of the exhaust hose.
- Connect the other end of the exhaust hose to the air outlet on the back of the unit.
- Install the adjustable window sealing kit in your window opening. Extend it to fit the window frame.
- Insert the hose adapter into the opening of the window sealing kit.

Figure 5: Illustrates the secure connection of the flexible exhaust hose to the designated port at the rear of the air conditioning unit.
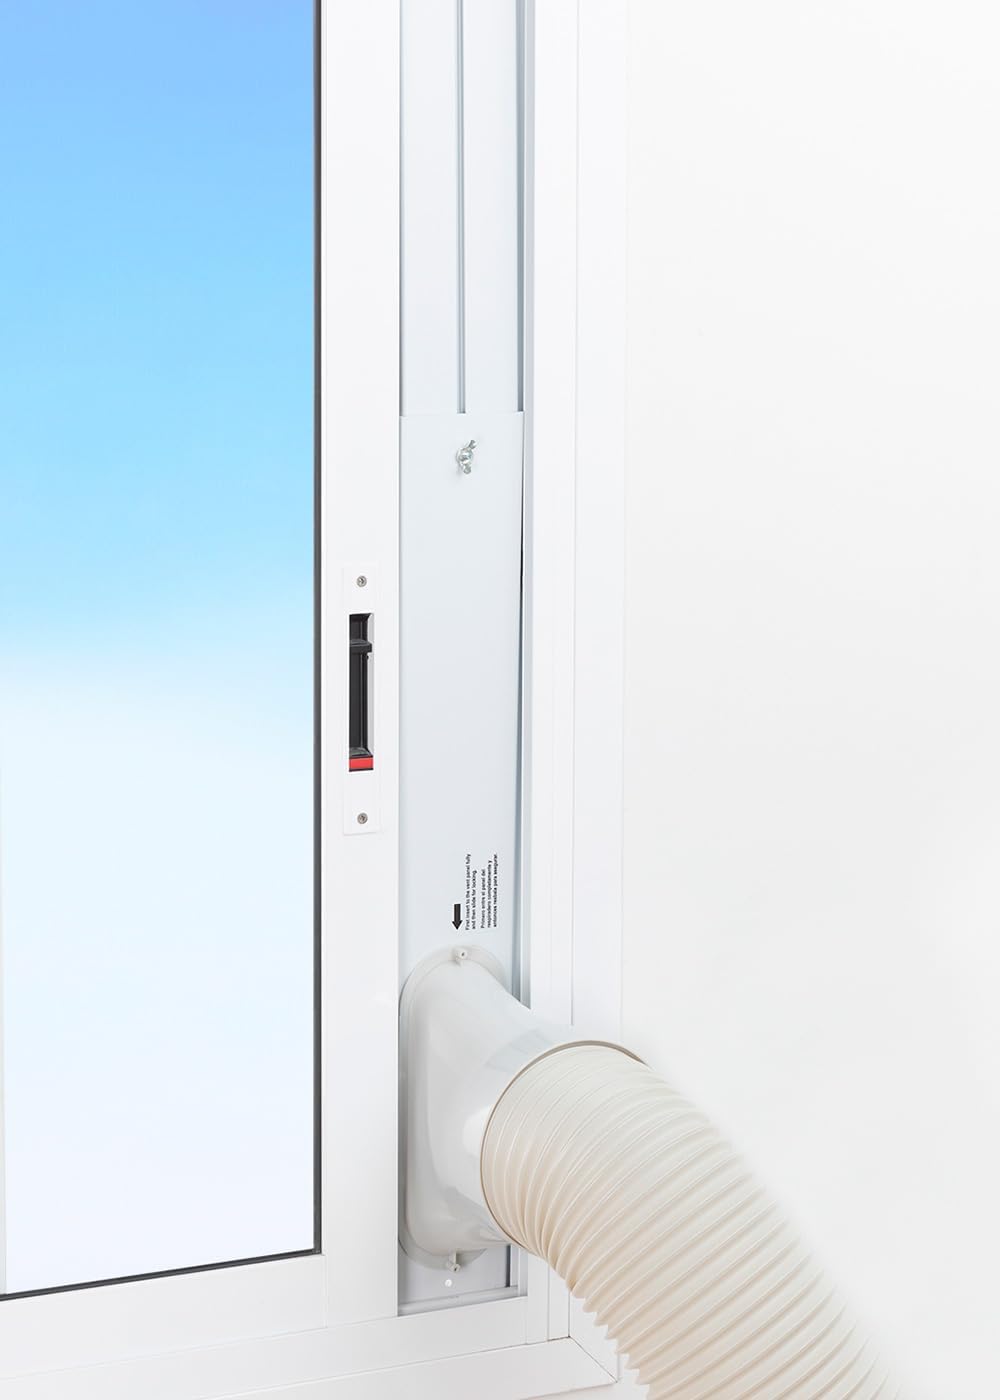
Figure 6: The window sealing kit is shown properly installed in a window frame, with the exhaust hose securely fitted into the kit's opening to vent hot air outside.
6. საოპერაციო ინსტრუქციები
6.1 საკონტროლო პანელის გამოყენებით
The control panel on top of the unit allows direct operation.
- დენის ღილაკი: დააჭირეთ ერთეულის ჩართვის ან გამორთვისთვის.
- რეჟიმის ღილაკი: Cycle through Cooling, Fan, and Dehumidifier modes.
- ვენტილატორის სიჩქარის ღილაკი: Adjust fan speed (Low, High).
- ტემპერატურის ღილაკები (+/-): Adjust desired temperature in Cooling mode.
- ტაიმერის ღილაკი: Set the auto-on or auto-off timer (up to 24 hours).
- ძილის რეჟიმის ღილაკი: Activates a quieter operation mode for nighttime use.
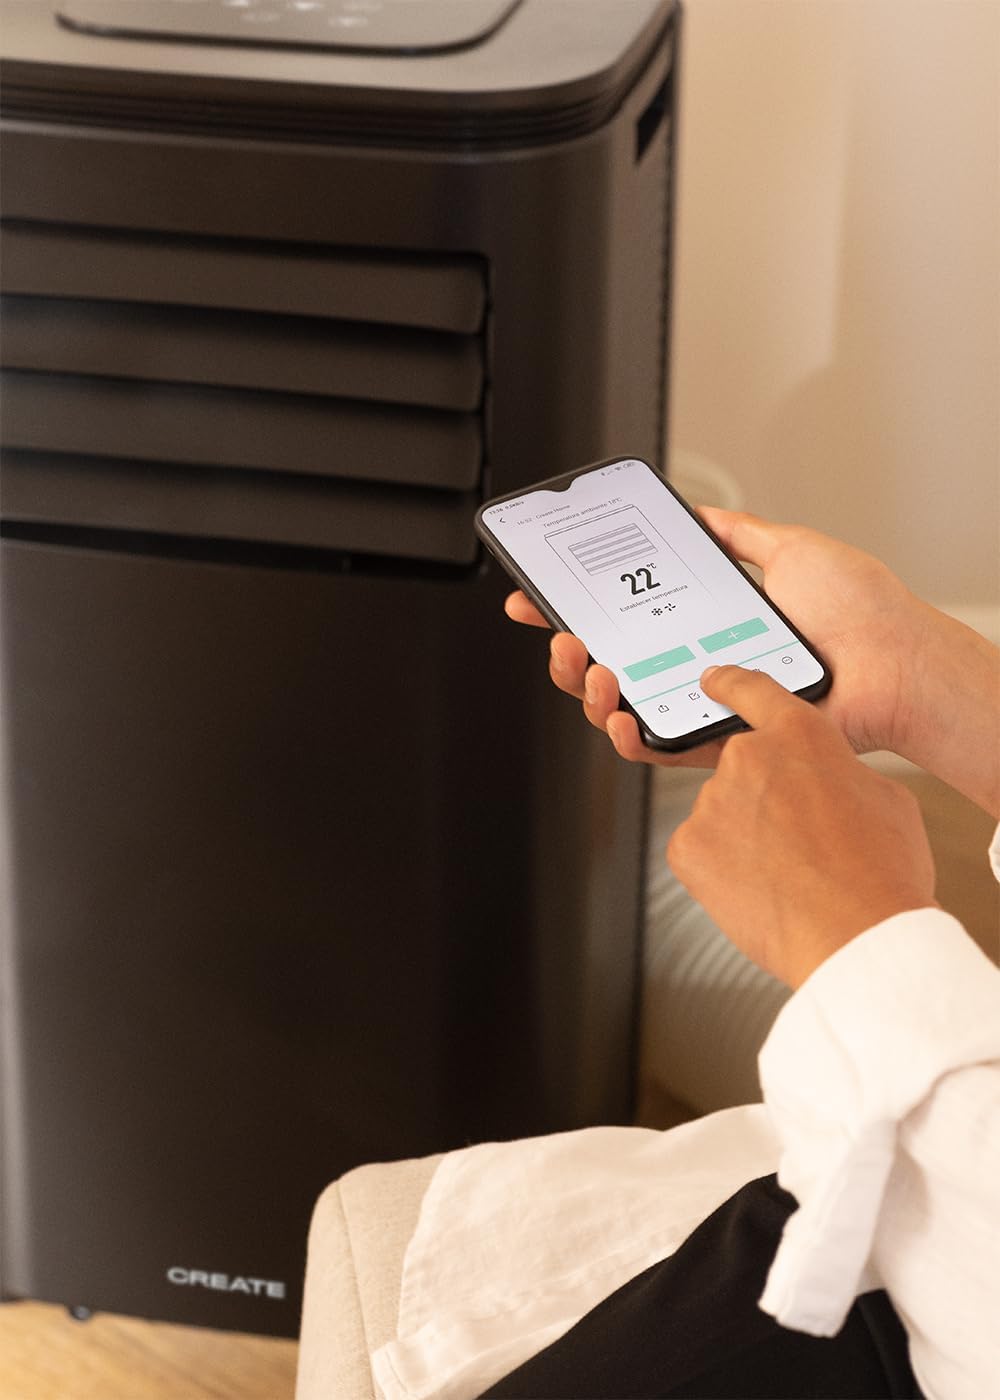
Figure 7: A user's hand interacting with the touch-sensitive control panel located on the top surface of the air conditioner, demonstrating direct manual operation.
6.2 დისტანციური მართვის გამოყენებით
The remote control provides convenient operation from a distance.

Figure 8: A hand holding the dedicated remote control for the air conditioner, illustrating its use for convenient operation from a distance.
6.3 Wi-Fi და აპლიკაციების კონტროლი
Download the CREATE Home app from your smartphone's app store. Follow the in-app instructions to connect your air conditioner to your home Wi-Fi network. Once connected, you can control all functions of the unit from your smartphone, including mode selection, temperature adjustment, fan speed, and timer settings.
Figure 9: A user interacting with the mobile application on a smartphone to remotely control the air conditioner, showcasing the Wi-Fi connectivity feature.
7. მოვლა
რეგულარული მოვლა უზრუნველყოფს ოპტიმალურ მუშაობას და ახანგრძლივებს თქვენი მოწყობილობის სიცოცხლის ხანგრძლივობას.
7.1 ჰაერის ფილტრის გაწმენდა
ჰაერის ფილტრი უნდა გაიწმინდოს ორ კვირაში ერთხელ ან უფრო ხშირად, გამოყენებისა და ჰაერის ხარისხის მიხედვით.
- გამორთეთ მოწყობილობა და გამორთეთ იგი დენის წყაროდან.
- Locate the air filter panel on the back of the unit.
- ნაზად ამოიღეთ ფილტრი.
- Clean the filter with warm, soapy water or a vacuum cleaner. Rinse thoroughly and allow it to air dry completely before reinserting.

Figure 10: Demonstrates the process of removing the air filter from the rear of the air conditioner unit for cleaning or replacement.
7.2 წყლის დრენაჟი
In Dehumidifier mode or high humidity conditions, the internal water tank may fill up. The unit will stop operating when the tank is full. Drain the water from the drainage port at the bottom rear of the unit.
8. Დიაგნოსტიკა
| პრობლემა | შესაძლო მიზეზი | გამოსავალი |
|---|---|---|
| ერთეული არ ირთვება | No power; Power cord not plugged in; Water tank full. | Check power outlet; Plug in power cord; Drain water tank. |
| მოწყობილობა ეფექტურად არ აგრილებს | ჰაერის ფილტრი დაბინძურებულია; გამონაბოლქვი შლანგი არასწორად არის დამონტაჟებული; ოთახი ძალიან დიდია; კარები/ფანჯრები ღიაა. | Clean air filter; Ensure hose is sealed; Use in recommended room size (14-25 m²); Close doors/windows. |
| ხმამაღალი ხმაური | მოწყობილობა არ დგას ბრტყელ ზედაპირზე; ვენტილატორში დაბრკოლებაა. | Place on flat surface; Check for obstructions. |
| Wi-Fi კავშირის პრობლემები | არასწორი Wi-Fi პაროლი; როუტერი ძალიან შორს არის ჩასმული; აპლიკაციის პრობლემები. | Verify password; Move unit closer to router; Restart app/unit. |
9. სპეციფიკაციები
| ფუნქცია | სპეციფიკაცია |
|---|---|
| მოდელის ნომერი | 64274_145198 |
| გაგრილების სიმძლავრე | 9000 BTU / 2270 Watt |
| სიმშრალის ტევადობა | 24 ლიტრი/დღეში |
| ჰაერის ნაკადი | 350 მ³/სთ-მდე |
| ოთახის რეკომენდებული ზომა | 14-25 მ² |
| ხმაურის დონე | 65 დბ |
| მაცივარი | R290 (ECO-friendly) |
| ტtage | 240 ვოლტი |
| ვატtage | 2600 ვატი |
| ზომები (L x W x H) | 35.5 x 36.5 x 71.3 სმ |
| მასალა | ABS |
| ენერგოეფექტურობის კლასი | A |

Figure 11: The energy efficiency label for the CREATE SILKAIR CONNECT, indicating an A-class energy rating, 2.6 kW cooling capacity, and a noise level of 65 dB. More details can be found at eprel.ec.europa.eu/qr/1580267.
10. გარანტია და მხარდაჭერა
გარანტიის შესახებ ინფორმაციისა და ტექნიკური მხარდაჭერისთვის, გთხოვთ, იხილოთ თქვენს პროდუქტთან ერთად მოწოდებული გარანტიის ბარათი ან ეწვიოთ CREATE-ის ოფიციალურ ვებგვერდს. webსაიტი. შეინახეთ თქვენი შესყიდვის ქვითარი შეძენის დასადასტურებლად.
მწარმოებელი: შექმნა
კონტაქტი: Refer to CREATE's official support channels.


