1. შესავალი
The Weber Genesis Smart SX-335 LP SS Liquid Propane Grill is designed to provide a comprehensive outdoor cooking experience. This manual provides essential information for the safe and efficient operation, maintenance, and troubleshooting of your new grill.

სურათი 1: Weber Genesis Smart SX-335 LP SS Liquid Propane Grill. This image shows the full grill unit with its stainless steel finish and black cabinet.
2. მნიშვნელოვანი უსაფრთხოების ინფორმაცია
გაფრთხილება: ამ ინსტრუქციების შეუსრულებლობამ შეიძლება გამოიწვიოს ხანძარი, აფეთქება ან დამწვრობის საშიშროება, რამაც შეიძლება გამოიწვიოს ქონების დაზიანება, პირადი დაზიანება ან სიკვდილი.
- გრილი ყოველთვის გარეთ, კარგად ვენტილირებად ადგილას გამოიყენეთ.
- არ შეინახოთ ან გამოიყენოთ ბენზინი ან სხვა აალებადი ორთქლები და სითხეები ამ ან სხვა მოწყობილობის სიახლოვეს.
- შეინახეთ მოწყობილობის ადგილი სუფთა და თავისუფალი აალებადი მასალებისგან, ბენზინისა და სხვა აალებადი ორთქლებისა და სითხეებისგან.
- არ შეაფერხოს წვის და ვენტილაციის ჰაერის ნაკადი.
- Keep any electrical supply cord and fuel supply hose away from heated surfaces.
- ყოველი გამოყენების წინ ყოველთვის შეამოწმეთ გაზის გაჟონვა.
- არასოდეს დატოვოთ გრილი უყურადღებოდ სამზარეულოს დროს.
- ყოველთვის მოარიდეთ ბავშვებს და შინაურ ცხოველებს გრილისგან.
- ატარეთ დამცავი ხელთათმანები ცხელ კომპონენტებთან მუშაობისას.
3. რა არის ყუთში
შენი Weber Genesis Smart SX-335 LP SS grill package includes the following components:
- Weber Genesis Smart SX-335 LP SS Gas Grill Unit
- Cooking Grates (porcelain-enameled cast iron)
- Flavorizer Bars
- Grease Management System (including drip tray and catch pan)
- Side Burner (integrated)
- Weber Connect Smart Grilling Hub (integrated)
- Propane Tank (sold separately, but required for operation)
- ინსტრუქციის სახელმძღვანელო

სურათი 2: Weber Genesis Smart SX-335 LP SS grill with its lid closed, showcasing the stainless steel finish and control panel.
4. დაყენება
4.1 შეკრება
Assembly of your Weber Genesis Smart SX-335 LP SS grill is required. For detailed, step-by-step interactive 3D instructions, download the free BILT app on your mobile device. This app provides visual guidance for each step of the assembly process.
Video 1: BILT App - Step by Step Interactive Assembly Instructions. This video demonstrates the interactive 3D assembly guide available through the BILT app for the Webერ. გენეზისი გრილი.
Ensure all parts are accounted for before beginning assembly. It is recommended to have a second person assist with assembly due to the size and weight of some components.
4.2 Connecting the Liquid Propane Tank
- დარწმუნდით, რომ სანთურის მართვის ყველა ღილაკი გამორთულია.
- Open the cabinet doors located beneath the grill.
- Place the liquid propane tank securely in the designated tank holder.
- Connect the regulator hose from the grill to the propane tank valve. Hand-tighten the connection firmly.
- Slowly open the propane tank valve fully.
- Check for any gas leaks using a soapy water solution on all connections. Bubbles indicate a leak. If a leak is detected, close the tank valve, tighten connections, and re-test. If the leak persists, do not use the grill and contact customer service.

Figure 3: A hand connecting the liquid propane tank to the grill's regulator hose inside the cabinet.
The grill cabinet features a hook that indicates the propane level by weight, helping you monitor remaining fuel.
4.3 საწყისი გაშვება
Before first use, operate the grill on high heat for 15 minutes with the lid closed to burn off any manufacturing residues. This process is called "seasoning" the grill.
5. საოპერაციო ინსტრუქციები
5.1 მთავარი სანთურების ანთება
- გახსენით გრილის სახურავი.
- დარწმუნდით, რომ პროპანის ავზის სარქველი სრულად ღიაა.
- Turn the leftmost main burner control knob to the START/HIGH position.
- დაუყოვნებლივ დააჭირეთ და ხანგრძლივად გააჩერეთ ელექტრონული ანთების ღილაკი სანთურის აალებამდე.
- Once the first burner is lit, turn on adjacent burners to the desired heat setting.
- If ignition does not occur within 5 seconds, turn the burner control(s) OFF, wait 5 minutes, and repeat the lighting procedure.

სურათი 4: ახლო ხედი Weber Genesis grill's control knobs, showing the ignition button and burner controls.
5.2 Temperature Control and Smart Features
The Weber Genesis Smart SX-335 LP SS features integrated Weber Connect smart technology for precise temperature monitoring. The digital display on the side table shows real-time food temperatures from connected probes.
- Weber Connect App: ჩამოტვირთეთ Weber Connect app to your smartphone for remote monitoring, temperature alerts, and flip & serve notifications.
- ზონდის მოცულობა: The grill supports up to 2 temperature probes for monitoring different food items simultaneously.
- Powering the Display: The grill display can be powered by plugging it into an electrical outlet or by using a USB-certified, 10,000mAh rechargeable power bank (sold separately) clipped under the side table.

სურათი 5: Weber Connect smart display on the grill's side table, showing temperature readings, alongside a smartphone displaying the Weber Connect app with temperature alerts.
5.3 Using the Sear Zone
The extra-large sear zone is designed for high-heat searing to achieve perfect grill marks and lock in juices. To activate the sear zone, turn the dedicated sear zone burner knob to the HIGH position. Allow it to preheat for 5-10 minutes before placing food directly over it.
5.4 Using the Side Burner
The integrated side burner allows you to sauté vegetables, boil corn, or heat up sauces while grilling. To light the side burner, open its cover, turn the control knob to the START/HIGH position, and press the electronic ignition button until it ignites.

სურათი 6: Weber Genesis grill with the side burner cover open, revealing the burner grate.
5.5 Weber Crafted Outdoor Kitchen Collection
Expand your culinary possibilities with the Weber Crafted Outdoor Kitchen Collection. By replacing a cooking grate with custom-fit grillware (sold separately), you can sear, roast, bake, steam, and stir-fry. The grill locker provides convenient storage for these accessories.

სურათი 7: Weber Crafted grillware frame installed in the grill, ready to accommodate various inserts.

Figure 8: A person stir-frying vegetables and rice in a wok insert on the Webერ. გენეზისი გრილი.
5.6 Cooking Techniques
- პირდაპირი სითბო: Use direct heat for searing, grilling smaller items, or cooking foods that require quick cooking.
- არაპირდაპირი სითბო: For larger cuts of meat, poultry, or delicate items, use indirect heat. Turn off the burners directly beneath the food and use adjacent burners to maintain the desired temperature. The expandable top cooking grate provides additional space for indirect cooking.

Figure 9: Two whole chickens cooking on the main grates, with temperature probes inserted, demonstrating indirect cooking.

Figure 10: Grilled shrimp, mixed vegetables in a basket, and toasted bread on the upper warming rack, illustrating diverse cooking options.
6. მოვლა
6.1 სამზარეულოს ბადეების გაწმენდა
After each use, while the grates are still warm, use a grill brush to scrape off any food residue. For a deeper clean, remove the grates and wash them with warm, soapy water.
6.2 ცხიმის მართვის სისტემა
The improved grease management system simplifies cleaning. Simply pull the grease tray out from the front of the grill and scrape away accumulated grease and debris. Replace the disposable catch pan as needed.
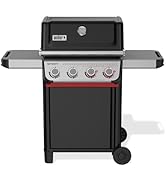
Figure 11: A hand demonstrating the removal and cleaning of the grease management system's pull-out tray.
6.3 გრილის საფარი
Protect your grill from the elements by using a weather-resistant grill cover when not in use. This helps prolong the life and appearance of your grill.
7. Დიაგნოსტიკა
| პრობლემა | შესაძლო მიზეზი | გამოსავალი |
|---|---|---|
| საწვავი ვერ აანთებს | გაზის ნაკადი არ არის, სანთურა გაჭედილია, ანთების სისტემა გაუმართავია. | Check propane tank connection and fuel level. Clean burner ports. Check igniter electrode. |
| არათანაბარი გათბობა | Clogged burner ports, low fuel, wind. | Clean burner ports. Ensure adequate fuel. Position grill away from strong winds. |
| დაბალი ალი ან ალის არარსებობა | Low fuel, regulator bypass, gas leak. | Check fuel level. Reset regulator by turning off all gas, disconnecting, waiting 1 minute, and reconnecting. Check for leaks. |
| Weber Connect display not working | No power, battery low (if using power bank). | Ensure plugged into outlet or power bank is charged and connected. |
For further assistance, refer to the full troubleshooting guide in your printed manual or contact Weber მომხმარებელთა მომსახურება.
8. სპეციფიკაციები
| ფუნქცია | დეტალი |
|---|---|
| ბრენდი | Weber |
| მოდელის სახელი | Genesis Smart SX-335 LP SS |
| საქონლის მოდელის ნომერი | 35600001 |
| პროდუქტის ზომები | 35.5"D x 31"W x 30.75"H |
| ნივთის წონა | 209 ფუნტი |
| ფერი | უჟანგავი ფოლადი |
| საწვავის ტიპი | თხევადი პროპანი (LP) |
| მთავარი სანთურების რაოდენობა | 3 |
| გათბობის სიმძლავრე | 13000 ბრიტანული თერმული ერთეული (BTU) |
| სამზარეულოს ზედაპირის ფართობი | 787 კვადრატული ინჩი |
| სპეციალური ფუნქცია | Grease Management System, Weber Connect Smart Technology, Sear Zone, Side Burner, Expandable Top Cooking Grate, Grill Locker |
| მასალა | უჟანგავი ფოლადი |
| საჭიროა შეკრება | დიახ |
9. გარანტია და მხარდაჭერა
The Weber Genesis Smart SX-335 LP SS Liquid Propane Grill comes with a 12 წლიანი შეზღუდული გარანტია. For detailed warranty information, please refer to the warranty card included with your product or visit the official Weber webსაიტი.
For customer support, technical assistance, or to order replacement parts, please visit the Weber მაღაზია Amazon-ზე ან კონტაქტი Weber directly through their official channels.
დაკავშირებული დოკუმენტები - SX-ჰიტები
 |
Weber Genesis S-335 LP გაზის გრილის აწყობის სახელმძღვანელო ყოვლისმომცველი აწყობის ინსტრუქციები WebGenesis S-335 LP თხევადი პროპანის გაზის გრილი. ეს სახელმძღვანელო გთავაზობთ დეტალურ ნაბიჯებს, ნაწილების სიას, ხელსაწყოების მოთხოვნებს და მნიშვნელოვან ინფორმაციას უსაფრთხოების შესახებ, ყველა შინაარსი კი ინგლისურ ენაზეა წარმოდგენილი გარკვევისა და ხელმისაწვდომობისთვის. |
 |
Weber Genesis E-325, E-335, EP-335 სწრაფი დაწყების სახელმძღვანელო: ბარბექიუს მომზადების ინსტრუქცია ეს სწრაფი დაწყების სახელმძღვანელო გთავაზობთ აუცილებელ ინსტრუქციებს WebGenesis E-325, E-335 და EP-335 მწვადები. შეისწავლეთ პირდაპირი და არაპირდაპირი მომზადების მეთოდები, გაიგეთ სანთურის პარამეტრები და გამოიყენეთ აქსესუარები ოპტიმალური გრილზე შეწვისა და შეწვის შედეგისთვის. მოიცავს ხატულების ლეგენდებს და მომზადების ცხრილებს. |
 |
WebGenesis II EX-335 SX-335-ის აწყობის სახელმძღვანელო ყოვლისმომცველი აწყობის სახელმძღვანელო Weber Genesis II EX-335 and SX-335 LP gas grills, providing step-by-step instructions, safety tips, and essential setup information for a successful build. |
 |
WebGenesis II EX-335 SX-335-ის აწყობის სახელმძღვანელო ყოვლისმომცველი აწყობის სახელმძღვანელო WebGenesis II EX-335 და SX-335 პროპანის გაზის გრილები. მოყვება ეტაპობრივი ინსტრუქციები და ნაწილების სია. |
 |
Weber Genesis II EX-335 / SX-335 მფლობელის სახელმძღვანელო - გრილის სახელმძღვანელო ყოვლისმომცველი მფლობელის სახელმძღვანელო WebGenesis II EX-335 და SX-335 გაზის გრილები. გაეცანით GS4 გრილის სისტემას, WEBER CONNECT technology, safety, installation, operation, maintenance, and troubleshooting for optimal outdoor cooking. |
 |
Weber Genesis E-315/E-415 LP აწყობის სახელმძღვანელო ყოვლისმომცველი ეტაპობრივი ინსტრუქციები შეკრებისთვის WebGenesis E-315 და E-415 LP გაზის გრილები, მათ შორის ნაწილების იდენტიფიკაცია, აწყობის პროცედურები და მნიშვნელოვანი ინფორმაცია აწყობამდე და აწყობის შემდეგ. |