1. შესავალი
Thank you for choosing the AONIMI 42800mAh Solar Charger Power Bank. This robust and versatile portable charger is designed to keep your devices powered in various environments, especially outdoors. Featuring a massive 42800mAh capacity, multiple output ports, and an integrated LED flashlight, it is an ideal companion for camping, hiking, travel, and daily use. This manual provides essential information on how to safely and effectively use and maintain your power bank.
2. უსაფრთხოების ინფორმაცია
Please read all safety instructions carefully before using the product to ensure safe and optimal performance.
- Do not expose the power bank to extreme temperatures (above 60°C/140°F) or direct sunlight for prolonged periods, as this may damage the battery.
- Avoid dropping, disassembling, or attempting to repair the device yourself. Refer to qualified service personnel for any repairs.
- Keep the power bank away from water, moisture, and flammable materials. While it is IP67 waterproof, prolonged submersion is not recommended.
- The solar charging feature is intended for emergency use only. For daily charging, always use a wall adapter and cable to ensure efficient and complete charging.
- This power bank features a built-in intelligent chip that protects against over-discharge, over-charge, short-circuit, and overheating.
- Use only certified charging cables and adapters to prevent damage to the power bank and connected devices.

Figure 2.1: Superior Safety Protection features of the power bank.
3. პაკეტის შიგთავსი
გთხოვთ, შეამოწმოთ შეფუთვა შემდეგი ნივთებისთვის:
- 1 x AONIMI 42800mAh Solar Charger Power Bank
- 1 x USB-C დამტენი კაბელი
- 1 x მომხმარებლის სახელმძღვანელო (ეს დოკუმენტი)

სურათი 3.1: პროდუქტის შეფუთვაში შემავალი შიგთავსი.
4. პროდუქტი დასრულდაview
The AONIMI Solar Charger Power Bank is designed for durability and multi-device compatibility. It features a large solar panel on one side for emergency charging and multiple output ports for various devices.

სურათი 4.1: წინა view of the AONIMI Solar Charger Power Bank.
ძირითადი კომპონენტები:
- მზის პანელი: Located on the top surface, used for emergency solar charging.
- USB-A გამომავალი პორტები (x4): Standard USB ports for charging most mobile devices.
- USB-C Input/Output Port (x1): A versatile port for both charging the power bank and charging compatible devices with Power Delivery (PD).
- LED ინდიკატორები: Display the remaining battery capacity and charging status.
- LED ფანარი: Integrated high-brightness flashlight for illumination.
- დენის ღილაკი: Activates the power bank and controls the flashlight.
5. დაყენება
Before first use, it is crucial to fully charge your AONIMI Solar Charger Power Bank using a wall adapter.
საწყისი დატენვა:
- Connect the provided USB-C cable to the USB-C port on the power bank.
- Plug the other end of the USB-C cable into a compatible USB wall adapter (not included).
- შეაერთეთ კედლის ადაპტერი დენის განყოფილებაში.
- The LED indicators will light up, showing the charging progress. All four LEDs will be solid when fully charged.
- Allow the power bank to charge completely before its first use. This ensures optimal battery performance and longevity.

Figure 5.1: Primary charging method via USB wall adapter (left) versus emergency solar charging (right).
6. საოპერაციო ინსტრუქციები
6.1 გარე მოწყობილობების დატენვა
The power bank can charge up to five devices simultaneously using its multiple output ports.
- შეაერთეთ თქვენი მოწყობილობის დამტენი კაბელი ერთ-ერთ USB-A გამომავალ პორტთან ან USB-C შემავალ/გამომავალ პორტთან პაუერბანკზე.
- შეაერთეთ კაბელის მეორე ბოლო თქვენს მობილურ მოწყობილობასთან.
- პაუერბანკი ავტომატურად დაიწყებს თქვენი მოწყობილობის დატენვას. LED ინდიკატორები აჩვენებს ბატარეის დარჩენილ დონეს.
- დატენვის შესაჩერებლად, უბრალოდ გამორთეთ მოწყობილობა.
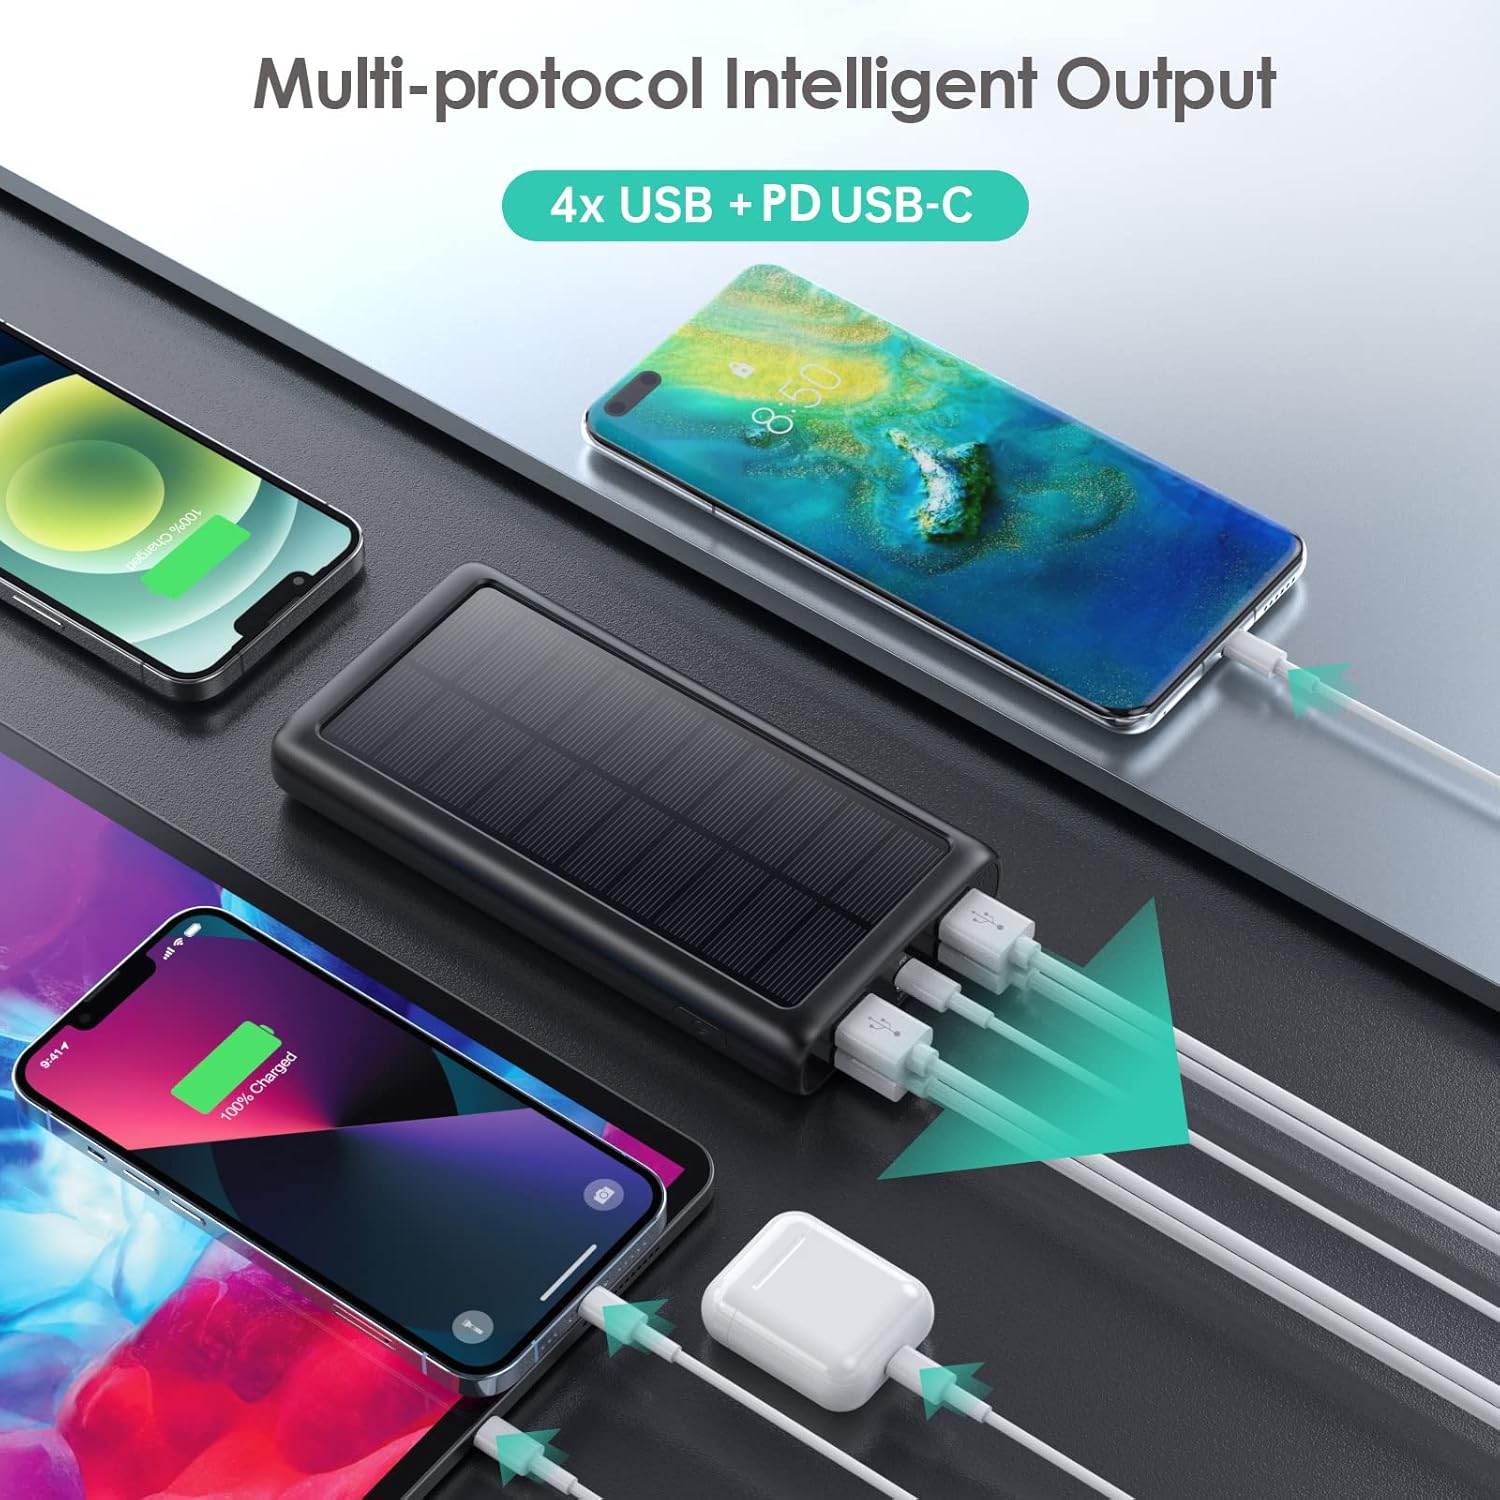
სურათი 6.1: ერთდროულად რამდენიმე მოწყობილობის დატენვა.
6.2 პაუერ ბანკის დატენვა
There are two ways to recharge your power bank:
A. Via USB-C Wall Adapter (Recommended)
This is the fastest and most efficient way to charge the power bank.
- Connect the USB-C cable to the power bank's USB-C port and a compatible wall adapter.
- The LED indicators will flash to show charging status and become solid when fully charged.
B. Via Solar Panel (Emergency Use Only)
The solar panel is designed for emergency power replenishment when no other power source is available. Due to variations in sunlight intensity and conversion rates, solar charging is significantly slower than wall charging.
- Place the power bank in direct sunlight. Ensure the solar panel is facing the sun.
- A green indicator light will illuminate to confirm solar charging is active.
- The LED battery indicators will show slow charging progress.
6.3 LED ფანრის გამოყენება
The integrated LED flashlight is a useful feature for outdoor activities or emergencies.
- ფანრის ჩასართავად: ორჯერ სწრაფად დააჭირეთ ჩართვის ღილაკს.
- რეჟიმებს შორის გადართვისთვის: Once the flashlight is on, single-press the power button to switch between Strong Light, SOS, and Strobe modes.
- To turn off the flashlight: ორჯერ სწრაფად დააჭირეთ ჩართვის ღილაკს კიდევ ერთხელ.

Figure 6.2: The LED flashlight in use, demonstrating its various modes.
7. მოვლა
Proper care and maintenance will extend the lifespan of your power bank.
- დასუფთავება: გაწმინდეთ პაუერბანკი რბილი, მშრალი ქსოვილით. არ გამოიყენოთ უხეში ქიმიკატები ან აბრაზიული საწმენდები.
- შენახვა: Store the power bank in a cool, dry place away from direct sunlight and extreme temperatures. If storing for long periods, charge it to about 50-75% capacity every 3 months to prevent battery degradation.
- გამძლეობა: The power bank is IP67 rated, meaning it is protected against dust ingress and can withstand immersion in water up to 1 meter for 30 minutes. It is also shockproof. However, avoid intentional abuse or prolonged exposure to harsh conditions.

Figure 7.1: The power bank's IP67 waterproof, dustproof, and shockproof capabilities.
8. Დიაგნოსტიკა
If you encounter issues with your power bank, please refer to the following common problems and solutions:
| პრობლემა | შესაძლო მიზეზი | გამოსავალი |
|---|---|---|
| Power Bank არ იტენება | Loose cable connection; faulty cable/adapter; power bank fully discharged. | Ensure cables are securely connected. Try a different USB-C cable and wall adapter. If fully discharged, it may take longer to initiate charging. |
| Devices not charging from power bank | Power bank is out of charge; loose cable connection; incompatible device. | Recharge the power bank. Ensure device charging cable is securely connected. Verify device compatibility (most USB/Type-C charged devices are supported). |
| Solar charging is very slow | Solar charging is an emergency feature; low sunlight intensity; panel not in direct sun. | This is normal. Solar charging is significantly slower than wall charging. Ensure the panel is in direct, strong sunlight. Use wall charging for primary power. |
| ფანარი არ მუშაობს | Incorrect operation; power bank is out of charge. | Double-press the power button quickly to activate. Ensure the power bank has sufficient charge. |
9. სპეციფიკაციები
| ფუნქცია | სპეციფიკაცია |
|---|---|
| მოდელის ნომერი | HX200K3 |
| ბატარეის ტევადობა | 42800 mAh |
| შეყვანა (ტიპი-C) | 5V/3A |
| შეყვანა (მზის პანელი) | Emergency power sources only |
| გამომავალი (ტიპი-C) | 5V/3A |
| გამომავალი (USB-A x4) | 5V/2.1A (each) |
| ზომები | 16 x 8.23 x 2.54 სმ (5.91 x 2.95 x 0.6 ინჩი) |
| წონა | 372 გ |
| წყალგაუმტარი რეიტინგი | IP67 |
| განსაკუთრებული თვისებები | LED Flashlight (Strong, SOS, Strobe), Multi-Protection System |
10. გარანტია და მხარდაჭერა
AONIMI is committed to providing high-quality products and excellent customer service.
- This product comes with lifetime technical support.
- For any questions, concerns, or technical assistance, please contact AONIMI customer service.
- Please refer to your purchase platform or product packaging for specific warranty details and contact information.
