1. შესავალი
This manual provides detailed instructions for the installation, operation, and maintenance of the Turing TP-MFD4A28 Smart Series 4MP IR Dome IP Camera. This camera features 4-megapixel resolution, TwilightVision technology for optimal low-light performance, Smart IR up to 30 meters (98 feet), and robust IP67 and IK10 ratings for outdoor and vandal-resistant use. It supports Power over Ethernet (PoE) and a 256GB MicroSD card for local storage.
ძირითადი მახასიათებლები მოიცავს:
- Max. 4MP (2688x1520) resolution at 30/25fps
- 2.8 მმ ფიქსირებული ობიექტივი
- TwilightVision for optimal image clarity in low light
- Smart IR up to 30m (98ft) night vision
- IP67 weather resistance and IK10 vandal resistance
- ფართო დინამიური დიაპაზონი (WDR)
- Power over Ethernet (PoE) მხარდაჭერა
- Support for 256GB MicroSD card
- People and Vehicle Search capabilities when used with Turing Smart Series NVR and Turing Vision Cloud
2. უსაფრთხოების ინფორმაცია
Please read these safety instructions carefully before using the product to prevent damage or injury.
- ელექტრომომარაგება: Use only the specified power adapter (12V DC) or a compliant Power over Ethernet (PoE) switch/injector. Incorrect voltagშეიძლება დააზიანოს კამერა.
- ინსტალაცია: Ensure the camera is securely mounted to prevent it from falling. Professional installation is recommended for outdoor or high-altitude mounting.
- გარემო: Do not expose the camera to extreme temperatures, humidity, or corrosive environments beyond its IP67 rating. Avoid direct sunlight for prolonged periods.
- დასუფთავება: Disconnect power before cleaning. Use a soft, dry cloth. Do not use strong detergents or solvents.
- დაშლა: არ სცადოთ კამერის დაშლა ან მოდიფიცირება. ეს გააუქმებს გარანტიას და შეიძლება გამოიწვიოს დაზიანება.
- კაბელები: Protect network and power cables from being walked on or pinched, especially at plugs and the point where they exit the camera.
3. პაკეტის შიგთავსი
გახსნისას დარწმუნდით, რომ ყველა ნივთი ადგილზეა და კარგ მდგომარეობაშია:
- Turing TP-MFD4A28 IP Dome Camera
- სამონტაჟო ხრახნები და კედლის შტეფსელები
- Ethernet კაბელის წყალგაუმტარი კონექტორი
- სწრაფი დაწყების სახელმძღვანელო / ინსტრუქციის სახელმძღვანელო (ეს დოკუმენტი)
- Drill Template (may be included)
Note: A power adapter (12V DC) is not always included as the camera supports PoE. A PoE switch or injector is required for PoE power.
4. პროდუქტი დასრულდაview
The Turing TP-MFD4A28 is a compact dome-style IP camera designed for discreet surveillance. Its robust housing provides protection against weather and vandalism.
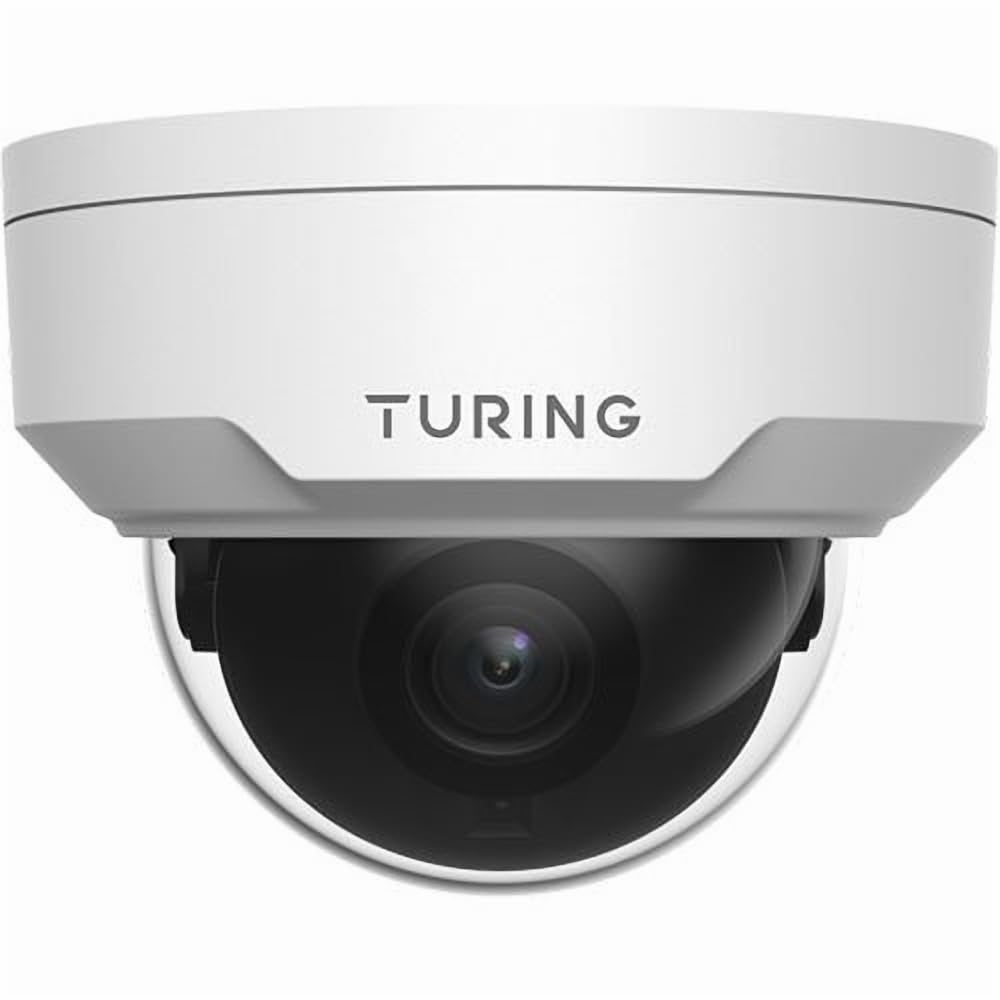
სურათი 4.1: წინა view of the Turing TP-MFD4A28 4MP IR Dome IP Camera, showing its white dome design and lens.
ძირითადი კომპონენტები:
- გუმბათის საფარი: Protective cover for the lens and IR LEDs.
- ობიექტივი: 2.8mm fixed lens for a wide field of view.
- IR LED- ები: Infrared illuminators for night vision.
- MicroSD ბარათის სლოტი: Located internally, accessible by removing the dome cover.
- გადატვირთვის ღილაკი: Located internally, used for factory reset.
- Ethernet პორტი (RJ45): ქსელური კავშირისა და Ethernet-ის საშუალებით კვებისთვის (PoE).
- შემავალი სიმძლავრე (DC 12V): Optional power input if PoE is not used.
5. დაყენება
5.1 Physical Installation (Wall Mount)
- აირჩიეთ ადგილმდებარეობა: Select a suitable wall-mount location that provides the desired viewing angle and is within range of your network cable.
- მოამზადეთ ზედაპირი: Use the provided drill template (if available) to mark the screw holes on the wall. Drill pilot holes.
- Mount the Camera Base: Secure the camera's mounting base to the wall using the provided screws and wall plugs.
- მარშრუტის კაბელები: Pass the Ethernet cable through the cable entry point on the mounting base.
5.2 კვება და ქსელური კავშირი
- Ethernet კავშირი: Connect an Ethernet cable from your PoE switch/injector or network router to the camera's RJ45 port. Use the waterproof connector for outdoor installations.
- სიმძლავრე (სურვილისამებრ): თუ PoE-ს არ იყენებთ, კამერის კვების წყაროსთან შეაერთეთ 12 ვოლტიანი დენის ადაპტერი (არ მოყვება).
- გადაამოწმეთ სიმძლავრე: The camera's indicator light (if present) should illuminate, indicating power.
5.3 MicroSD ბარათის ინსტალაცია
The camera supports up to a 256GB MicroSD card for local storage.
- გამორთეთ ელექტროენერგია: Ensure the camera is powered off before installing or removing the MicroSD card.
- გუმბათის საფარის მოხსნა: Carefully twist or unclip the outer dome cover to access the internal components.
- MicroSD ბარათის ჩასმა: Locate the MicroSD card slot and insert the card with the contacts facing down until it clicks into place.
- Replace Dome Cover: Securely reattach the dome cover, ensuring a watertight seal for IP67 protection.
- ფორმატის ბარათი: After powering on, format the MicroSD card via the camera's web interface or connected NVR for proper operation.
5.4 საწყისი კონფიგურაცია
For initial setup and advanced configuration, access the camera via its web interface or connect it to a Turing Smart Series NVR or Turing Vision Cloud.
- IP მისამართის პოვნა: Use a network scanner tool or your NVR to discover the camera's IP address on your local network.
- წვდომა Web ინტერფეისი: გახსენით ა web browser and enter the camera's IP address. Log in using the default credentials (refer to the Quick Start Guide for default username/password).
- შეცვალეთ ნაგულისხმევი პაროლი: For security, immediately change the default password upon first login.
- ქსელის პარამეტრები: Configure network settings (e.g., static IP, DNS) if required by your network environment.
- დროის პარამეტრები: ზუსტი ჩაწერის დროის დასადგენად დააყენეთ სწორი თარიღი და დროamps.
6. მოქმედებს
6.1 ცოცხალი View და ჩაწერა
Access the live video feed through your NVR, Turing Vision Cloud, or the camera's web interface. You can initiate manual recordings or configure scheduled/motion-triggered recordings.
- რეზოლუცია: The camera supports up to 4MP (2688x1520) resolution. Adjust settings as needed for bandwidth and storage.
- კადრების სიხშირე: Records at 30/25 frames per second for smooth video.
6.2 Night Vision (Smart IR)
The camera automatically switches to night vision mode in low-light conditions, utilizing its Smart IR LEDs to provide clear black-and-white video up to 30 meters (98 feet). TwilightVision technology enhances low-light performance before IR activation.
6.3 ფართო დინამიური დიაპაზონი (WDR)
WDR technology helps balance areas of high contrast in the image, ensuring details are visible in both bright and dark regions simultaneously. This is particularly useful in scenes with strong backlighting.
6.4 მოძრაობის აღმოჩენა და ანალიტიკა
Configure motion detection zones and sensitivity via the camera's web interface or NVR. When integrated with a Turing Smart Series NVR or Turing Vision Cloud, the camera supports advanced analytics like People and Vehicle Search.
- გაფრთხილების ტიპი: Motion Only alerts are supported.
- კონფიგურაცია: Set up email notifications or NVR alarms for detected events.
7. მოვლა
7.1 კამერის გაწმენდა
რეგულარული გაწმენდა ხელს უწყობს გამოსახულების ოპტიმალური ხარისხის შენარჩუნებას.
- Gently wipe the dome cover and lens with a soft, lint-free cloth.
- ჯიუტი ჭუჭყის შემთხვევაში, მსუბუქად გაწმინდეთ ქსოვილიampწყლით გაჟღენთილი. მოერიდეთ აბრაზიული საწმენდი საშუალებების გამოყენებას.
- Ensure no moisture enters the camera housing.
7.2 პროგრამული უზრუნველყოფის განახლებები
Periodically check the Turing website or your NVR system for available firmware updates. Firmware updates can improve performance, add new features, and enhance security. Follow the provided instructions carefully when performing updates.
7.3 MicroSD ბარათის მართვა
If using a MicroSD card for recording, it is recommended to format it periodically (e.g., monthly) to maintain performance and prevent data corruption. Back up any important recordings before formatting.
8. Დიაგნოსტიკა
| პრობლემა | შესაძლო მიზეზი | გამოსავალი |
|---|---|---|
| დენი არ არის / კამერა არ ირთვება |
|
|
| ვიდეო არხი არ არის |
|
|
| სურათის ცუდი ხარისხი |
|
|
| MicroSD Card Not Recording |
|
|
9. სპეციფიკაციები
| მოდელის ნომერი | TP-MFD4A28 |
| ეფექტური მაინც რეზოლუცია | 4 მეგაპიქსელი (2688x1520) |
| ობიექტივი | 2.8 მმ ფიქსირებული ობიექტივი |
| კადრების სიხშირე | 30 fps |
| ღამის ხედვის დიაპაზონი | Up to 30m (98.43 Feet) with Smart IR |
| დაბალი განათების ტექნოლოგია | TwilightVision |
| დაცვის საერთაშორისო რეიტინგი | IP67 (ამინდგამძლე) |
| ვანდალური წინააღმდეგობა | IK10 |
| ფართო დინამიური დიაპაზონი (WDR) | დიახ |
| დენის წყარო | PoE (Power over Ethernet) ან 12V DC |
| დაკავშირების ტექნოლოგია | სადენიანი (Ethernet) |
| MicroSD ბარათის მხარდაჭერა | 256 გბ-მდე |
| სამონტაჟო ტიპი | კედლის სამაგრი |
| ფორმის ფაქტორი | გუმბათი |
| ზომები (L x W x H) | 4.3 x 4.3 x 3.2 ინჩი |
| ნივთის წონა | 14.9 უნცია (0.93 ფუნტი) |
| ფერი | თეთრი |
| გაფრთხილების ტიპი | მოძრაობა მხოლოდ |
| ფოტო სენსორის ტექნოლოგია | CMOS |
10. გარანტია და მხარდაჭერა
Turing products are covered by a manufacturer's warranty. Please refer to the official Turing webკონკრეტული გარანტიის პირობებისთვის იხილეთ საიტი ან თქვენი შეძენის დოკუმენტაცია.
For technical support, troubleshooting assistance, or warranty claims, please contact Turing customer service through their official webსაიტი ან თქვენი შესყიდვისას მოწოდებული საკონტაქტო ინფორმაცია.
ონლაინ რესურსები:
- Official Turing Webსაიტი: www.turing.com
- Support Portal: (Check Turing website for specific support links)


