1. შესავალი
Thank you for choosing the Mecer 23.8 Inch Full HD LED Monitor. This manual provides essential information for setting up, operating, and maintaining your monitor. Please read it thoroughly before use to ensure proper functionality and longevity of your device.
This monitor features a 23.8-inch Full HD (1920 x 1080) display, offering crisp and clear visuals. It incorporates TFT LED panel technology for energy efficiency and vibrant colors, with a 16:9 aspect ratio suitable for widescreen viewing. Connectivity options include VGA and HDMI, making it compatible with various devices. Built-in speakers provide basic audio, and wide 178° viewing angles ensure comfortable use. With a 2ms response time, it is suitable for general computing and multimedia consumption.
2. უსაფრთხოების ინფორმაცია
- დენის წყარო: გამოიყენეთ მხოლოდ მონიტორთან ერთად მოწოდებული კვების ადაპტერი. დარწმუნდით, რომ კვების წყარო სათანადოდ არის დამიწებული.
- ვენტილაცია: არ დაბლოკოთ ვენტილაციის ღიობები. მონიტორის გარშემო საკმარისი ადგილი დატოვეთ ჰაერის ნორმალური ნაკადისთვის, რათა თავიდან აიცილოთ გადახურება.
- განთავსება: Place the monitor on a stable, flat surface. Avoid placing it in direct sunlight, near heat sources, or in environments with excessive dust or humidity.
- დასუფთავება: Disconnect the power cord before cleaning. Use a soft, dry cloth for the screen and a slightly damp cloth for the casinზ. მოერიდეთ აბრაზიული საწმენდი საშუალებების ან გამხსნელების გამოყენებას.
- სითხის ექსპოზიცია: Keep liquids away from the monitor. If liquid enters the monitor, disconnect power immediately and contact qualified service personnel.
- დაშლა: მონიტორის დამოუკიდებლად დაშლას ან შეკეთებას ნუ ეცდებით. ყველა სახის მომსახურებისთვის მიმართეთ კვალიფიციურ სერვის პერსონალს.
3. პაკეტის შიგთავსი
გთხოვთ, შეამოწმოთ პაკეტის შიგთავსი, რათა დარწმუნდეთ, რომ ყველა ნივთი ადგილზეა:
- Mecer 23.8 Inch LED Monitor
- მონიტორის სადგამი (ძირი და კისერი)
- დენის ადაპტერი და კაბელი
- HDMI კაბელი
- VGA კაბელი
- მომხმარებლის სახელმძღვანელო (ეს დოკუმენტი)
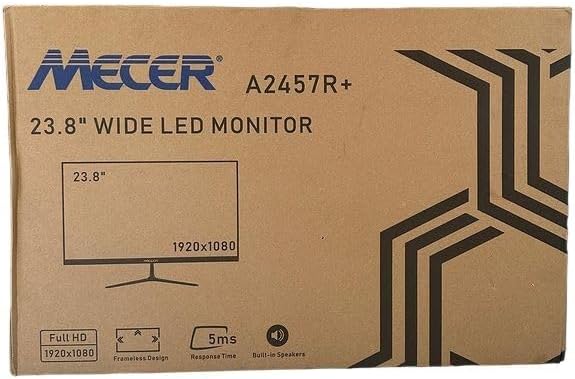
სურათი 3.1: The monitor packaging box, indicating the model A2457R+ and key features like 23.8" display, Full HD 1920x1080 resolution, frameless design, 5ms response time, and built-in speakers.
4. დაყენება
4.1. მონიტორის სადგამის აწყობა
- ფრთხილად ამოიღეთ მონიტორისა და სადგამის კომპონენტები შეფუთვიდან.
- სადგამის ყელი მონიტორის პანელზე მიამაგრეთ ჩანართების გასწორებით და მტკიცედ დააჭირეთ, სანამ არ დააწკაპუნებს.
- Attach the stand base to the stand neck, securing it with the provided screw (usually hand-tightened).
- აწყობილი მონიტორი მოათავსეთ სტაბილურ, ბრტყელ ზედაპირზე.

სურათი 4.1: წინა view of the Mecer 23.8 Inch LED Monitor with its stand assembled, ready for connection.
4.2. კომპიუტერთან დაკავშირება
მონიტორი მხარს უჭერს როგორც HDMI, ასევე VGA კავშირებს. აირჩიეთ თქვენი კომპიუტერისთვის შესაფერისი კაბელი.
- HDMI კავშირი: Connect one end of the HDMI cable to the HDMI port on your computer's graphics card and the other end to the HDMI port on the monitor. HDMI transmits both video and audio signals.
- VGA კავშირი: Connect one end of the VGA cable to the VGA port on your computer's graphics card and the other end to the VGA port on the monitor. VGA transmits only video signals.

სურათი 4.2: უკანა view of the Mecer 23.8 Inch LED Monitor, showing the input ports including HDMI and VGA, as well as the power input.
4.3. დენის კავშირი
- Connect the power adapter cable to the DC IN port on the back of the monitor.
- შეაერთეთ დენის ადაპტერი კედლის განყოფილებაში.
5. საოპერაციო ინსტრუქციები
5.1. ჩართვა/გამორთვა
Press the power button, typically located on the bottom right side or rear of the monitor, to turn the monitor on or off. The power indicator light will illuminate when the monitor is on.
5.2. შეყვანის წყაროს შერჩევა
If you have multiple devices connected, you may need to manually select the input source. Use the monitor's control buttons (usually located near the power button) to navigate to the input selection menu and choose between HDMI or VGA.
5.3. ეკრანზე ჩვენების (OSD) მენიუ
The OSD menu allows you to adjust various display settings. Use the monitor's control buttons to:
- შედით OSD მენიუში.
- Navigate through menu options (e.g., Brightness, Contrast, Color Settings, Input Source).
- Adjust values or select options.
- გამოდით OSD მენიუდან.
საერთო რეგულირებადი პარამეტრები მოიცავს:
- სიკაშკაშე/კონტრასტი: დაარეგულირეთ საერთო სიკაშკაშე და განსხვავება ღია და ბნელ უბნებს შორის.
- ფერის პარამეტრები: Adjust color temperature, RGB values, or select preset color modes.
- ასპექტის თანაფარდობა: Change between 16:9, 4:3, or other available options.
- აუდიო: Adjust volume for the built-in speakers.
5.4. ჩამონტაჟებული დინამიკები
The monitor includes built-in speakers for basic audio output. If using an HDMI connection, audio will be transmitted automatically. For VGA connections, ensure your computer's audio output is configured correctly. Adjust the volume through the OSD menu or your computer's operating system.
6. მოვლა
6.1. მონიტორის გაწმენდა
- მონიტორის გაწმენდამდე ყოველთვის გამორთეთ დენის წყაროდან.
- ეკრანი: ფრთხილად გაწმინდეთ ეკრანი რბილი, უბუშტო ქსოვილით. ჯიუტი ლაქების შემთხვევაში, მსუბუქად გაწმინდეთ.ampen the cloth with water or a specialized screen cleaner (ensure it's alcohol-free and ammonia-free) and wipe carefully. Do not spray liquid directly onto the screen.
- Casing: მონიტორის გასაწმენდად გამოიყენეთ რბილი, მშრალი ქსოვილი.asinგ. საჭიროების შემთხვევაში, ოდნავ დamp შესაძლებელია ქსოვილის გამოყენება, შემდეგ კი მშრალი ქსოვილის გასუფთავება.
6.2. შენახვა
მონიტორის ხანგრძლივი პერიოდის განმავლობაში შენახვის შემთხვევაში, გათიშეთ ყველა კაბელი, შეფუთეთ ორიგინალ შეფუთვაში (ასეთის არსებობის შემთხვევაში) და შეინახეთ გრილ, მშრალ ადგილას, მზის პირდაპირი სხივებისა და ექსტრემალური ტემპერატურისგან მოშორებით.
7. Დიაგნოსტიკა
თუ თქვენს მონიტორთან დაკავშირებით პრობლემები შეგექმნათ, იხილეთ შემდეგი გავრცელებული პრობლემები და მათი გადაჭრის გზები:
- ძალა არ არის:
- Ensure the power cable is securely connected to the monitor and the wall outlet.
- შეამოწმეთ, რომ დენის წყარო მუშაობს სხვა მოწყობილობის ჩართვით.
- Check if the power adapter is working correctly.
- არანაირი სიგნალი:
- Ensure the video cable (HDMI or VGA) is securely connected to both the monitor and the computer.
- Verify that the correct input source is selected on the monitor (via the OSD menu).
- Check if your computer is powered on and outputting a video signal.
- Try a different video cable if available.
- სურათი ბუნდოვანი ან დამახინჯებულია:
- Ensure the monitor's resolution is set to its native resolution (1920 x 1080) in your computer's display settings.
- Adjust the monitor's OSD settings for brightness, contrast, and sharpness.
- For VGA connections, use the 'Auto Adjust' function in the OSD menu if available.
- No Audio from Built-in Speakers:
- Ensure the monitor's volume is not muted or set too low in the OSD menu.
- Check your computer's audio output settings to ensure the monitor is selected as the playback device.
- If using VGA, ensure your computer's audio is routed to an external speaker system, as VGA does not carry audio.
8. სპეციფიკაციები
| ფუნქცია | სპეციფიკაცია |
|---|---|
| ბრენდი | Mecer |
| მოდელის ნომერი | A2457R+ |
| ჩვენების ზომა | 23.8 ინჩი |
| რეზოლუცია | 1920 x 1080 პიქსელი (სრული HD) |
| ჩვენების ტიპი | LED (TFT LED Panel) |
| ასპექტის თანაფარდობა | 16:9 |
| რეაგირების დრო | 2 მილიწამი |
| განახლების სიხშირე | 75 ჰც |
| Viewing კუთხეები | 178° ჰორიზონტალური / 178° ვერტიკალური |
| დაკავშირება | 1x HDMI, 1x VGA |
| ჩამონტაჟებული დინამიკები | დიახ |
| ფერი | შავი |
| პროდუქტის ზომები (D x W x H) | 560D x 42W x 410H millimetres |
| განსაკუთრებული თვისებები | High performance intelligent multi-frequency scanning, Micro Computer digital technology control, no radiation, no glare, Comply with VESA DPMS international power saving regulation, Support DDC 1/2B and Windows PNP Plug and Play |
9. გარანტია და მხარდაჭერა
This Mecer monitor comes with a 1 წლიანი შეზღუდული გარანტია შეძენის დღიდან. გთხოვთ, შეინახოთ შეძენის დამადასტურებელი საბუთი გარანტიის მოთხოვნებისთვის.
For technical support, service, or warranty inquiries, please contact your retailer or the authorized Mecer service center in your region. Do not attempt to repair the product yourself, as this may void your warranty.