1. შესავალი
This manual provides essential instructions for setting up, operating, and maintaining your VGKE Mini Projector. Please read it thoroughly before using the product to ensure optimal performance and longevity.

Figure 1: VGKE Mini Projector and its stand.
2. დაყენება
2.1 ყუთის ამოღება
Carefully unpack all components from the product box. Ensure all items listed in the package contents are present.
Video 1: Unboxing the projector and its accessories.
2.2 Physical Setup and Power Connection
Place the projector on a stable, flat surface. The projector features a 90-degree adjustable and retractable stand for flexible positioning. Connect the power cord to the projector and then to a power outlet.

Figure 2: The VGKE Mini Projector demonstrating its 90-degree adjustable lens for flexible projection onto walls or ceilings.
Video 2: Demonstrating power connection and initial startup of a smart Android projector.
2.3 დისტანციური მართვის დაწყვილება
To ensure full functionality, pair the remote control with your projector. Follow the on-screen instructions or refer to the video below.
Video 3: Instructions on how to pair the Bluetooth remote control with the projector.
2.4 ქსელის კონფიგურაცია
Connect your projector to your Wi-Fi network and sign in to your Google account to access smart features and apps. Follow the on-screen prompts.
Video 4: Guide on how to start and configure the projector, including Wi-Fi and Google account setup.
2.5 Connecting to iOS/Android Devices
The projector supports AirPlay/Miracast/Google Cast for screen mirroring. Ensure your device and projector are on the same Wi-Fi network.
- IOS მოწყობილობებისთვის: Select the 'E-Share' app on the home page, turn on 'AirPlay' in settings, and select the projector from your iOS device's screen mirroring options.
- Android მოწყობილობებისთვის: Select the 'E-Share' app on the home page, turn on 'Miracast' in settings, and select the projector from your Android device's wireless projection options.

Figure 3: Instructions for connecting to an iOS device for screen mirroring.

Figure 4: Instructions for connecting to an Android device for screen mirroring.
3. საოპერაციო ინსტრუქციები
3.1 პროექციის კორექტირება
The projector features 3D TOF autofocus and auto keystone correction for a clear image. You can also manually adjust the focus if needed.
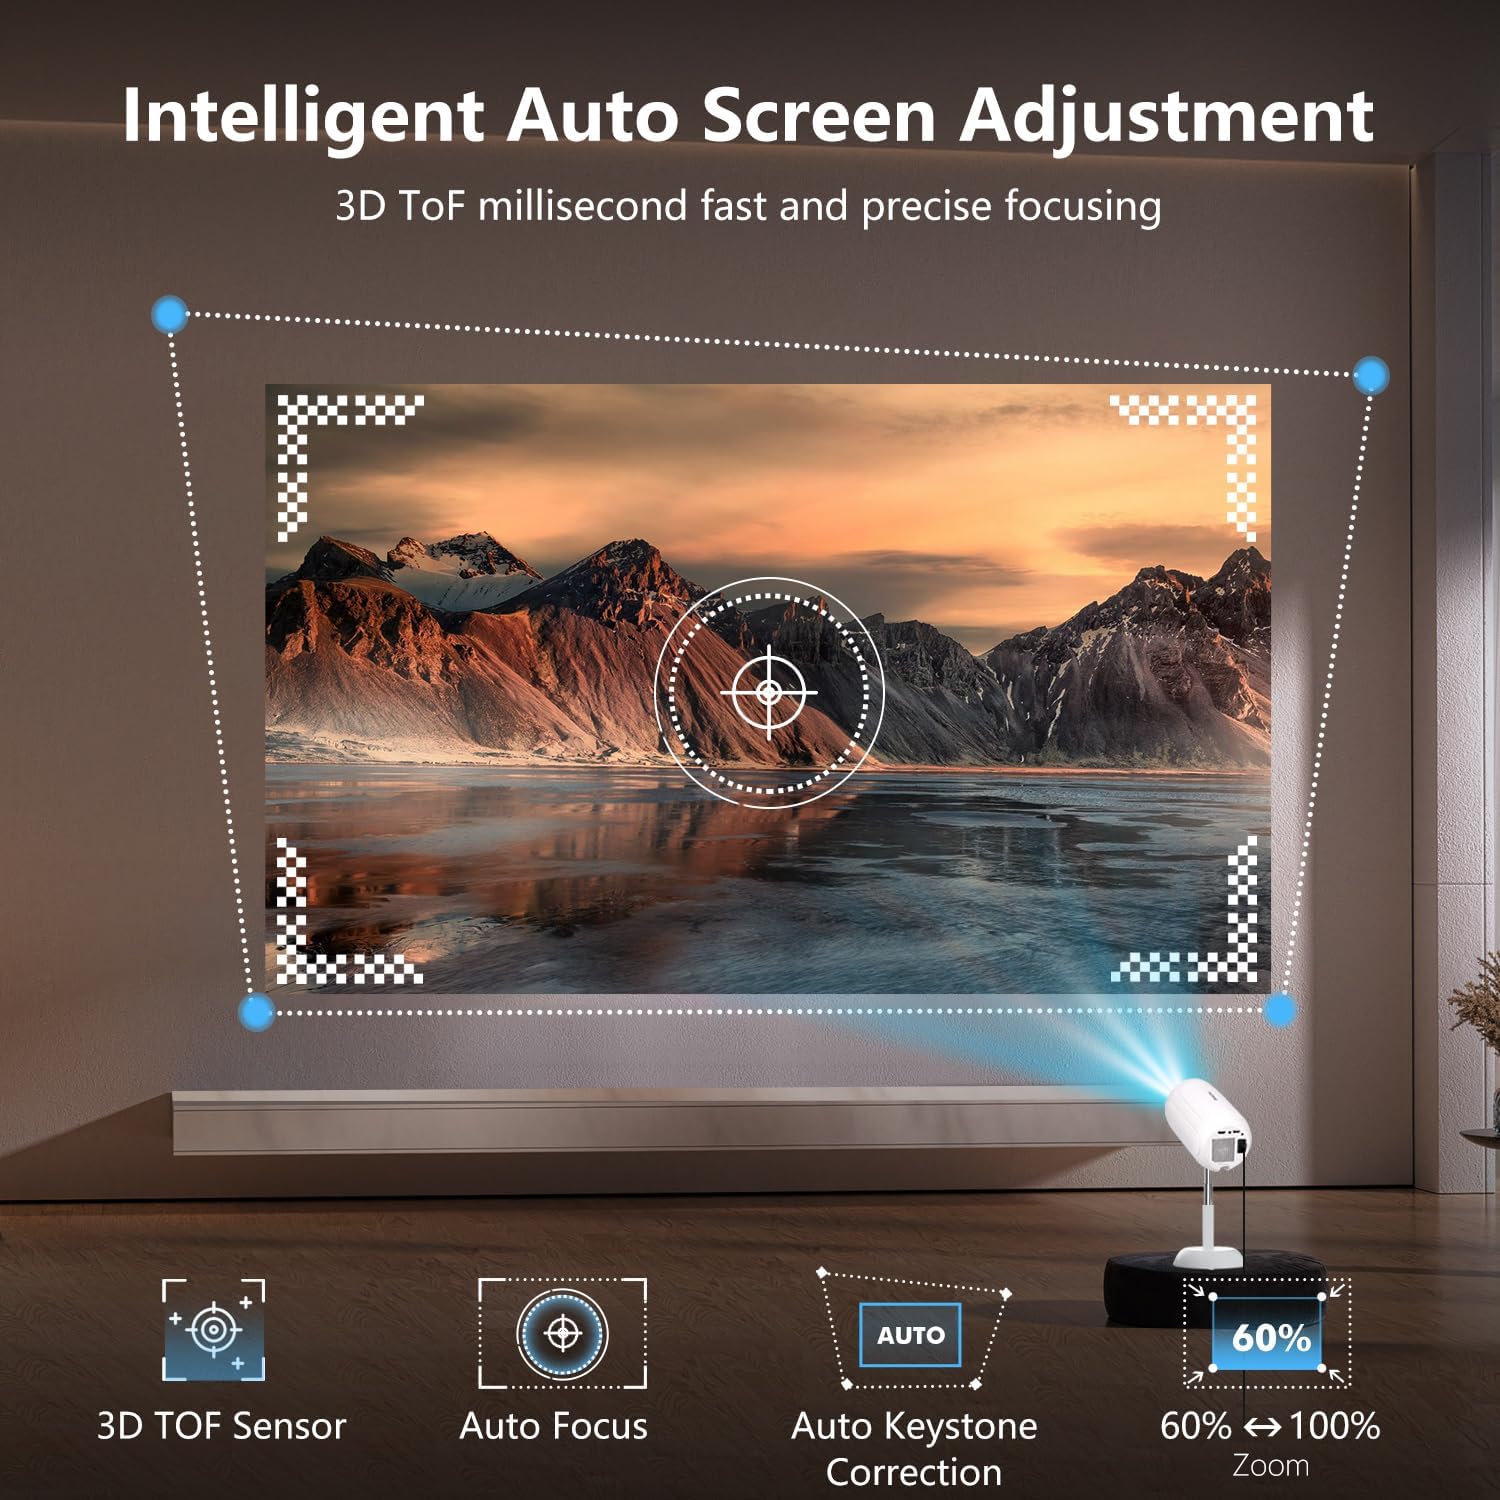
Figure 5: Illustration of the projector's intelligent auto screen adjustment features, including 3D TOF sensor, autofocus, and auto keystone correction.
3.2 ჩაშენებული აპლიკაციების გამოყენება
The projector runs on Android 13.0, allowing direct access to over 8,000 apps like Netflix, Prime Video, YouTube, and Disney+ without external devices.

Figure 6: The VGKE Mini Projector displaying its smart interface with pre-installed applications for direct streaming.
3.3 ეკრანის ასახვა
Mirror content from your iOS or Android devices seamlessly using AirPlay, Miracast, or Google Cast. Ensure a stable WiFi 6 connection for optimal performance.
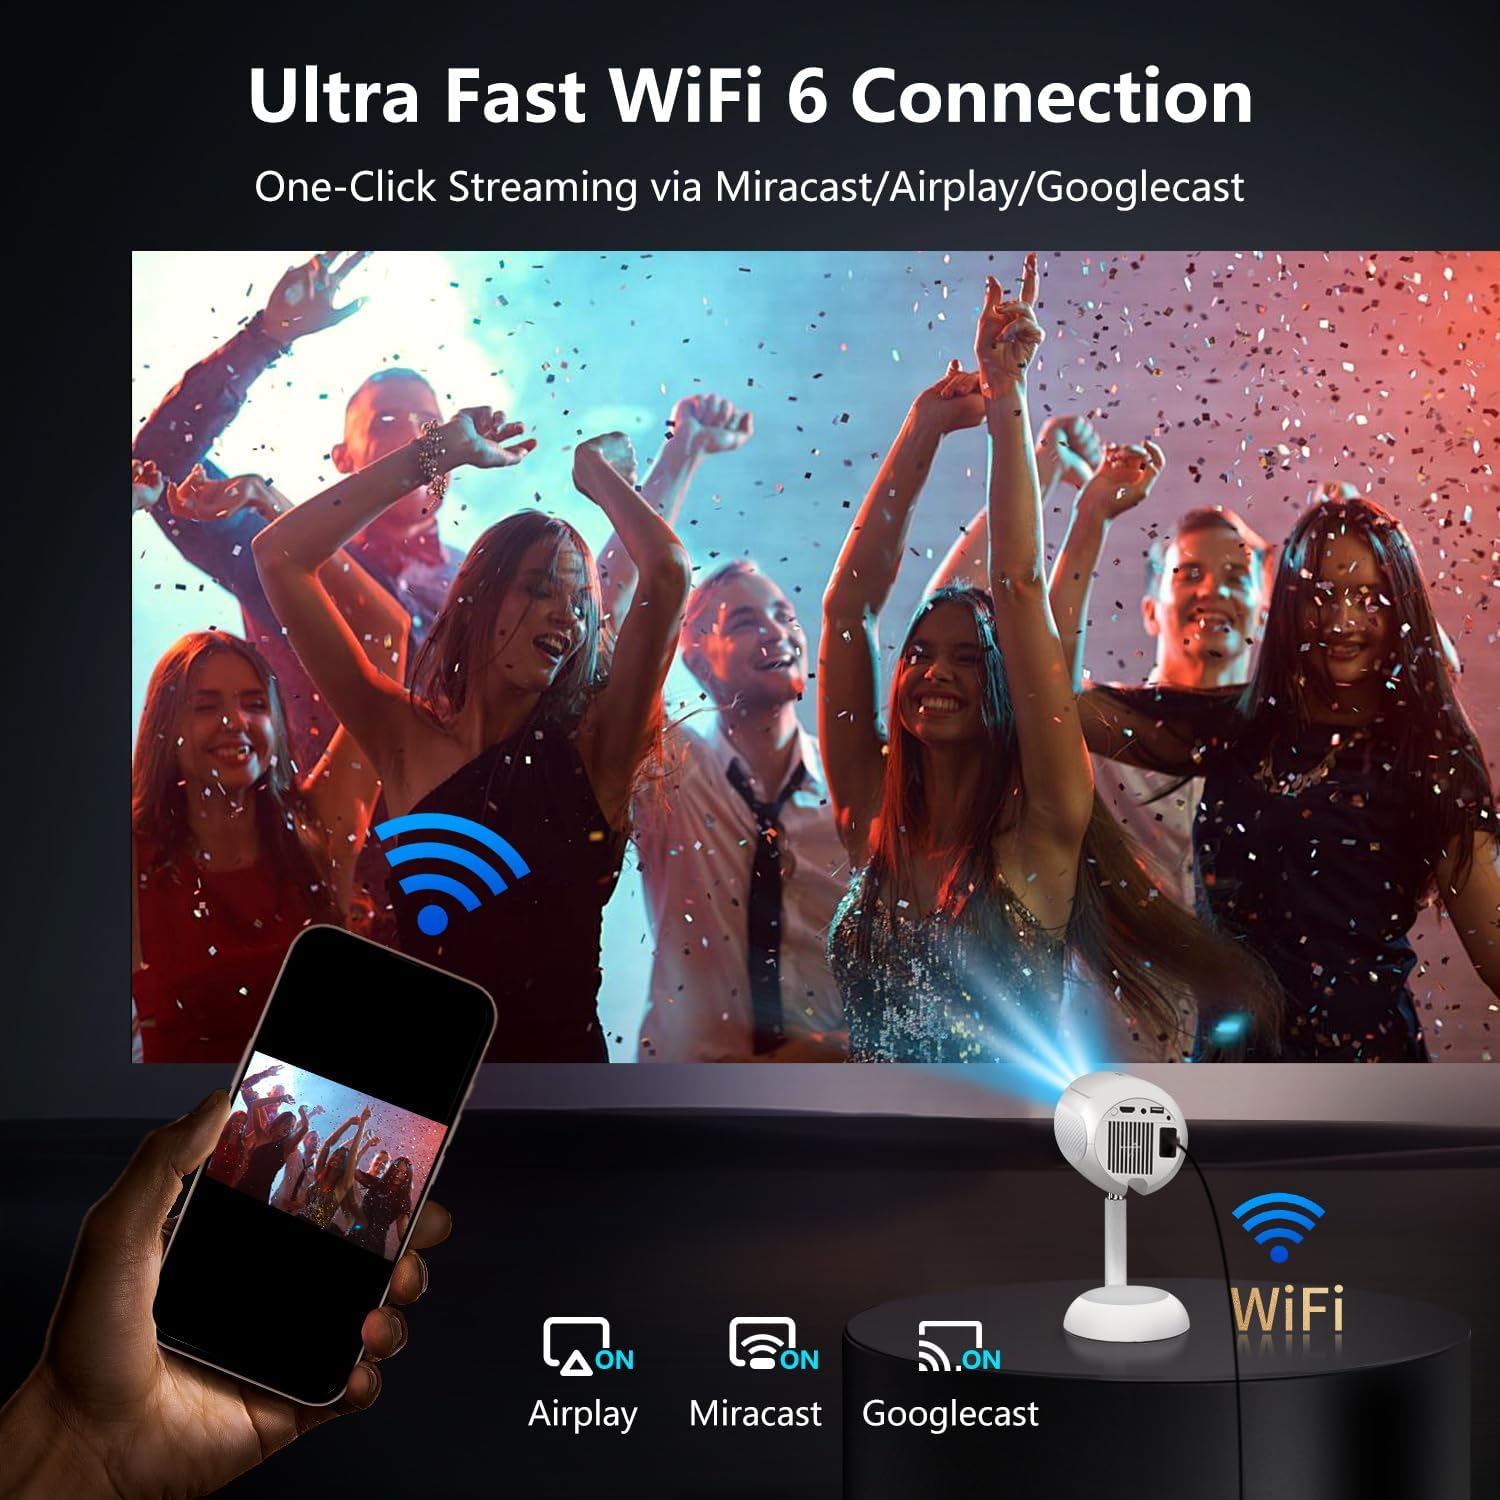
Figure 7: The projector connected via Ultra Fast WiFi 6, demonstrating one-click streaming via Miracast, Airplay, and Googlecast.
3.4 Bluetooth კავშირი
Connect external Bluetooth 5.2 devices such as soundbars or headphones for an enhanced audio experience.

Figure 8: The VGKE Mini Projector utilizing two-way Bluetooth 5.2 for immersive stereo audio experience with external speakers.
3.5 გარე მოწყობილობის შეერთება
Utilize the HDMI, AV, and USB ports to connect various devices like smartphones, laptops, tablets, DVD players, and TV sticks/boxes.

Figure 9: The projector's versatile connectivity options, including HDMI, USB, and Audio ports, compatible with smartphones, laptops, and gaming consoles.
4. მოვლა
4.1 Cleaning the Projector Lens and Internal Dust
Regular cleaning ensures optimal image quality. Use a flat screwdriver or art knife to open the dust cover. Use a cotton swab from the cleaning kit to gently clean any black spots on the projector LCD screen. Remember to put the dust cover back on after cleaning.
Video 5: Detailed instructions on how to clean the internal dust from the projector.
5. Დიაგნოსტიკა
- სურათის გარეშე: Ensure the power cord is securely connected and the projector is turned on. Check the input source (HDMI, USB) is correctly selected.
- ბუნდოვანი სურათი: Use the auto-focus feature or manually adjust the focus dial. Ensure the projection surface is flat and the projector is positioned correctly.
- ხმა არ არის: Check the volume settings on the projector and any connected external audio devices. Ensure Bluetooth audio is correctly paired or HDMI audio is selected.
- დაკავშირების პრობლემები (Wi-Fi/Bluetooth): Ensure the projector is within range of the network/device. Re-enter Wi-Fi passwords or re-pair Bluetooth devices.
- დისტანციური მართვა არ პასუხობს: Check the batteries in the remote control. Re-pair the remote control if necessary.
6. სპეციფიკაციები
| ფუნქცია | დეტალი |
|---|---|
| ბრენდი | VGKE |
| მოდელი | 16000LM_Android Projector |
| პროდუქტის ზომები | 15.49 x 15.49 x 24.38 სმ |
| ნივთის წონა | 1.36 კგ |
| ფორმის ფაქტორი | პორტატული |
| ეკრანის გარჩევადობა | 1280 x 720 (მშობლიური) |
| ეკრანის გარჩევადობა მაქსიმალური | 3840 x 2160 Pixels (4K Support) |
| ოპერაციული სისტემა | Android 13.0 |
| განსაკუთრებული თვისებები | 3D TOF Autofocus, Auto Keystone, 90° Adjustable, Built-in Apps |
| დაკავშირების ტექნოლოგია | Bluetooth 5.2, HDMI, Wi-Fi 6 (2.4G/5G), AV, USB |
| დენის წყარო | ცვლადი დენი (230 ვოლტი) |
| მოყვება კომპონენტები | Power Cord, Remote, User Manual |
7. გარანტია და მხარდაჭერა
VGKE is committed to providing reliable after-sales support. For any inquiries, technical assistance, or warranty claims, please contact VGKE customer service. Our team is always ready to provide you with consultation or assistance.
Please refer to your purchase documentation for specific warranty terms and contact details.


