1. შესავალი
The Osee G7 Pro is a high-brightness 7-inch touchscreen camera monitor designed for professional video production. It features a 3000-nit display, HDR capabilities, camera control functions, and extensive monitoring tools. This manual provides detailed instructions for setting up, operating, and maintaining your G7 Pro monitor.
2. ძირითადი მახასიათებლები
- 3000-Nit High Brightness Display: Ensures clear visibility in outdoor environments without the need for a sunshade.
- კამერის კონტროლი: Direct control over camera functions (WB, ISO, Aperture, Shutter Speed, Record/Shoot, Touch Focus) via a Type-C cable when powered by an NP-F battery. Supported cameras include EOS R5 II, EOS R6 II, EOS R6, EOS R8, EOS 5D Mark IV, A7 IV, ZV-E10M2, FX3, Z9, Z6 III, Z6 II, Z6, GFX100 II, X-H2, X-H2S, X-T5, X-S20, LUMIX GH5S, LUMIX GH6, LUMIX S5, LUMIX S5 II, E2, E2C.
- Touch to Focus & Dynamic Focus Tracking: Trigger photo capture and track focus directly from the touchscreen.
- გაძლიერებული კონტრასტი: New IPS technology and anti-reflection coating provide a 1300:1 contrast ratio.
- 3G-SDI & 4K HDMI Connectivity: Supports up to 1080p60 via SDI and 4Kp30 via HDMI for versatile signal input/output.
- Advanced Analysis Modes: Simultaneous display of waveform, histogram, and vectorscope. Customizable false color and 8 preview MySets.
- 3D-LUT Support: Precise 3D-LUT reproduction for accurate skin tones and HDR footage, with 22-bit internal processing for 18 stops of dynamic range. Upload LUTs via SD card.
- მოქნილი კვების წყარო: Can be powered by NP-F battery, D-tap, or Type-C cable. The monitor can also power the camera via USB-PD.
- New User Interface (UI): Optimized UI logic and reorganized function layout for improved user experience.
- გამძლე კონსტრუქცია: High-aluminum silicate glass touchscreen and internal die-cast aero aluminum plate for shock resistance and effective heat dissipation.
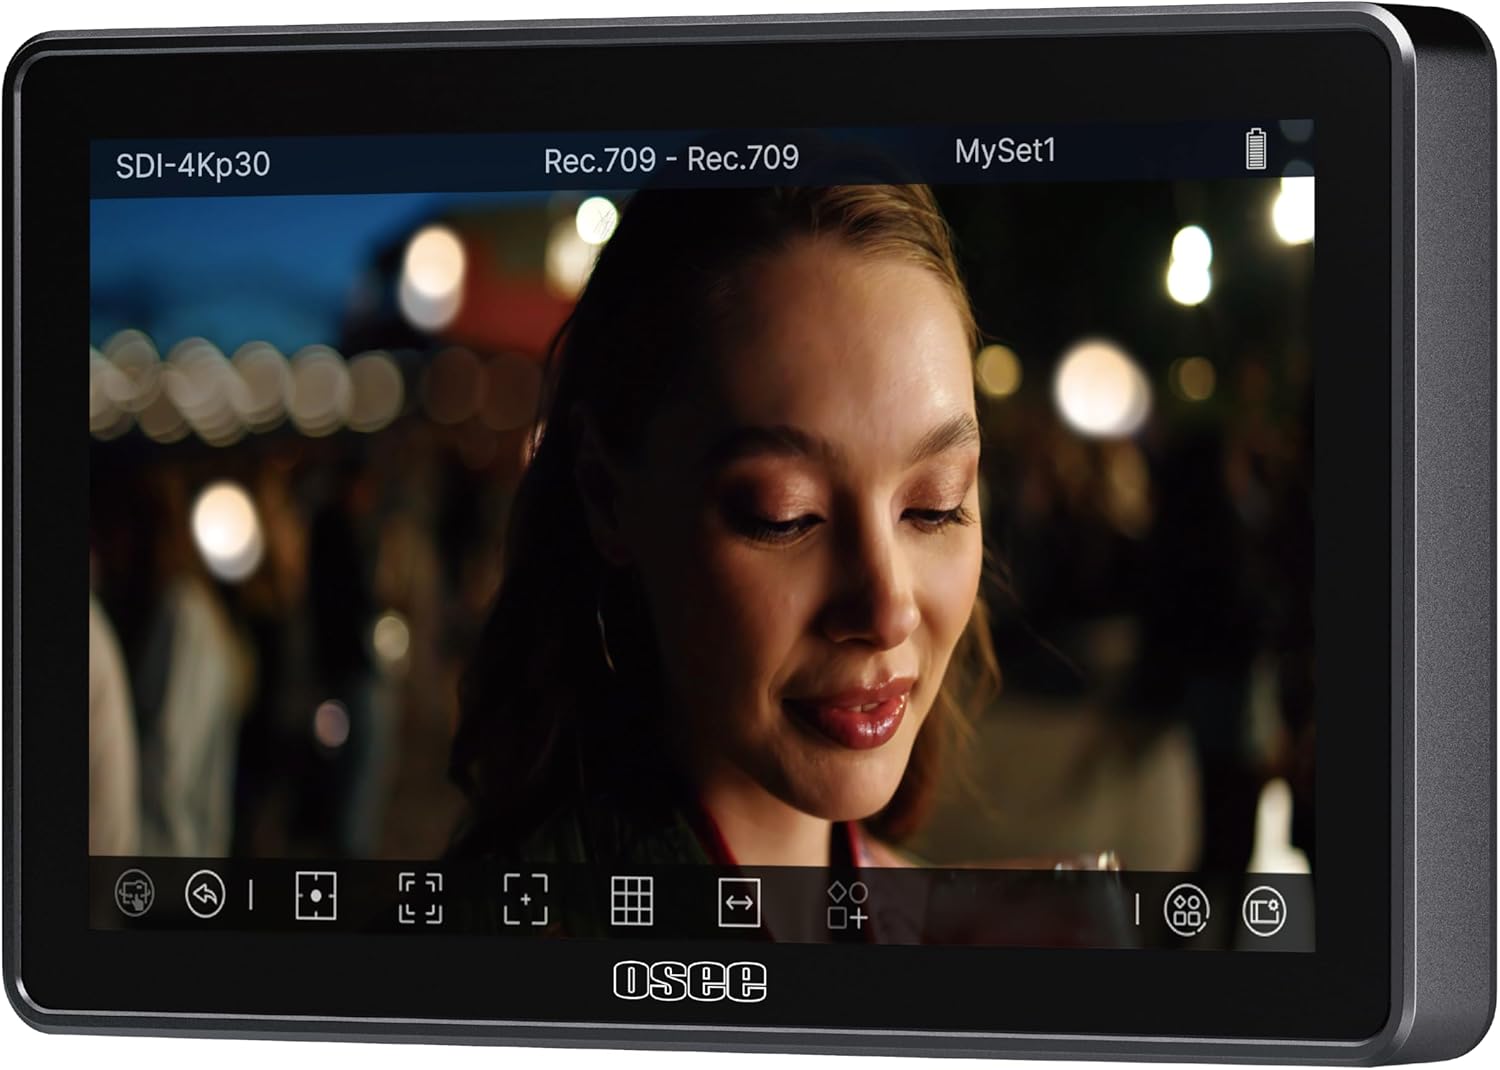
Figure 2.1: The Osee G7 Pro monitor displaying a video feed with its user interface elements visible at the bottom.

Figure 2.2: Illustration of the camera control feature, showing the monitor connected to a camera and listing compatible camera models.
3. დაყენება
3.1 გახსნა და პირველადი შემოწმება
Carefully unpack the Osee G7 Pro monitor and all included accessories. Verify that all components listed in the packaging are present and undamaged. The package typically includes the camera monitor.
3.2 მონიტორის ჩართვა
The G7 Pro offers flexible power options:
- NP-F Battery: Attach a compatible NP-F battery to the battery plate on the rear of the monitor. This is required for camera control functionality.
- D-tap: Connect a D-tap power source using a D-tap DC cable.
- ტიპი C: Use a Type-C cable to connect to a compatible power source.

Figure 3.1: Powering options for the Osee G7 Pro, including NP-F battery, D-tap, and Type-C connections. The diagram also shows the monitor powering a camera via Type-C.
3.3 კამერასთან დაკავშირება
The G7 Pro features 3G-SDI and 4K HDMI input/output ports.
- HDMI კავშირი: Use an HDMI cable to connect your camera's HDMI output to the monitor's HDMI input. The monitor supports up to 4Kp30 signals.
- SDI Connection: Use an SDI cable to connect your camera's SDI output to the monitor's SDI input. The monitor supports up to 1080p60 signals.
- Camera Control Connection: For camera control functionality, connect your camera to the monitor via a Type-C cable. Ensure the monitor is powered by an NP-F battery for this feature to be active.

სურათი 3.2: უკანა view of the Osee G7 Pro highlighting the 3G-SDI and 4K HDMI input/output interfaces.
4. საოპერაციო ინსტრუქციები
4.1 ძირითადი ოპერაცია
- ჩართვა/გამორთვა: მონიტორის ჩასართავად ან გამოსართავად დააჭირეთ და გეჭიროთ ჩართვის ღილაკი.
- სენსორული ეკრანის ინტერფეისი: Navigate the monitor's functions and settings using the touchscreen. The optimized UI provides intuitive access to various tools.
4.2 კამერის კონტროლი
Once connected via Type-C and powered by an NP-F battery, you can control supported camera functions directly from the G7 Pro's touchscreen.
- მხარდაჭერილი ფუნქციები: Adjust White Balance (WB), ISO, Aperture, Shutter Speed, initiate Record/Shoot, and utilize Touch Focus.
- გადართვის კონტროლი: A one-click option allows switching between monitor and camera control.
- Touch to Focus: Tap on the screen to set focus. The monitor supports dynamic focus tracking for moving subjects.
4.3 Monitoring Tools and Analysis Modes
The G7 Pro offers a suite of professional monitoring tools to assist with exposure, focus, and color accuracy.
- Waveform, Histogram, Vectorscope: These tools can be displayed simultaneously to provide comprehensive video signal analysis.
- ცრუ ფერი: Customizable false color modes assist in evaluating exposure levels.
- Peaking Focus Assist: Highlights in-focus areas for precise manual focusing.
- ზებრა: Indicates overexposed areas.
- 3D-LUTs: Apply up to 10 custom 3D-LUTs for accurate color preview. Upload LUTs via an SD card.
- MySets: Configure and save up to 8 custom monitoring tool layouts (MySets) for quick access during different shooting scenarios.

სურათი 4.1: მაგamples of the G7 Pro's analysis modes, such as false color, peaking focus assist, zebras, and waveform, aiding in precise image evaluation.
5. მოვლა
5.1 მონიტორის გაწმენდა
To clean the touchscreen and body of the monitor, use a soft, lint-free cloth. For stubborn smudges, a small amount of screen cleaning solution can be applied to the cloth (not directly to the screen). Avoid abrasive materials or harsh chemicals.
5.2 პროგრამული უზრუნველყოფის განახლებები
It is recommended to regularly check for and install the newest firmware versions to ensure optimal performance and access to new features. Refer to the Osee official website for firmware download instructions.
5.3 შენახვა
When not in use, store the monitor in a dry, cool place, away from direct sunlight and extreme temperatures. Use a protective case to prevent scratches and impacts.
6. Დიაგნოსტიკა
6.1 No Signal Displayed
- Ensure all HDMI/SDI cables are securely connected to both the camera and the monitor.
- Verify that the camera is outputting a compatible video signal (up to 4Kp30 for HDMI, up to 1080p60 for SDI).
- Try disconnecting and reconnecting the video cable.
- Check the camera's video output settings.
6.2 Camera Control Not Working
- Confirm the monitor is powered by an NP-F battery. Camera control is only enabled with this power source.
- Ensure your camera model is listed as supported for camera control.
- Verify the Type-C cable is correctly connected between the monitor and the camera.
- Check for available firmware updates for both the monitor and your camera.
6.3 გადახურება ან ვენტილატორის ხმაური
The G7 Pro features a silent fan with a temperature sensor designed to balance noise and heat. If you experience unusual overheating or excessive fan noise, ensure the fan vents are not obstructed. Prolonged use in extremely hot environments may affect performance.
6.4 Display Artifacts or Glitches
In rare cases, minor display artifacts may occur. These are often temporary and do not affect the image quality. If persistent, try restarting the monitor or checking for firmware updates.
7. სპეციფიკაციები
| ფუნქცია | სპეციფიკაცია |
|---|---|
| მოდელის ნომერი | G7 პრო |
| ეკრანის ზომა | 7 ინჩი |
| სიკაშკაშე | 3000 nits |
| კონტრასტის თანაფარდობა | 1300:1 |
| რეზოლუცია | 1920x1080 (1080p) |
| Pixel Density (PPI) | 360 PPI |
| ფერის სიღრმე | 10 ბიტიანი |
| განახლების სიხშირე | 60 ჰც |
| ვიდეო შეყვანები | 3G-SDI (up to 1080p60), 4K HDMI (up to 4Kp30) |
| ვიდეო გამომავალი | 3G-SDI (up to 1080p60), 4K HDMI (up to 4Kp30) |
| ელექტრომომარაგება | NP-F Battery, D-tap, Type-C |
| ზომები | 9 x 8 x 1.53 ინჩი |
| ნივთის წონა | 1.76 ფუნტი |
| მწარმოებელი | Osee |
8. გარანტია და მხარდაჭერა
8.1 პროდუქტის გარანტია
The Osee G7 Pro monitor typically comes with a 1-year warranty. Please refer to your purchase documentation or the official Osee webსაიტზე კონკრეტული გარანტიის პირობებისა და პირობებისთვის.
8.2 მომხმარებელთა მხარდაჭერა
For technical assistance, troubleshooting, or any questions regarding your Osee G7 Pro monitor, please contact the Osee customer service team. Osee provides lifetime technical support and 24/7 live chat services.
- ონლაინ დახმარება: Visit the official Osee webსაიტი ხშირად დასმული კითხვებისთვის, დამხმარე რესურსებისა და საკონტაქტო ინფორმაციისთვის.
- პირდაპირი ჩატი: Available 24/7 for immediate assistance.
- ელ.ფოსტის მხარდაჭერა: Contact via email for detailed inquiries.

Figure 8.1: Osee customer support team available for assistance.


