1. შესავალი
This manual provides detailed instructions for the installation, operation, and maintenance of the RAB Lighting B17 LED Bollard Light. This outdoor luminaire features field-adjustable wattage and selectable color temperature (CCT), designed for various outdoor applications.
ძირითადი მახასიათებლები მოიცავს:
- Energy-efficient LED with a 50,000-hour lifespan.
- რეგულირებადი ვატიtage: 24W, 19W, or 14W.
- Selectable CCT: 3000K (Warm White), 4000K (Neutral White), or 5000K (Cool White).
- 0-10V dimming capability.
- UL ჩამოთვლილია სველი ადგილებისთვის.
- Durable metal construction with a glass shade.
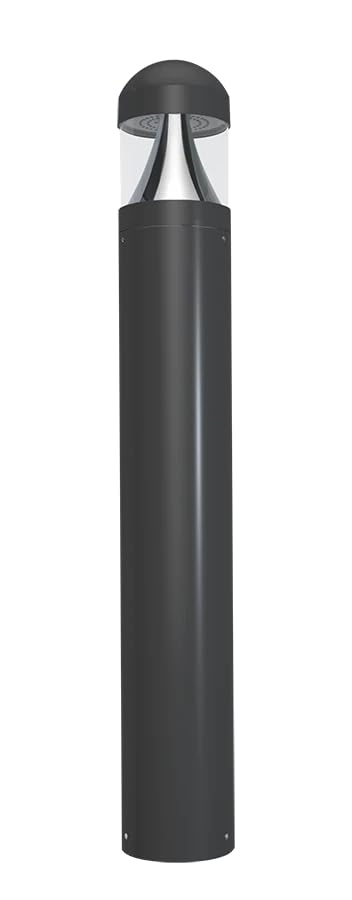
Figure 1: RAB Lighting B17 LED Bollard Light (Model B17D shown).
2. უსაფრთხოების ინფორმაცია
გაფრთხილება: ელექტროშოკის რისკი. ინსტალაციამდე ან მომსახურებამდე გათიშეთ ელექტროენერგია. ინსტალაცია უნდა შეასრულოს კვალიფიციურმა ელექტრიკოსმა ყველა მოქმედი ეროვნული და ადგილობრივი ელექტრო კოდექსის შესაბამისად.
- უზრუნველყოს მიწოდების ტომიtage სწორია მოწყობილობისთვის.
- Do not handle live components.
- ატარეთ შესაბამისი პერსონალური დამცავი მოწყობილობა (PPE).
- This fixture is suitable for wet locations. Ensure all connections are properly sealed to prevent water ingress.
- არ შეცვალოთ მოწყობილობა. ნებისმიერმა ცვლილებამ შეიძლება გააუქმოს გარანტია და შექმნას უსაფრთხოების რისკები.
3. პაკეტის შიგთავსი
ინსტალაციის დაწყებამდე დარწმუნდით, რომ ყველა კომპონენტი ხელმისაწვლელია:
- B17 LED Bollard Light Fixture
- On-Off Switch (Included Components)
- Installation Hardware (e.g., mounting bolts, gaskets) - (Assumed, not explicitly listed but typical for such products)
- ინსტრუქციის სახელმძღვანელო (ეს დოკუმენტი)
4. დაყენება და ინსტალაცია
Follow these steps for proper installation of the B17 LED Bollard Light:
- მოამზადეთ ინსტალაციის საიტი: Ensure the mounting surface is stable and level. Run electrical conduit and wiring to the desired location according to local codes.
- გამორთეთ ელექტროენერგია: ნებისმიერი ელექტრო სამუშაოების დაწყებამდე გამორთეთ დენი ამომრთველზე.
- Mount the Bollard: Secure the bollard base to the mounting surface using appropriate hardware. Ensure a watertight seal if required by local codes.
- გააკეთეთ ელექტრული კავშირები: Connect the fixture's wires to the supply wires. Follow standard wiring practices:
- Black to Line (L)
- White to Neutral (N)
- Green/Ground to Ground (G)
- Purple to Dimming (+) (for 0-10V dimming)
- Gray to Dimming (-) (for 0-10V dimming)
- აირჩიეთ Wattage და CCT: Before closing the fixture, adjust the wattage and CCT switches located inside the fixture head. Refer to Section 5 for details.
- Secure the Fixture Head: Attach the fixture head to the bollard body, ensuring all seals are properly seated to maintain the wet location rating.
- ენერგიის აღდგენა: Turn on power at the circuit breaker and test the light.

Figure 2: The B17 Bollard Light is UL Listed and rated for wet locations, ensuring durability in outdoor environments.
5. საოპერაციო ინსტრუქციები
5.1. Field-Adjustable Wattage
The B17 bollard light allows you to select the desired wattage output to optimize brightness and energy consumption. A switch located inside the fixture head enables selection between 24W, 19W, and 14W.
- 24 ვტ მაქსიმალური სიკაშკაშე.
- 19 ვტ Medium brightness, reduced energy use.
- 14 ვტ Lower brightness, maximum energy savings.
დასარეგულირებლად: Disconnect power. Open the fixture head. Locate the wattage selection switch and move it to the desired setting. Close the fixture head and restore power.
5.2. Selectable Color Temperature (CCT)
The fixture offers three color temperature options to suit different aesthetic preferences and applications. A separate switch inside the fixture head allows selection between 3000K, 4000K, and 5000K.
- 3000K: Warm White, ideal for creating a cozy and inviting atmosphere.
- 4000K: Neutral White, suitable for general illumination and task lighting.
- 5000K: Cool White, provides bright, crisp light, often used for security or modern aesthetics.
დასარეგულირებლად: Disconnect power. Open the fixture head. Locate the CCT selection switch and move it to the desired setting. Close the fixture head and restore power.

Figure 3: Visual representation of adjustable wattage and selectable CCT settings.
5.3. 0-10V Dimming
The B17 bollard light is compatible with 0-10V dimming systems. Connect the purple and gray dimming wires to a compatible 0-10V dimmer control. This allows for smooth adjustment of light output from 100% down to 10% (or lower, depending on dimmer specifications).
Ensure the dimmer is rated for LED loads and is compatible with 0-10V dimming protocols.
6. მოვლა
The B17 LED Bollard Light is designed for minimal maintenance due to its long LED lifespan of 50,000 hours.
- დასუფთავება: პერიოდულად გაწმინდეთ მოწყობილობის გარე ზედაპირი რბილი, დ-სპირტითamp cloth to remove dirt and debris. Do not use abrasive cleaners or solvents. Ensure power is off before cleaning.
- ინსპექტირება: Annually inspect the fixture for any signs of damage, loose connections, or wear. Ensure all seals remain intact to maintain weather resistance.
- LED ჩანაცვლება: LEDs are integrated and not user-replaceable. The long lifespan minimizes the need for replacement.

Figure 4: The B17 LED Bollard Light offers a long 50,000-hour operational lifespan.
7. Დიაგნოსტიკა
| პრობლემა | შესაძლო მიზეზი | გამოსავალი |
|---|---|---|
| შუქი არ ირთვება. | არ არის კვების წყარო. ფხვიერი გაყვანილობა. არასწორი ვატიtage/CCT setting. | Check circuit breaker. Ensure power is on. დარწმუნდით, რომ ყველა მავთულის შეერთება მყარადაა დამაგრებული (ჯერ გამორთეთ ელექტრომომარაგება). დაადასტურეთ რაtage/CCT switches are set correctly. |
| შუქი მოულოდნელად ციმციმებს ან ქრება. | შეუთავსებელი დიმერი. Loose dimming wire connection. ტtage რყევები. | Ensure 0-10V dimmer is compatible with LED loads. Check purple and gray dimming wire connections. ელექტროენერგიის მიწოდების სტაბილურობის შესამოწმებლად მიმართეთ ელექტრიკოსს. |
| სინათლის გამომავალი სიმძლავრე ძალიან დაბალი/მაღალია. | არასწორი ვატიtage პარამეტრი. | დაარეგულირეთ ვატიtage selection switch inside the fixture head (power off first). |
| Light color is not desired. | არასწორი CCT პარამეტრი. | Adjust the CCT selection switch inside the fixture head (power off first). |
8. სპეციფიკაციები
| ფუნქცია | დეტალი |
|---|---|
| მოდელის სახელი | B17 |
| ბრენდი | RAB განათება |
| ვატtage | Field-Adjustable: 24W / 19W / 14W |
| ფერის ტემპერატურა (CCT) | არჩევადი: 3000K / 4000K / 5000K |
| ჩაბნელება | 0-10 ვ დაბნელება |
| სიცოცხლის ხანგრძლივობა | 50,000 საათი |
| მასალა | Metal body, Glass shade |
| გარემოსდაცვითი რეიტინგი | UL Listed for Wet Locations |
| მოყვება კომპონენტები | Ჩართვა / გამორთვა |
| UPC | 192552028424 |
| ASIN | B0DY2FPPNS |
9. გარანტია და მხარდაჭერა
For warranty information and technical support, please contact RAB Lighting directly. Refer to the official RAB Lighting webკონკრეტული გარანტიის პირობებისა და საკონტაქტო ინფორმაციისთვის იხილეთ საიტი ან თქვენი შესყიდვის დოკუმენტაცია.
RAB Lighting Contact: www.rablighting.com


